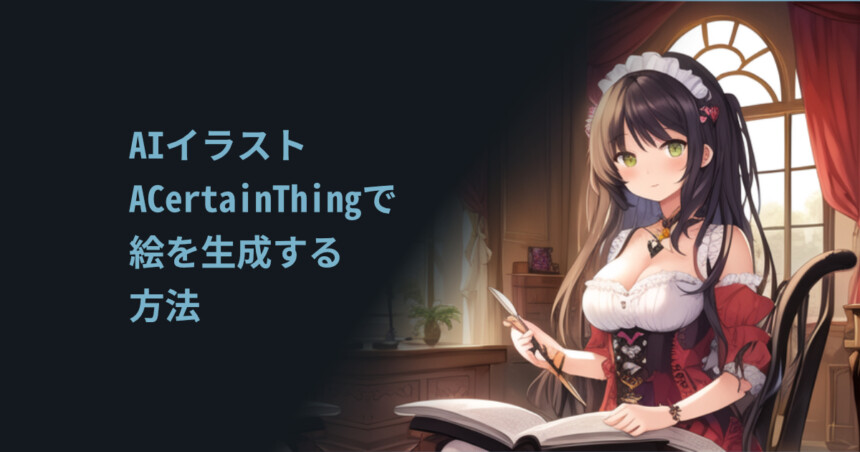
はじめに
今回はNMKD SD-GUI1.8でACertainThingのモデルを動かし絵を生成する方法を解説します。
NMKD SD-GUIの導入
こちらにアクセス。
Download Nowを選択。

「No thanks, just take me to the downloads」を選択。
※$4.00と出てるのは開発寄付のお金。

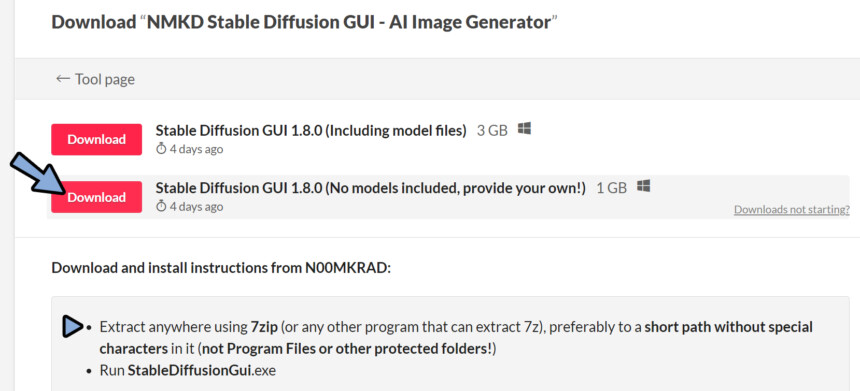
下のモデルが無い方のDownloadを選択。
また、展開に7zipの解凍が必要な事を確認。
こちらのソフトを導入して.7zを展開。

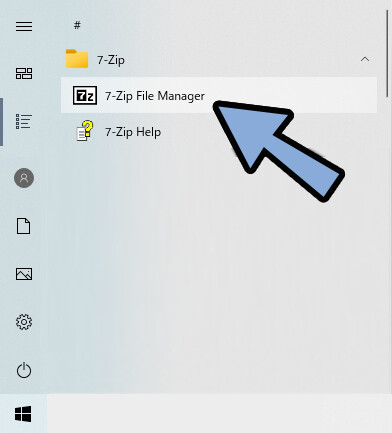
7-Zip File Managerを実行。
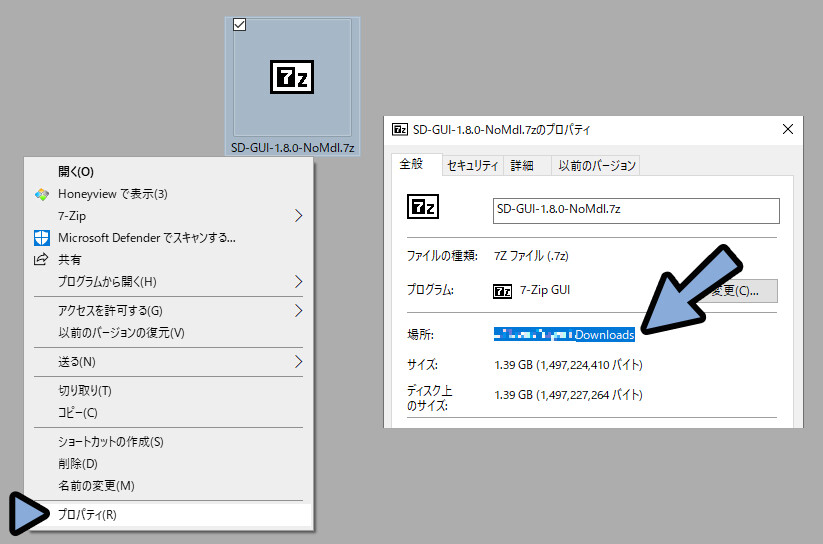
先ほどDLしたSD-GUIの7zファイルを右クリック。
プロパティ → 場所の所をドラッグ。
Ctrl+Cでコピー。
7-Zip File Managerに戻ります。
ファイル参照先の所にCtrl+Vで貼り付け。
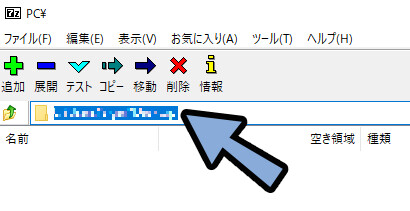
ダウンロードした7zのファイルを選択。
展開を押します。

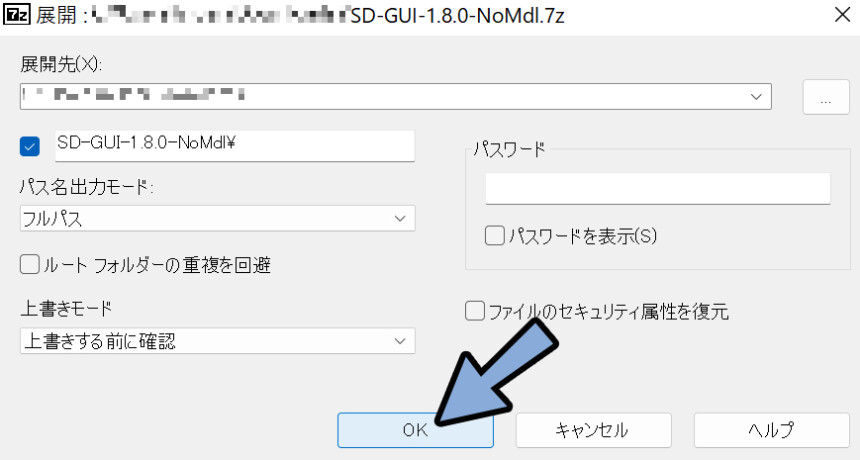
展開先などを指定してOKボタンを押します。
これでNMKD SD-GUIの導入が完了です。
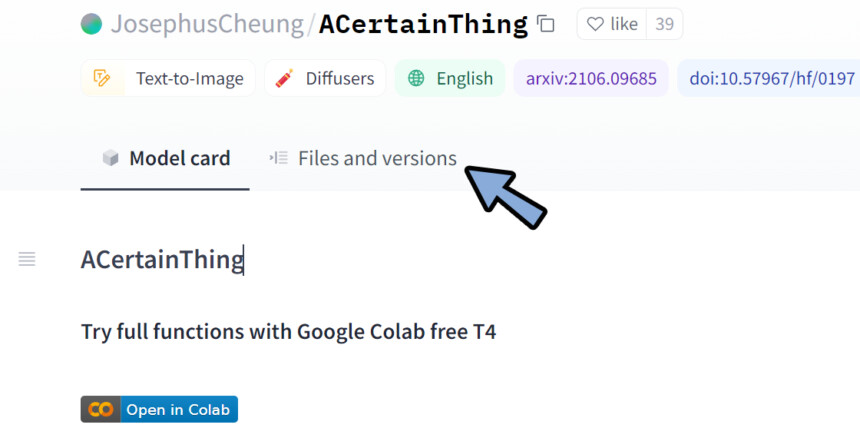
ACertainThingの導入
こちらのページにアクセス。
Files and versionsを選択。
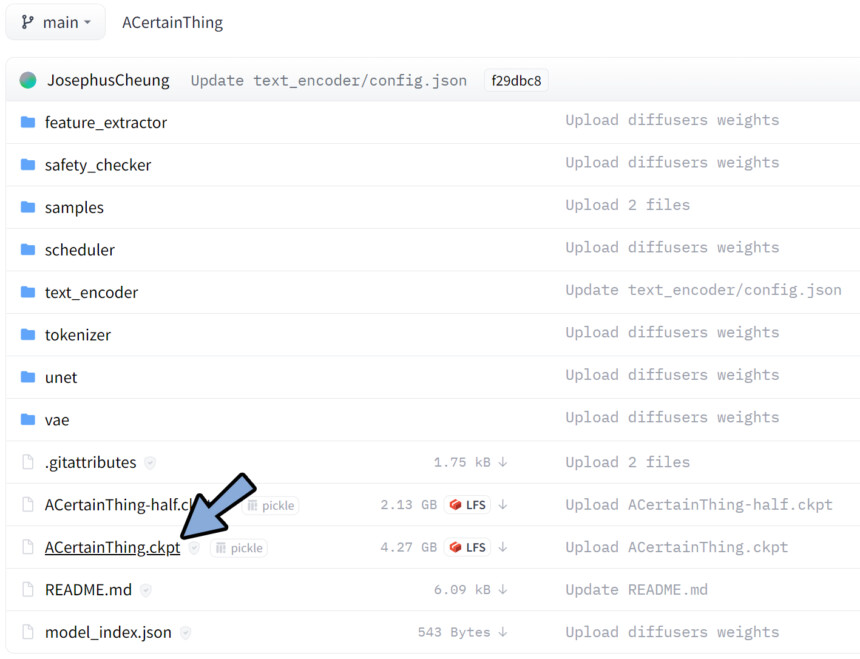
ACertainThing.ckptを選択。
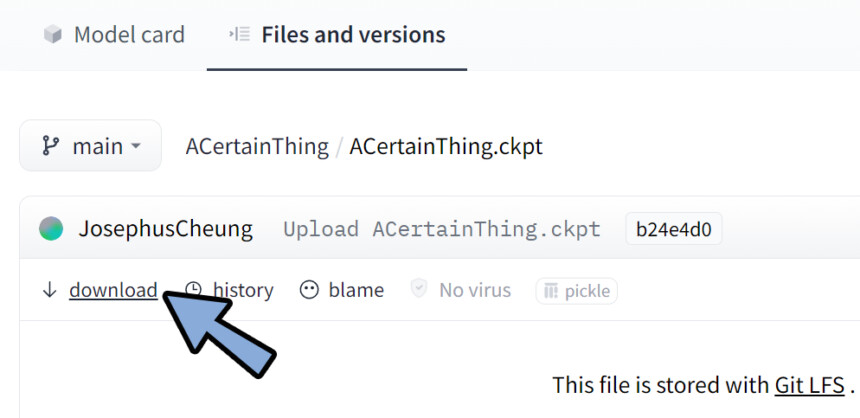
左上の所でダウンロード。
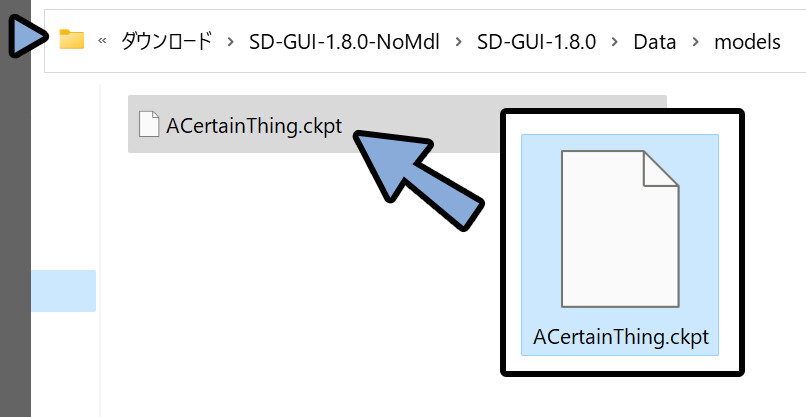
先ほど導入したSD-GUI-1.8.0のフォルダを開きます。
SD-GUI-1.8.0 → Data → modelsの中にACertainThingのモデルデータを入れます。
これでACertainThingの導入が完了です。
SD-GUIの設定
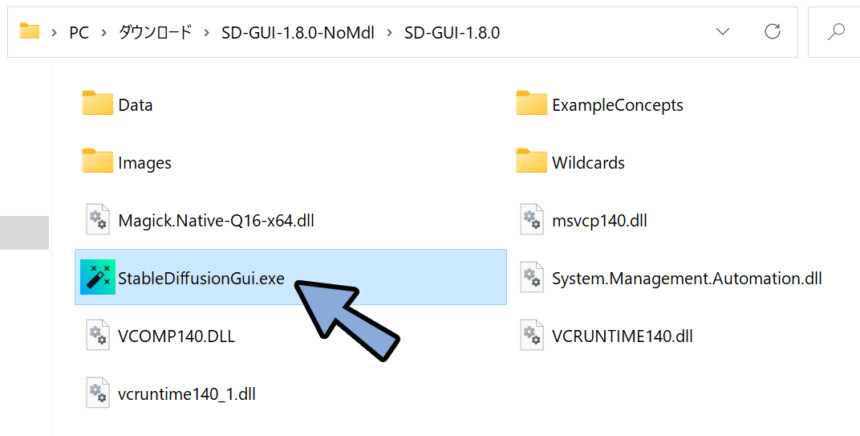
StableDiffusionGui.exeを実行。
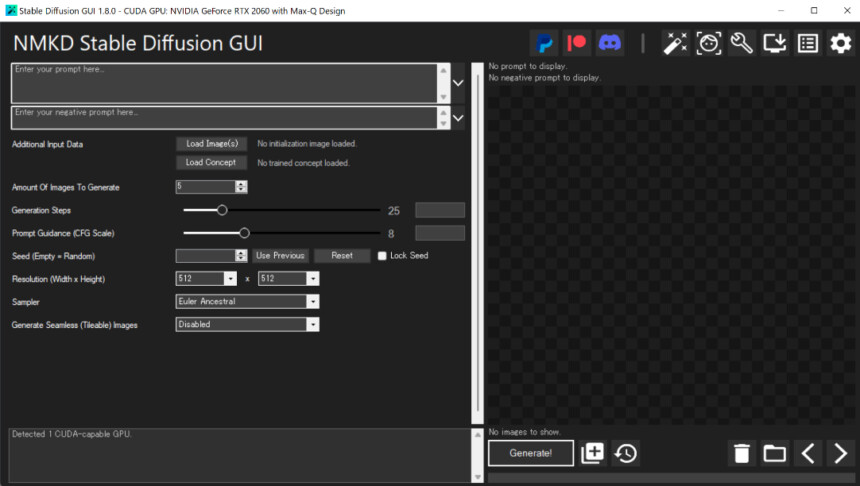
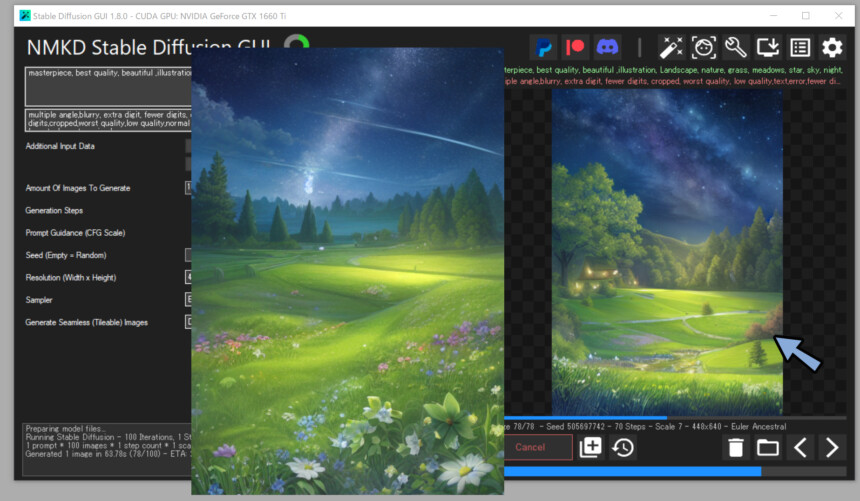
すると、このような画面が出てきます。
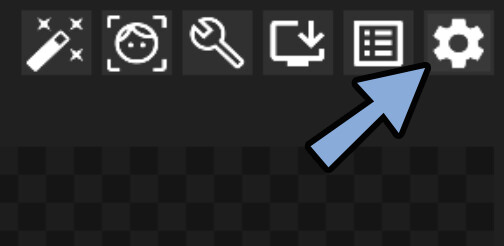
右上の歯車ボタンを選択。
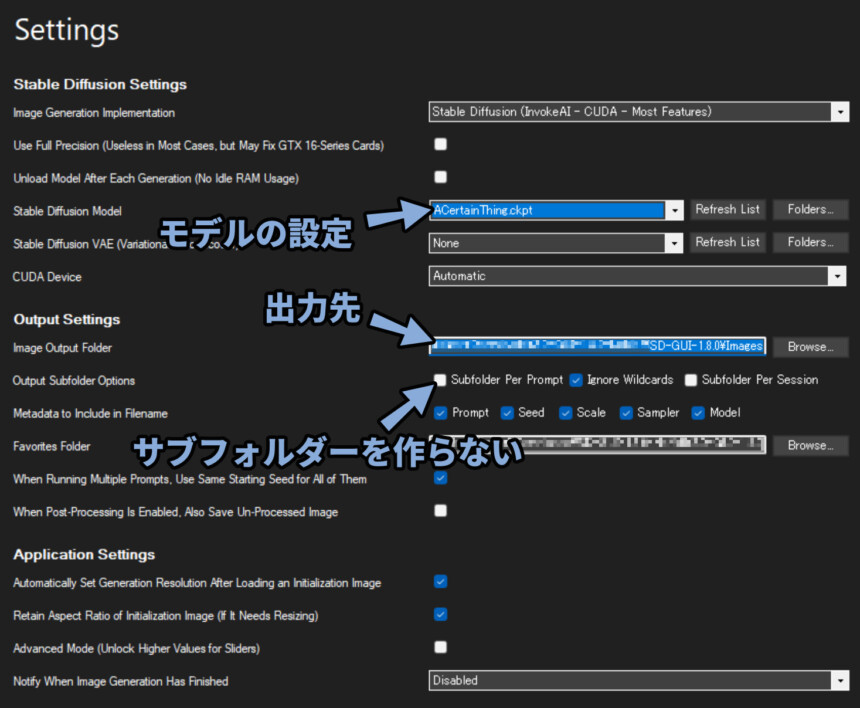
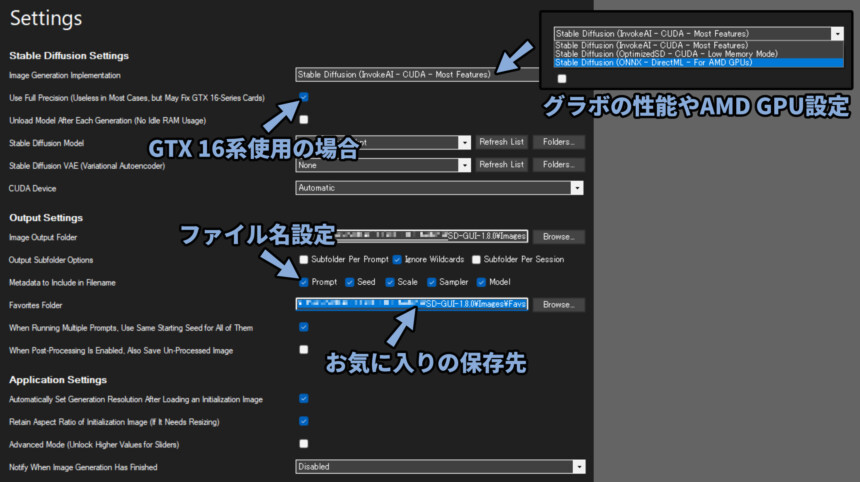
必須の設定が下図。
・Stable Diffusion Modelで使用するモデルを設定(ACertainThing)
・Image Output Folderで生成した画像の出力先を設定。
・Output Subfolder Optionsの「Subdolder」のチェックを解除しサブフォルダを作らない設定。
他、任意で下記を設定。
・使用するグラボに合わせてImage Generation Implementationを設定。
(性能が低い場合はLow Memory、LegionなどのAMD系のグラボを使う場合はAMD GPUs)
・GTX16系(1660や1660Tiなど)を使用する場合はUse Full Precisionにチェック。
・Metadata to INclude in Filenameでファイル名の設定
・Favorites Folderでお気に入りの保存先を設定(通常の出力先以外にしないとエラーが発生)
他にも気になる項目があれば自由に設定してください。
これで最低限の設定が完了です。
画像の生成
最低限の設定を行いGenerate!を押します。
・上の所に生成するワードを入力
・下の所に生成を除外するワードを入力
・Amount Of Images To Generateを100等に設定(生成する画像枚数)
・Generation Stepsを30~80に設定(実験の生成用は30で素早く、本番は50~80がおすすめ)
・Prompt Guidanceを7~8.5に設定
・Resolutionで画像の大きさを設定。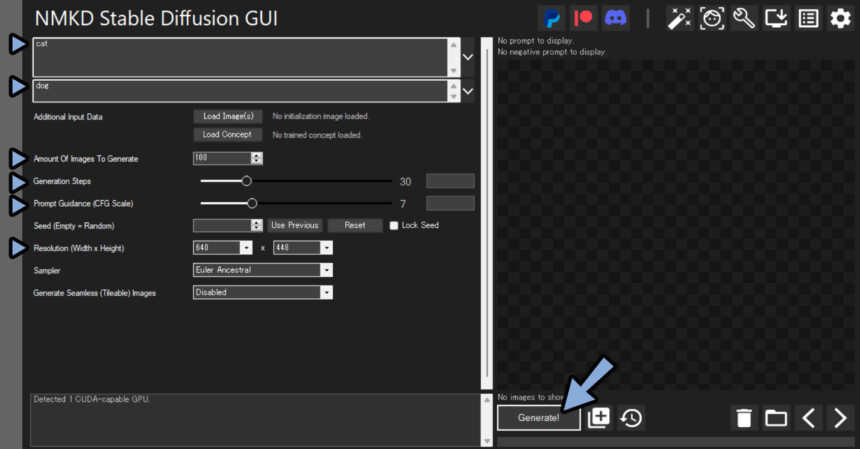
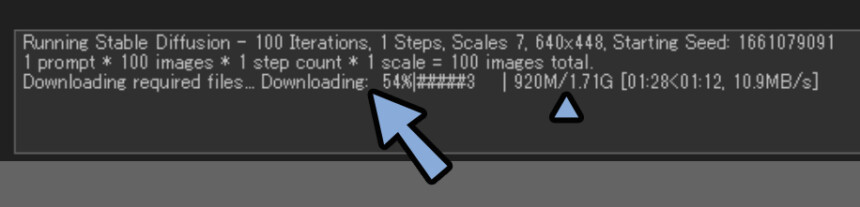
初回の生成は長いので待ちます。
なにか必要なデータがDLされてるようです。
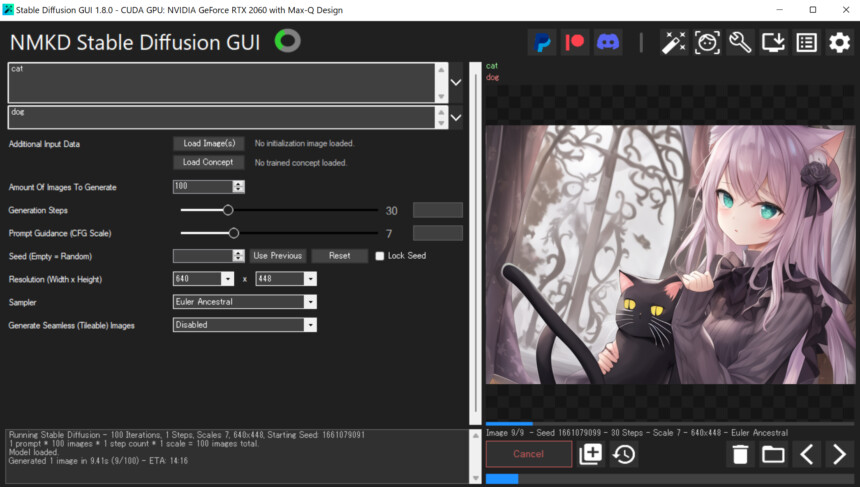
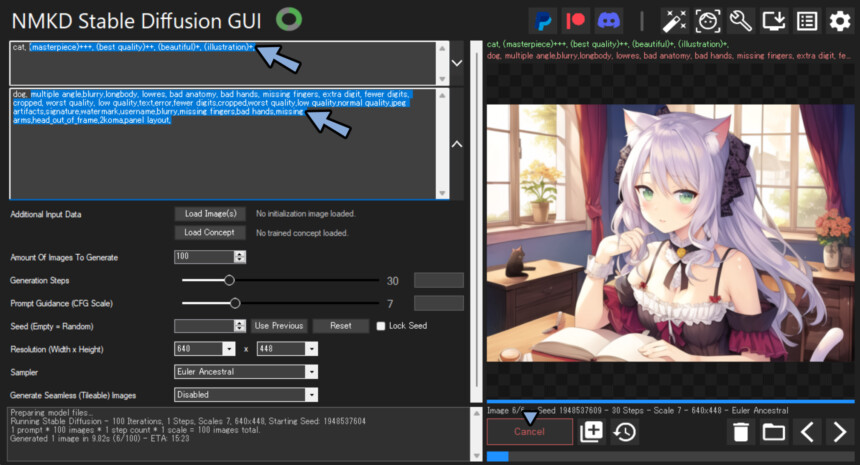
promptに「cat」、negative promptに「dog」を入力。
すると。このような画像が生成されました。
※ACertainThingモデルはキャラに特化してるので動物は出ないようです。
これで画像の生成が完了です。
生成画像のクォリティを上げる
絵のクオリティを上げるワードがあります。
()++はそのワードを強調する処理。
◆プロンプトに下記のワードを追加
(masterpiece)++,(best quality)+,beautiful ,(illustration)+,
◆ネガティブプロンプトに下記のワードを追加
multiple angle, blurry, lowres, extra digit, fewer digits, cropped, worst quality, low quality,text,error,fewer digits,cropped,worst quality,low quality,normal quality,jpeg artifacts,signature,watermark,username,blurry, 2koma, panel layout,
↓↓キャラを作る場合は下記も追加。
longbody, bad anatomy, bad hands, missing fingers, missing fingers,bad hands,missing arms,head out of frame,
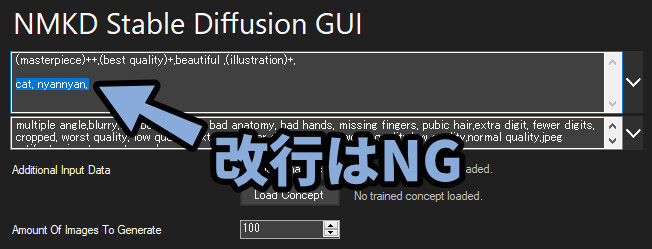
(ネガティブプロンプトに追加、改行不可)一言で言うと「クォリティを上げて、失敗を減らす」という指示です。
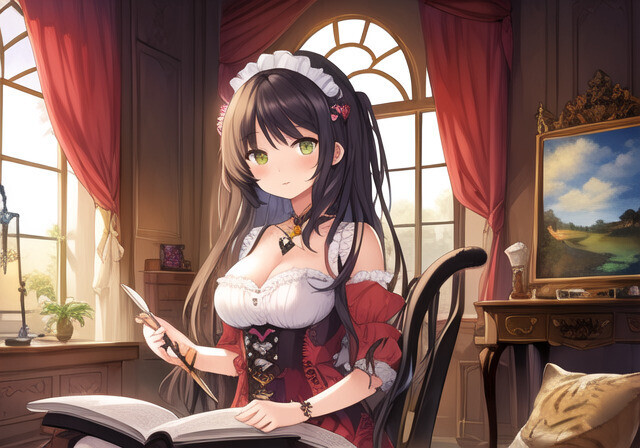
これを入れて再生成するとクォリティが上がります。
ただ、入れ過ぎると元の指示が弱まっていくので注意。
必要に応じてワードを消したり+数を変えます。
下の絵では元の指示が弱まり猫耳が消えました。
見やすいようにと改行を入れると動作しないので注意。
見ずらくても一文で行ってください。
その他の操作
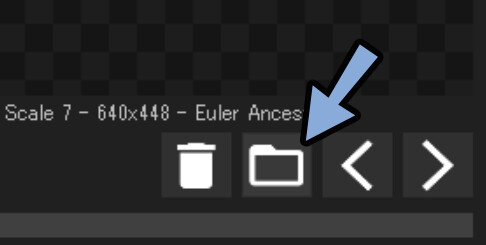
右下のファイルマークを押すと生成した画像があるファイルを開けます。
プレビュー上にマウスを置きます。
中ホイールを動かすと画像が切り替わります。

生成画像はクリックすると別ウインドウで表示されます。
・中ホイールで拡大
・ESCで閉じる
Ctrl+Dを押すと表示されてる生成画像をお気に入りできます。
Setting → Favorites Folderで指定したフォルダに入ります。

以上が主要な他の操作です。
まとめ
今回はNMDK-SD-GUI1.8とACertainThingでAIイラストを生成する方法を紹介しました。
・ACertainThingは絵の学習データが入ったモデルで単体では動かない
・NMDK-SD-GUIはACertainThingを動かすための環境
・クォリティを上げるプロンプトがあり、入れると綺麗になる。
・プロンプト、ネガティブプロンプト、Step数を調整が絵に影響を与えやすい
また、他にもAIイラスト関連について解説してます。
ぜひ、こちらもご覧ください。
コメント