Introduction
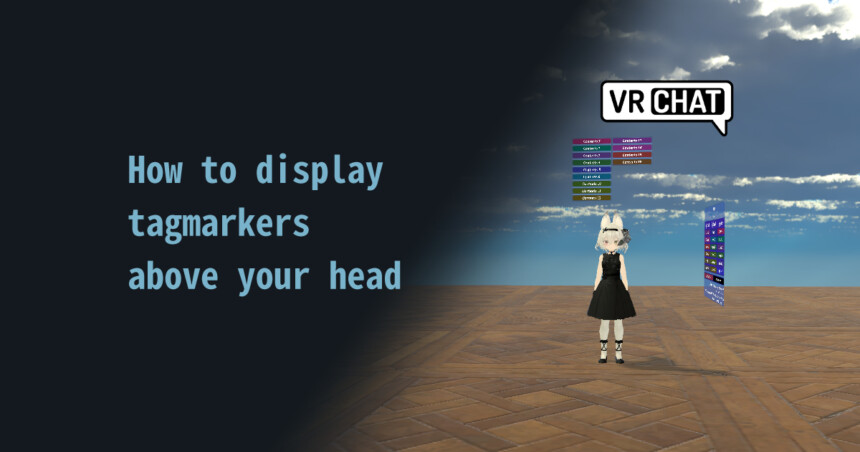
In this article, I will show you how to display tags above your head in VRChat.
This is a world gimmick.
I will proceed on the assumption that world exists.
(World SDK3, assuming Udon Sharp already implemented.)
※The writer is Japanese and translates using DeepL.
There may be some strange translations.
Introduction of tag markers
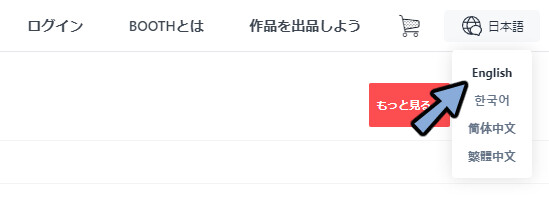
↓Access this page
Select the language button in the upper right corner.
Translate Booth Web page into English.
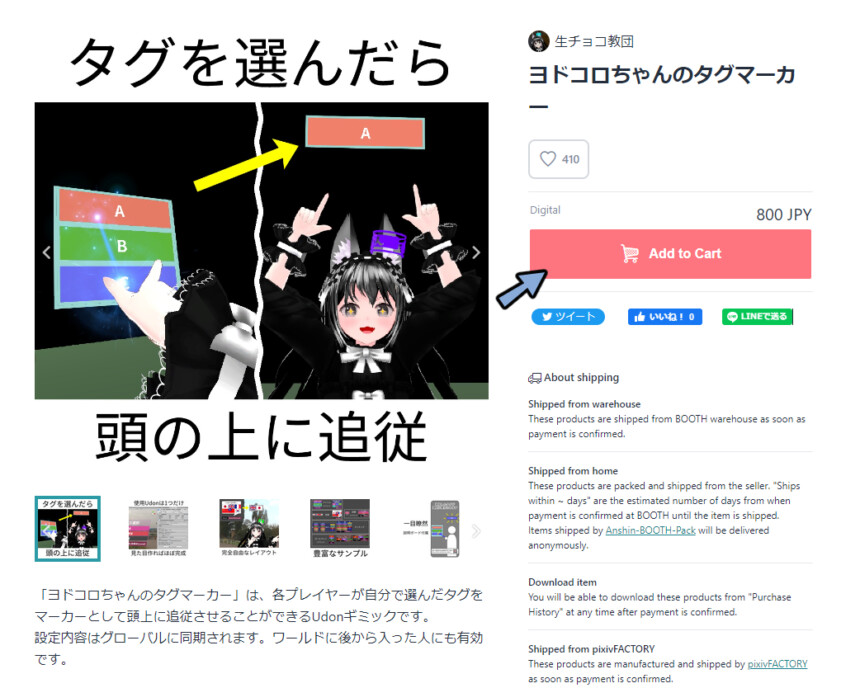
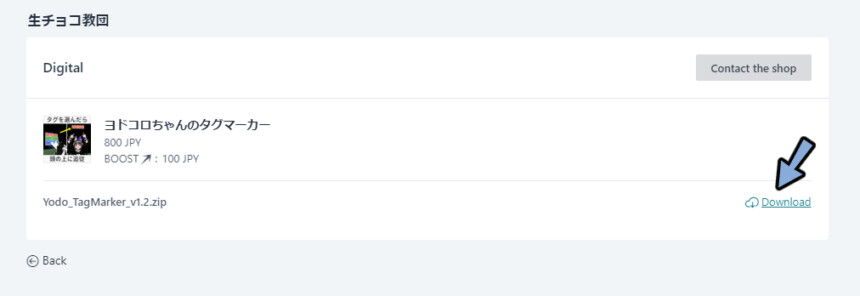
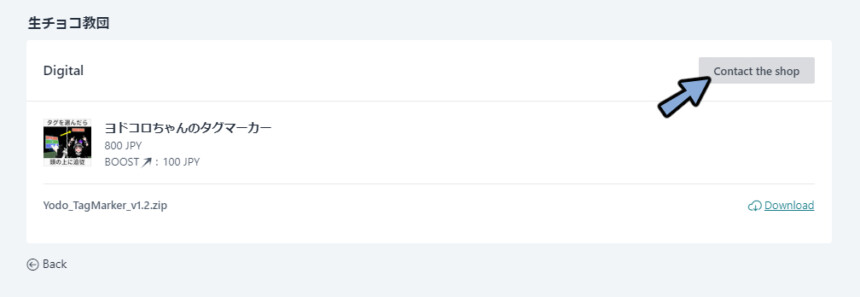
Buy markers here.
Please Click [Add to Cart] → Payment of 800 JP yen (PayPal supported)
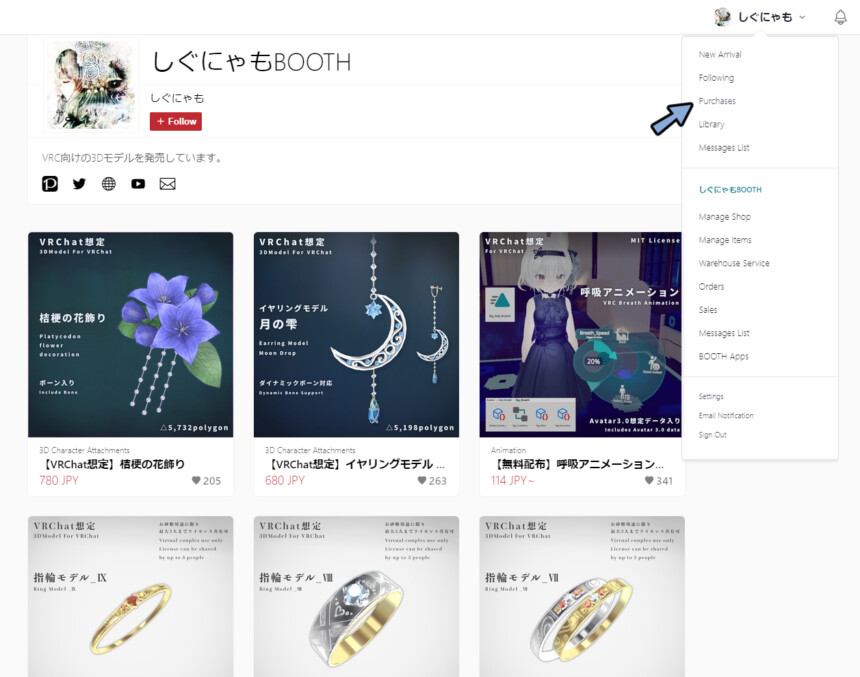
Click on the icon in the upper right corner of the Booth → click Purchases.
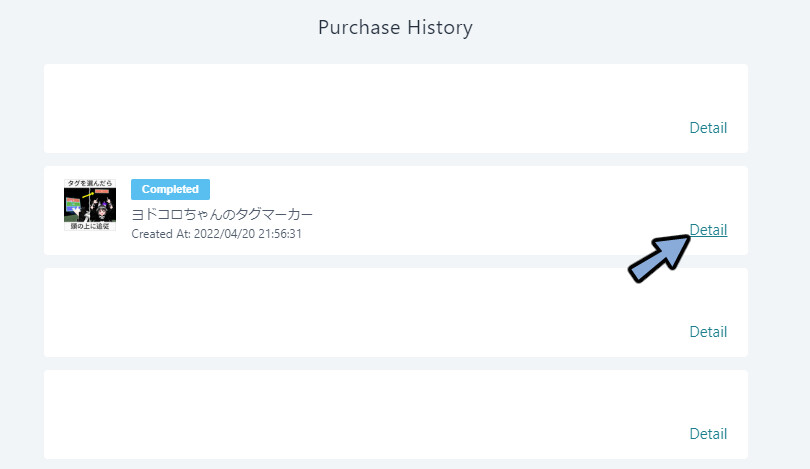
Click Purchase History → Detail of ヨドコロちゃんのタグマーカー.
Click Download.
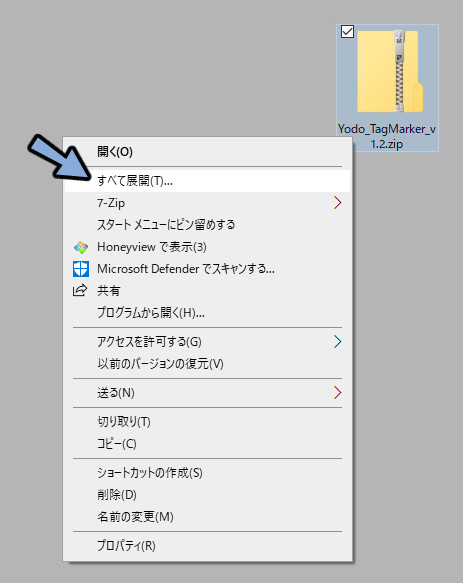
All Extract the DL Zip.
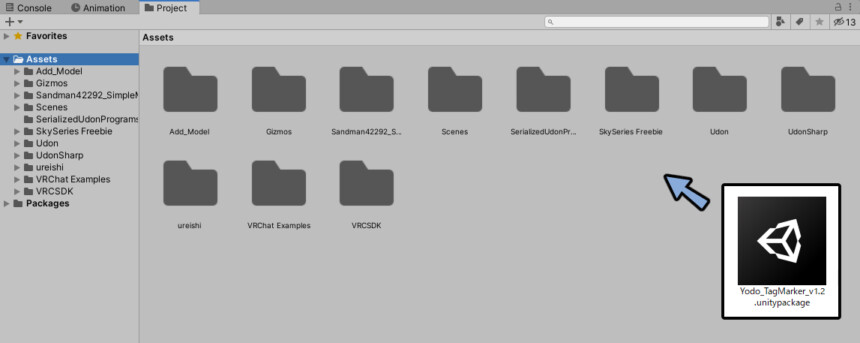
Drag and drop the .unitypackage inside to the world’s Project.
Make sure everything is checked.
Select Import.
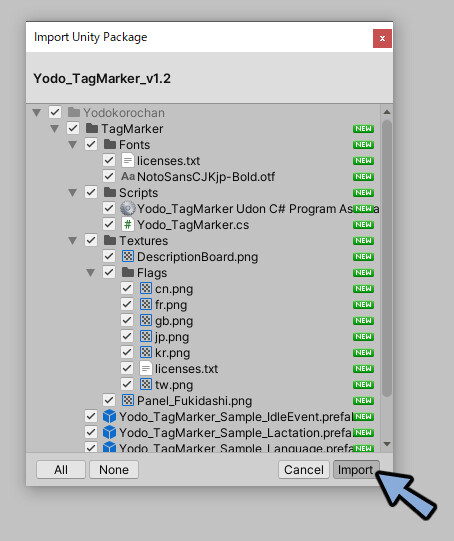
Open [Project → Assets → Yodokorochan → TagMarker.]
The six files at the top level are sample data.
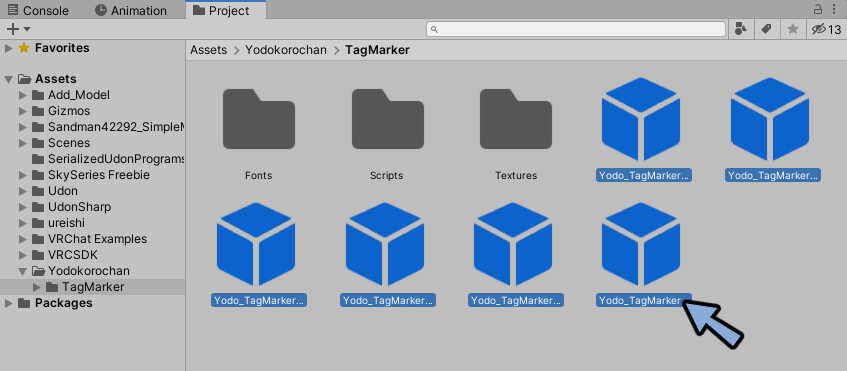
Drag and drop into the Hierarchy.
You can see a sample like this.
This completes the installation.
Preparation for tag creation
There are two things to do in the preparation.
1,Load samples.
2,nstallation of mirrors for confirmation.
These two are explained below.
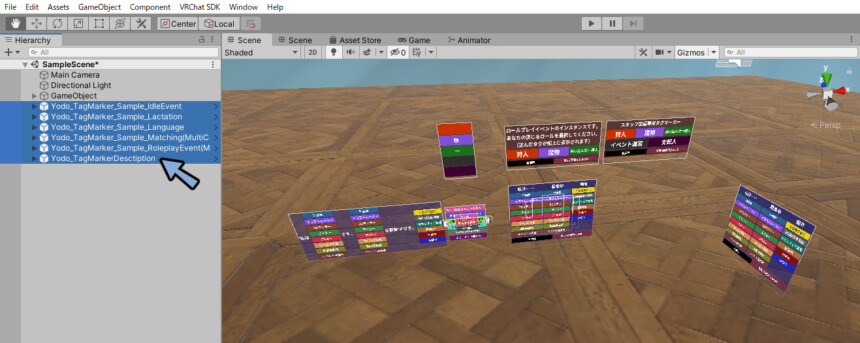
Loading Samples
Drag and drop the second .prefab from the left into the Hierarchy.
(Yodo_TagMarker_Sample_Lactation.prefab)
※You don’t have to understand what it means.
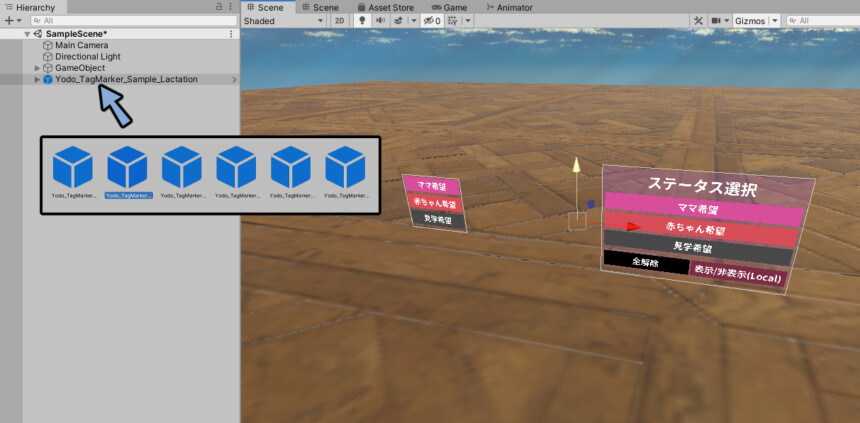
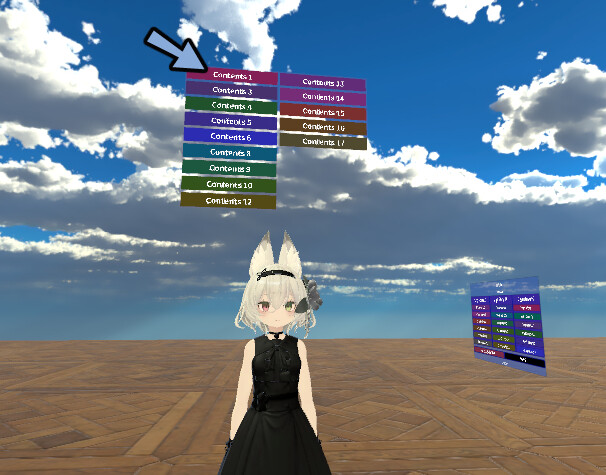
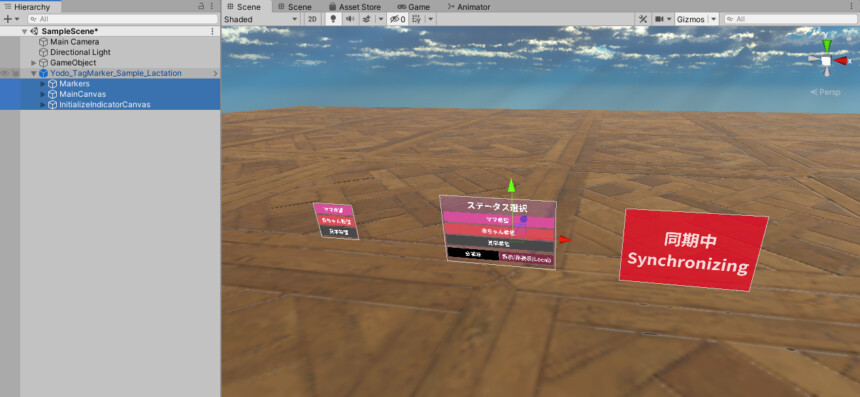
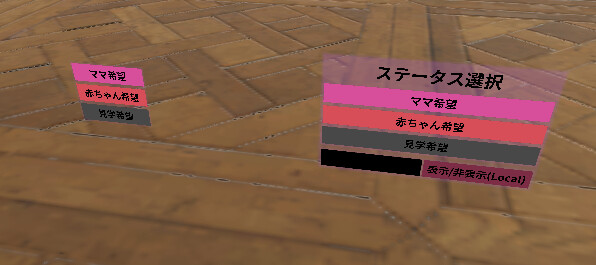
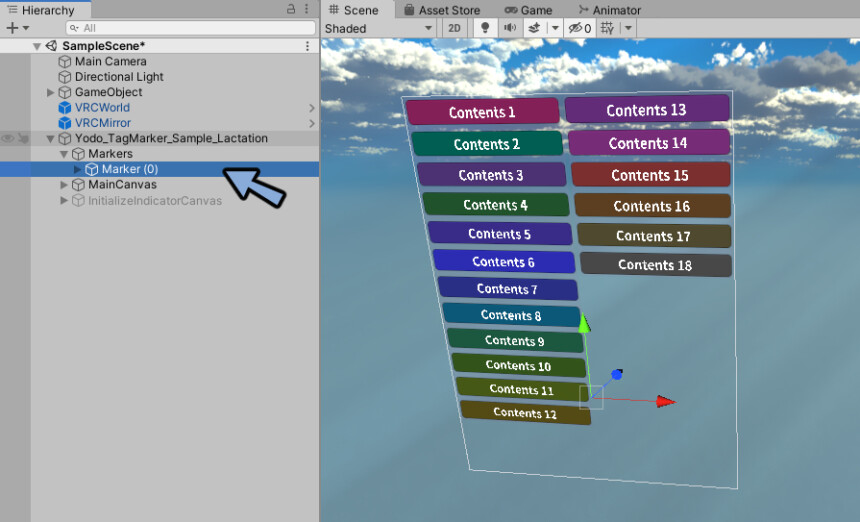
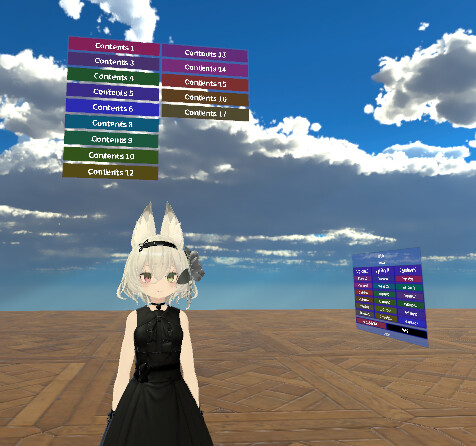
There are three contents.
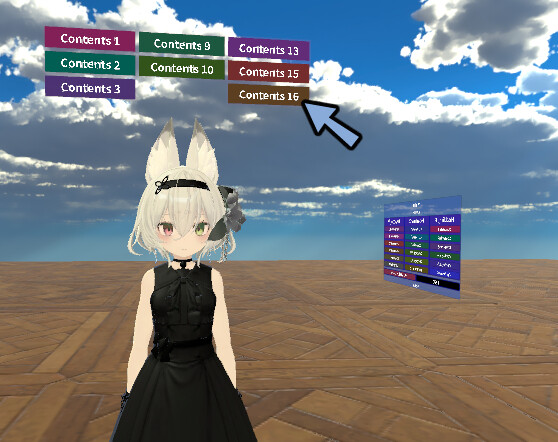
1,Markers = Items that are displayed at the top of the head.
2,MainCanvas = Button to display the tag at the top of the parietal.
3,InitializeIndicatorCanvas = what is displayed while waiting for synchronization.
This completes the loading of the sample.
Installation of confirmation mirrors
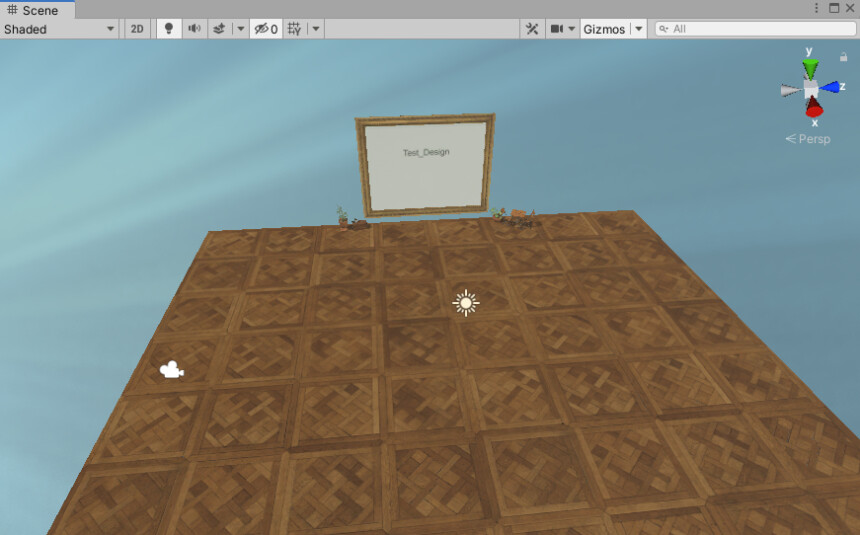
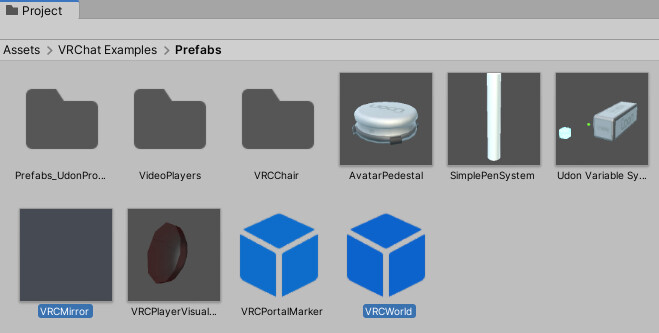
Open Assets → VRChat Examples → Prefabs.
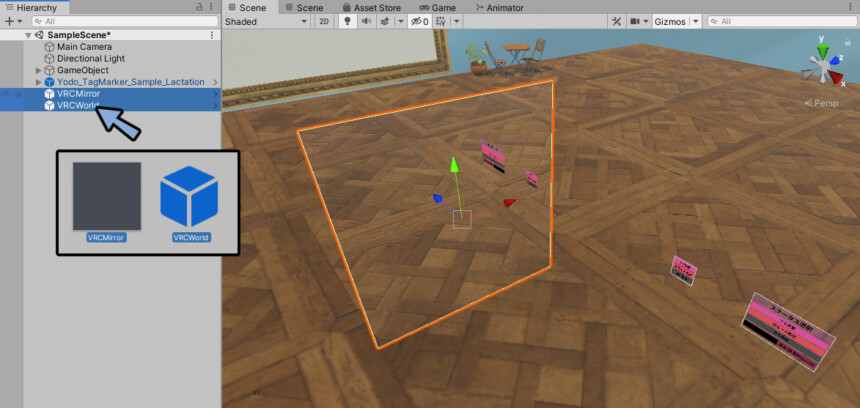
Drag and drop “VRCMirror” and “VRCWorld” into the Hierarchy.
※”VRCWorld” is not necessary if already set.
Set the respawn point in VRCWorld.
Adjust the shape of the VRCMirror mirror so that the tag can be seen.
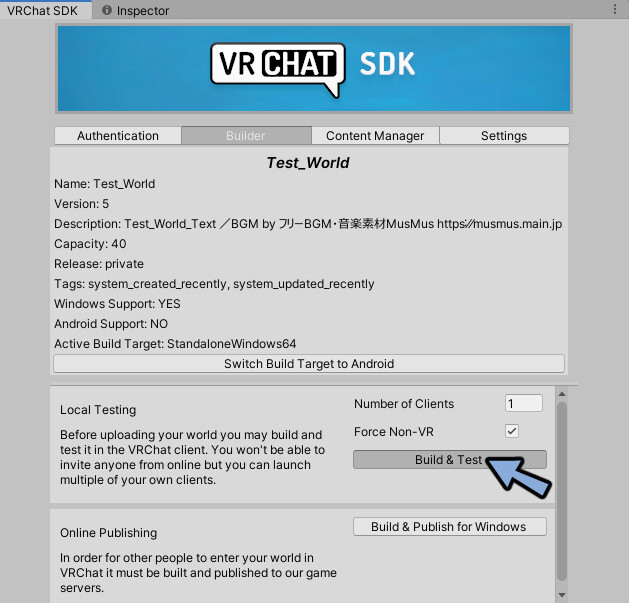
SDK → Press Build & Test.
Launch the world for debugging.
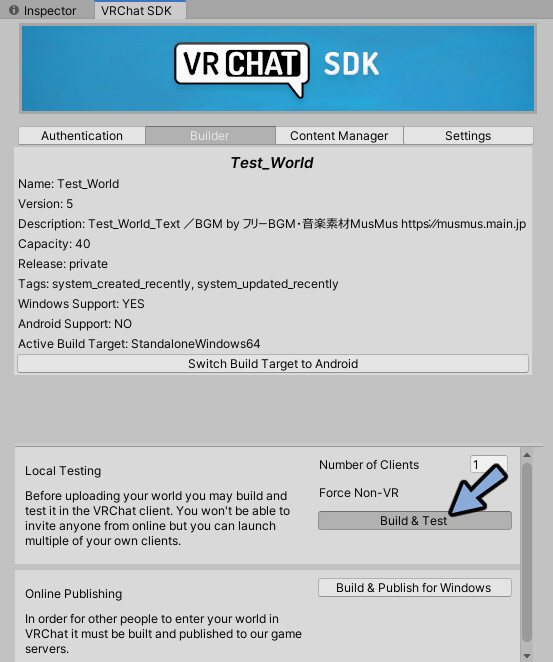
Press the button within VRChat.
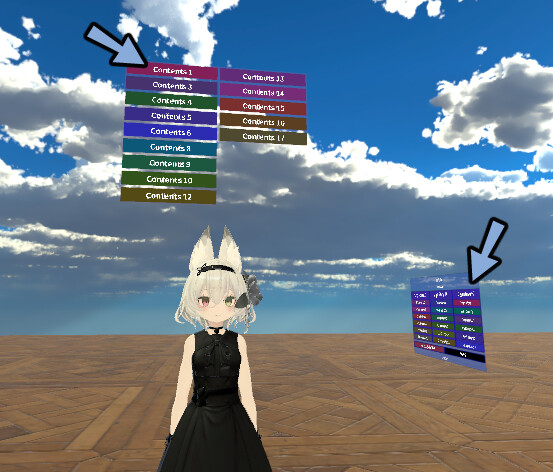
The tag will then appear in the head.
Once you have confirmed the tag in the mirror, return to Unity.
After pressing Build & Test, the text will be black in Unity.
Press Ctrl+S to save.
This will cure the text color.
This completes the installation of the confirmation mirror.
Creation of original tags
From here, we will explain how to set the tag contents on your own.
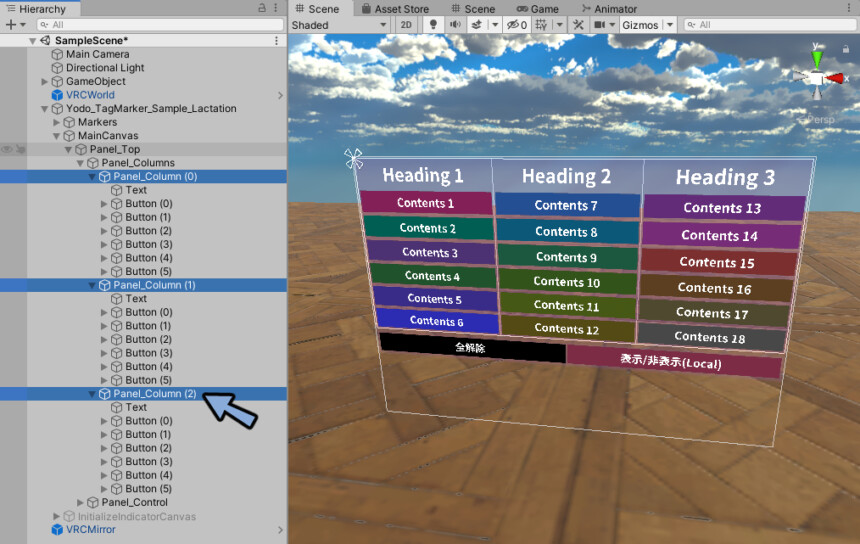
Add buttons (rows and columns)
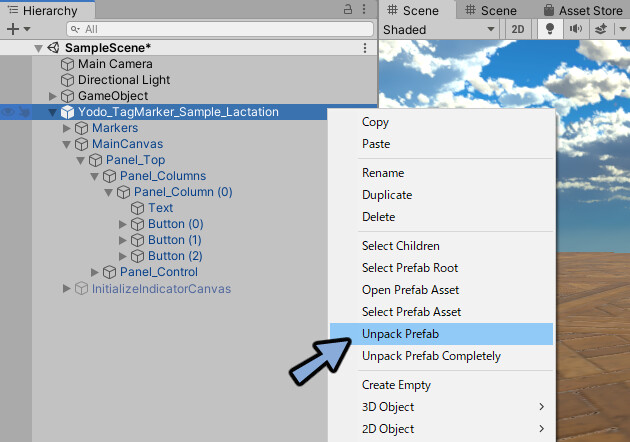
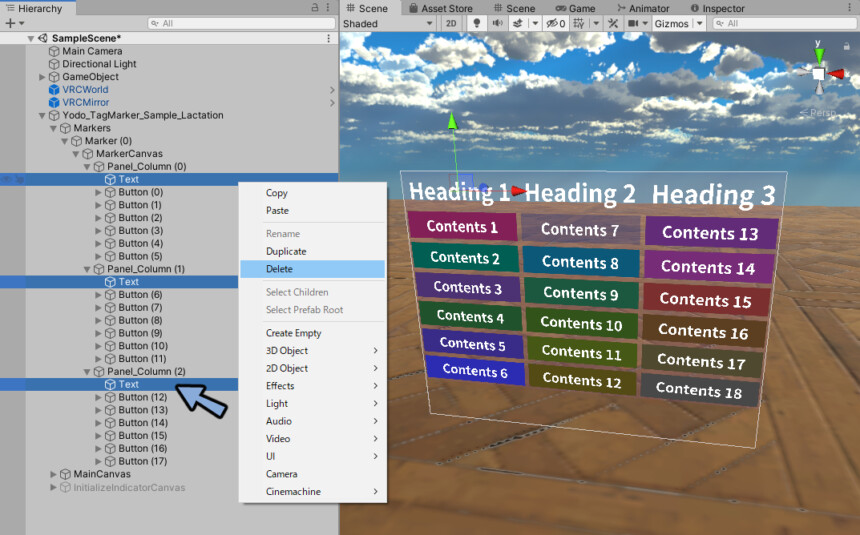
Right click on Yodo_TagMarker_Sample_Lactation.
Select Unpack Prefab.
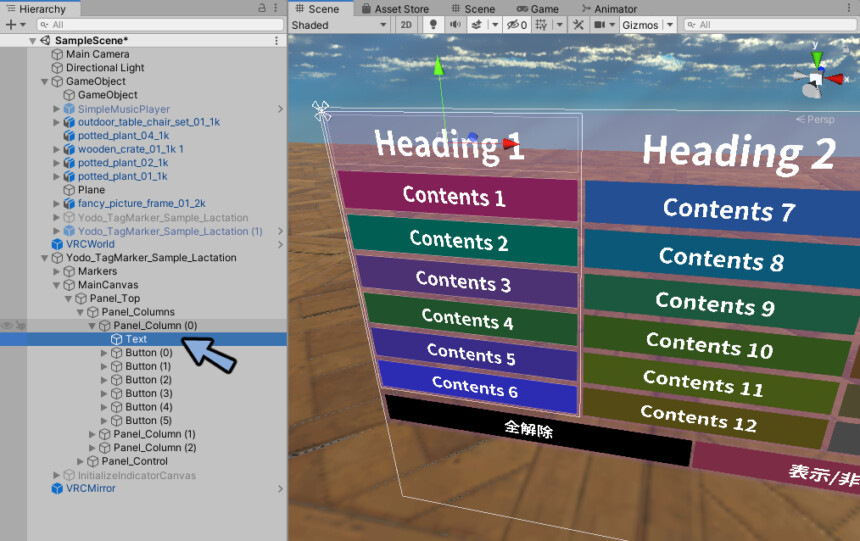
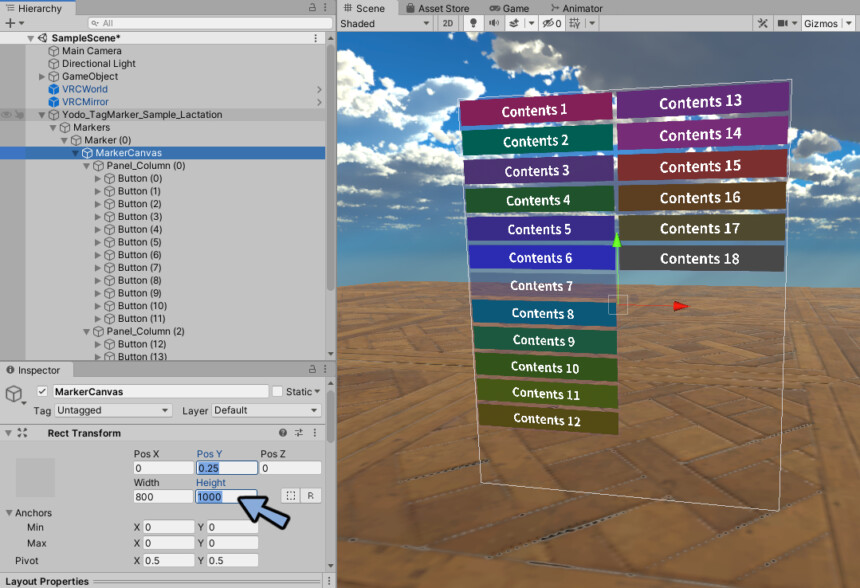
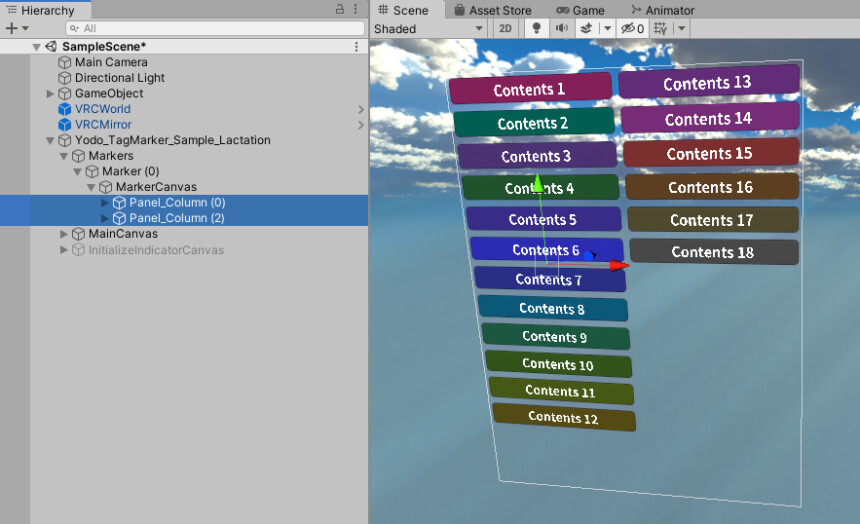
Check Button in MainCanvas → Panel_Top → Panel_Colums → Panel_Colums(0).

Select one button.
Duplicate the button by pressing Ctrl+C → Ctrl+V.
Then, one button will be added.
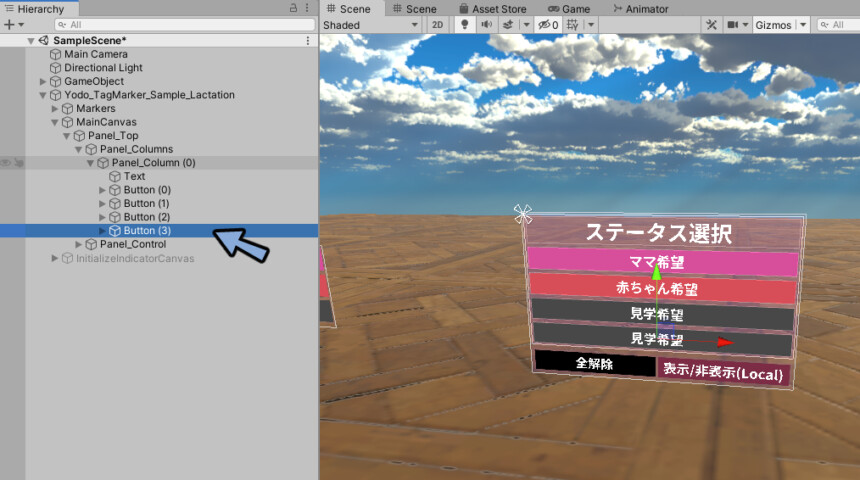
As more buttons are added, the text compresses and disappears.
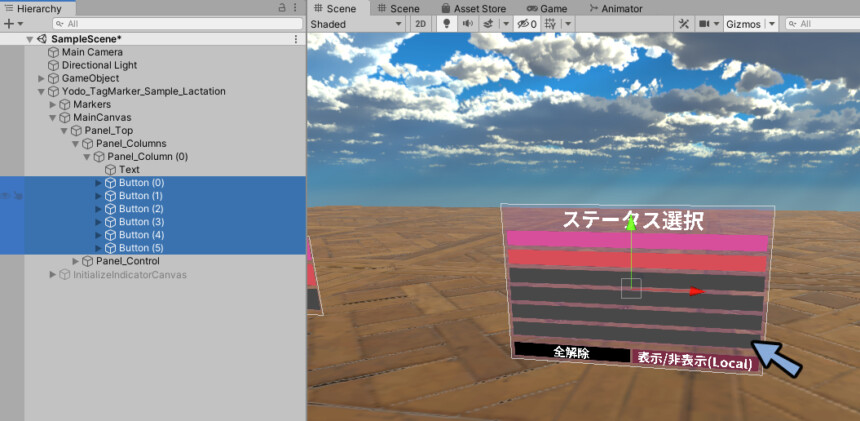
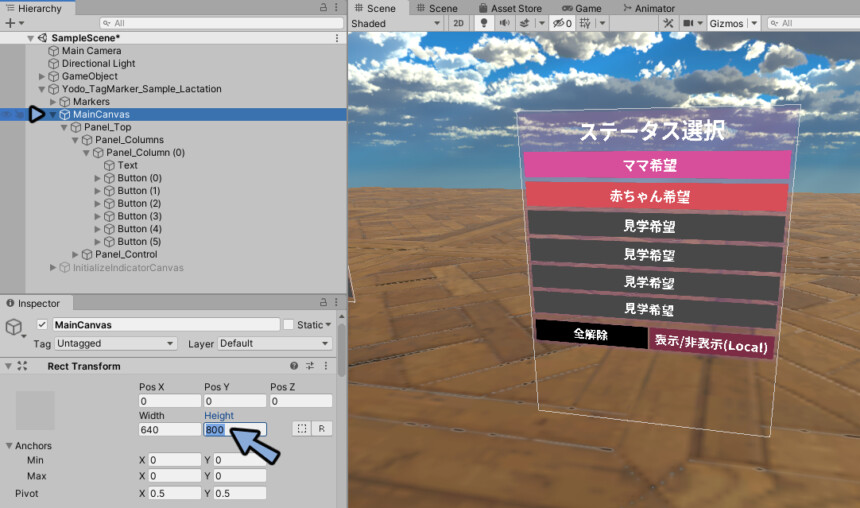
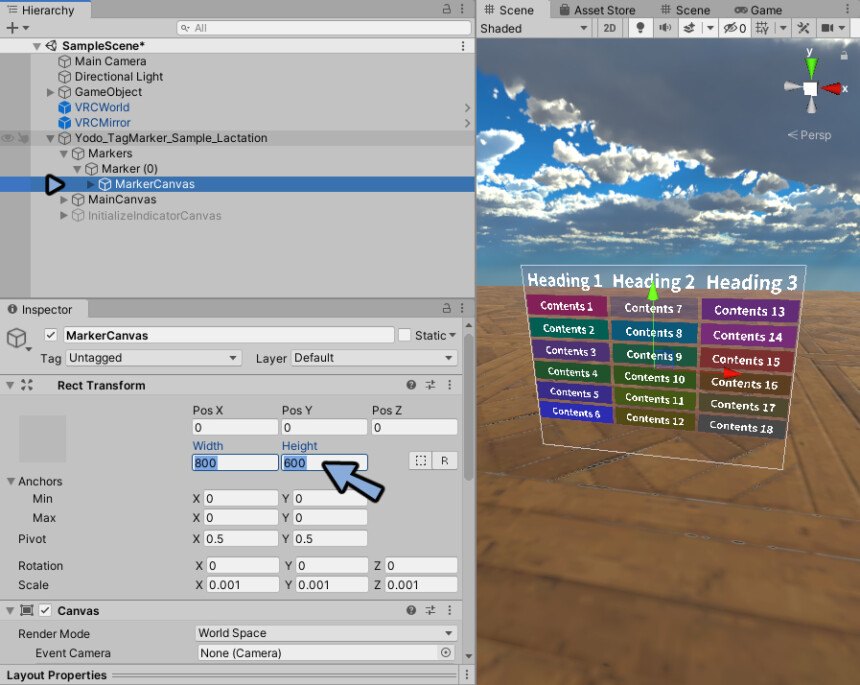
Select MainCanvas → Check Inspector.
Increase the Height value of Rect Transform to make the text visible.
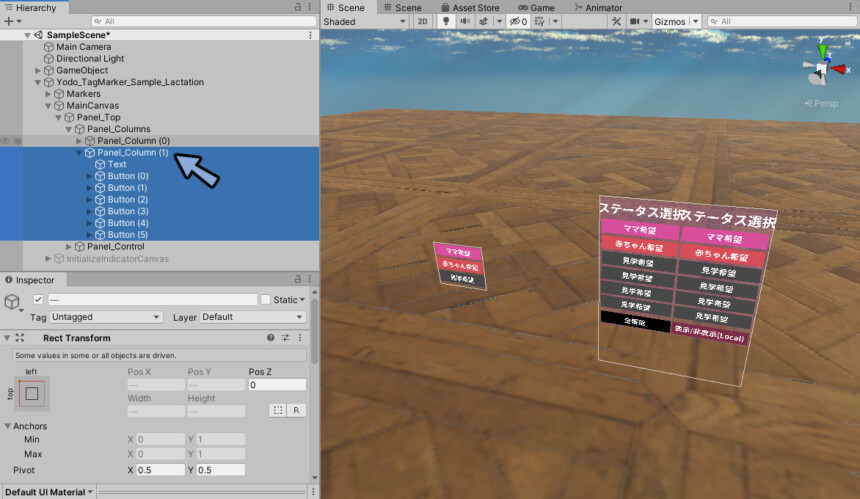
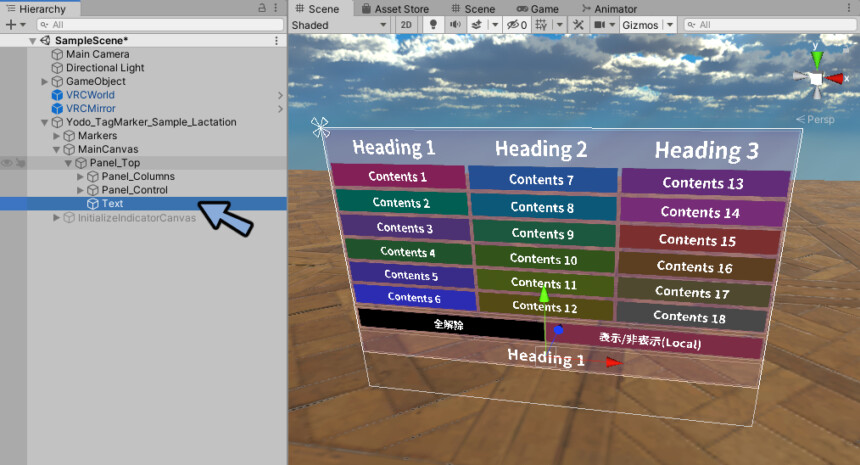
Select Panel_Colums(0) → Ctrl+C → Ctrl+V.
Panel_Colums(1) is created.
This will add one more row of buttons.
This one also compresses and collapses as it is increased.
Adjust the Width value of Rect Transform to the appropriate width.

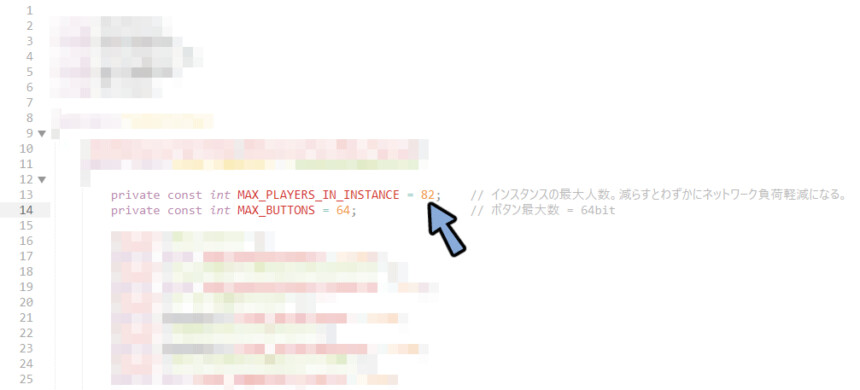
Also, the maximum number of buttons is 64.
The number counts from 0, so the number is 0~63.
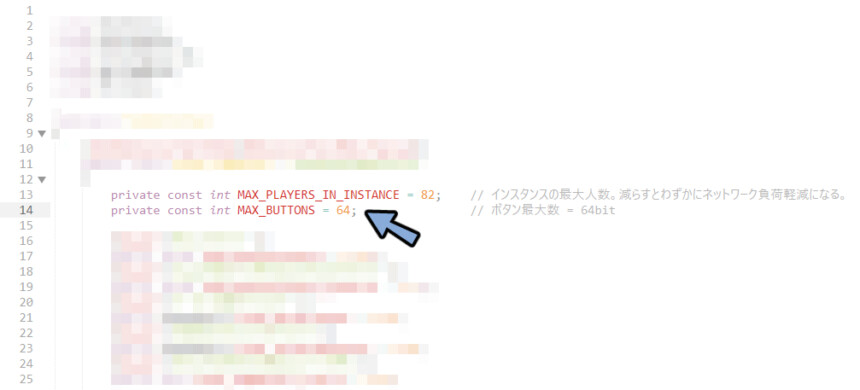
If you want to exceed the limit, please contact the creator (YODOKORO-chan) directly and you will get the data with the limit set to 128.
(Just rewriting MAX_BUTTONS = 128; was not sufficient.)
Contact → Twitter or Booth.
If Booth, Purchases → top right of Details.
Please send it with a contactable discord or other ID and this message.
ヨドコロ様始めまして。
ヨドコロちゃんのタグマーカーを購入した者です。
タグの上限数を64個以上設定したくご連絡致しました。
128個のお手隙の際ご対応お願い致します。

※また私は海外の者で日本語には詳しくありません。
This completes the addition of buttons (rows and columns).
Design Adjustments
Heading text changes
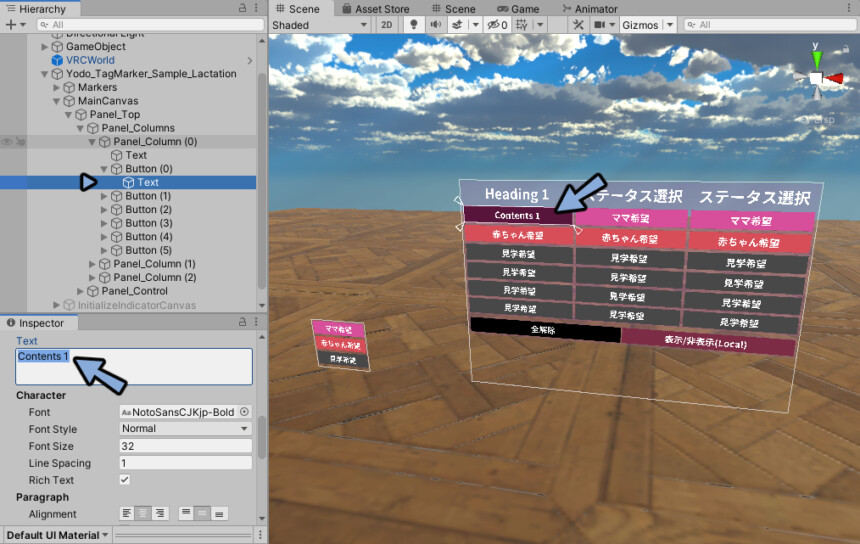
Select Text in Panel_Colums.
Edit the content with Inspector → Text to change the text and width.
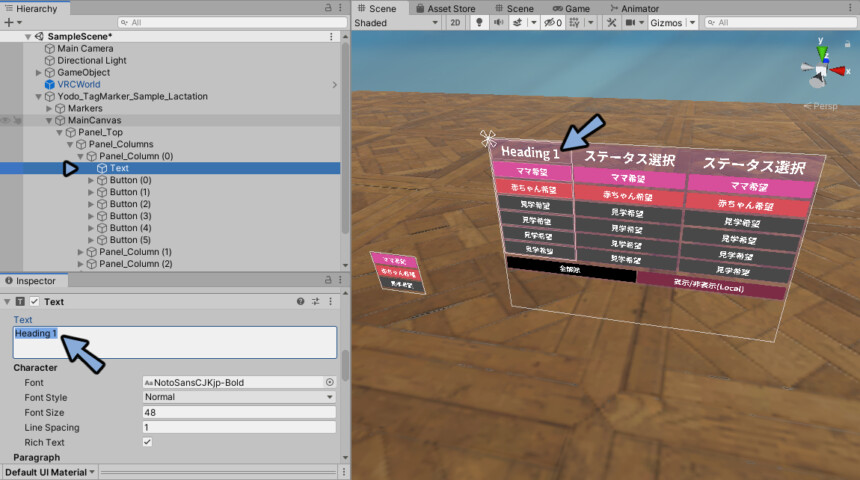
The width can be adjusted by typing a space ( ) at the letter.
Button Adjustment
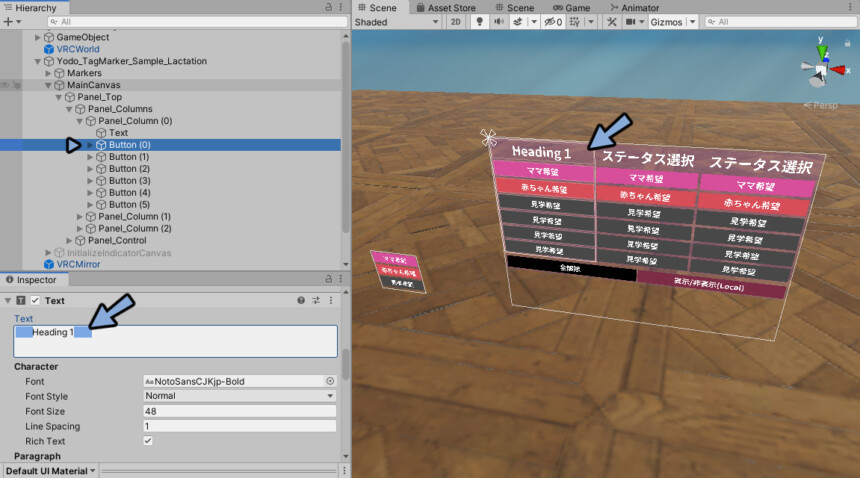
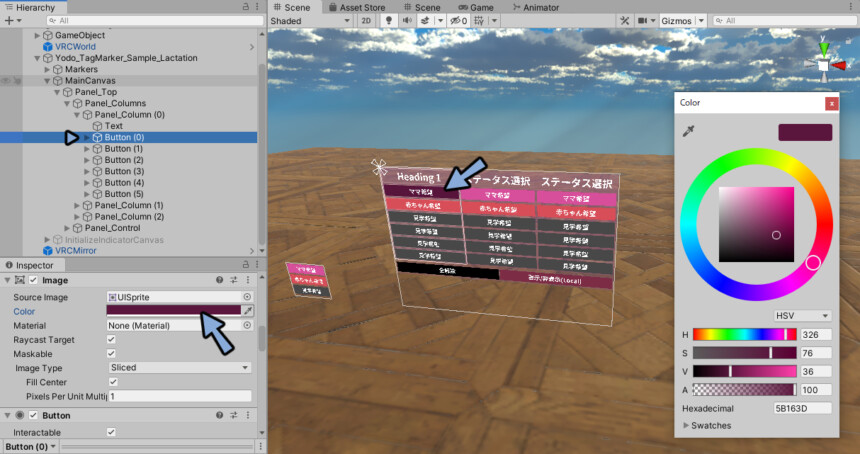
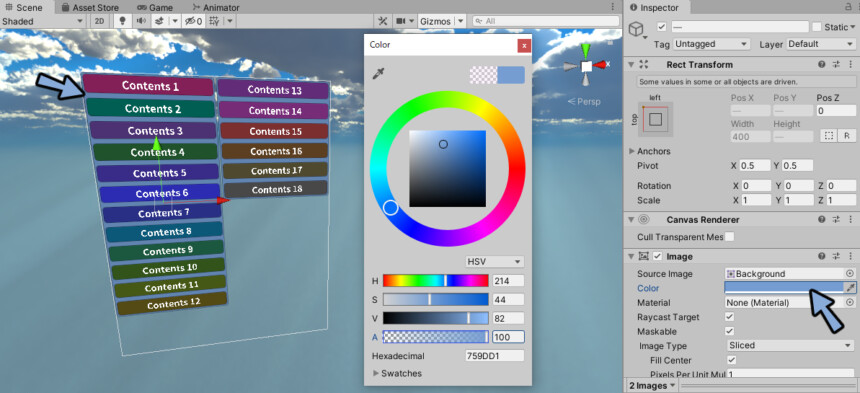
Select Button.
Change the color by selecting Inspector → Image → Color.
Open the Button and select Text.
Change the text in Inspector → Text to change the text of the button.
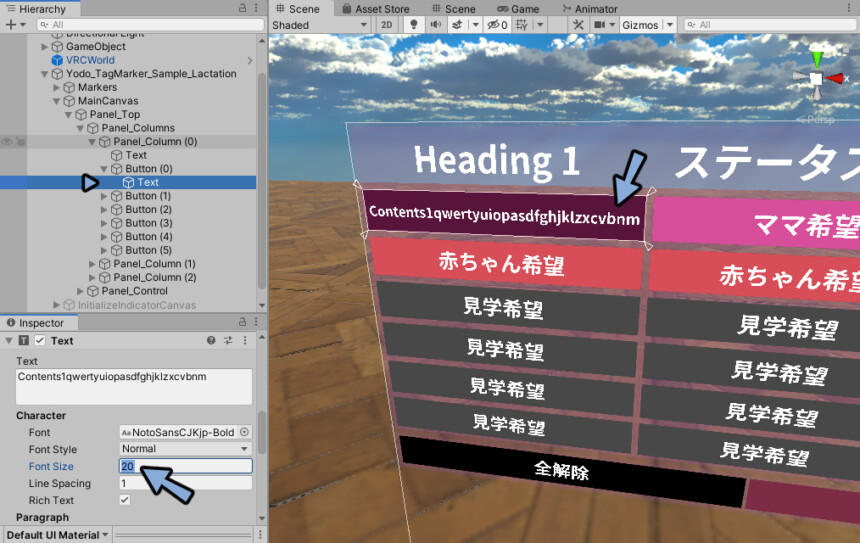
Characters will not be displayed if they are too long.
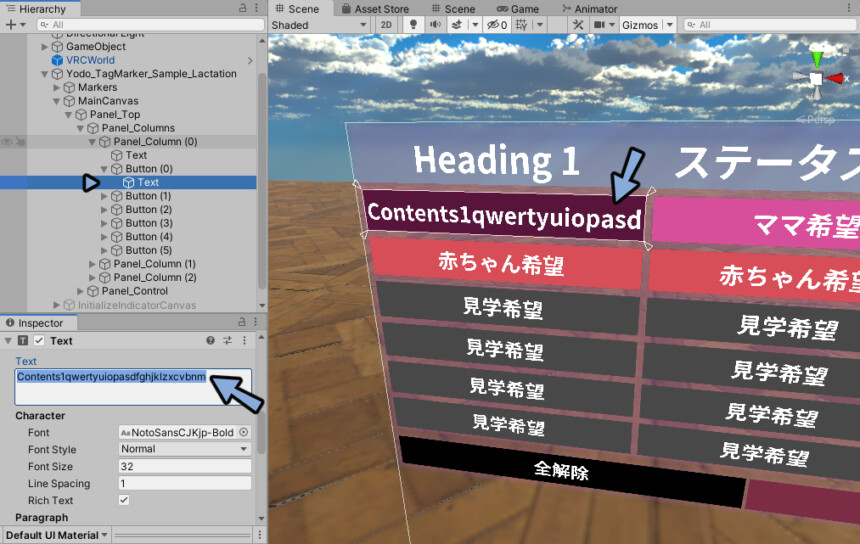
In that case, adjust the Font Size to see it.
If that does not work, consider making it two lines.
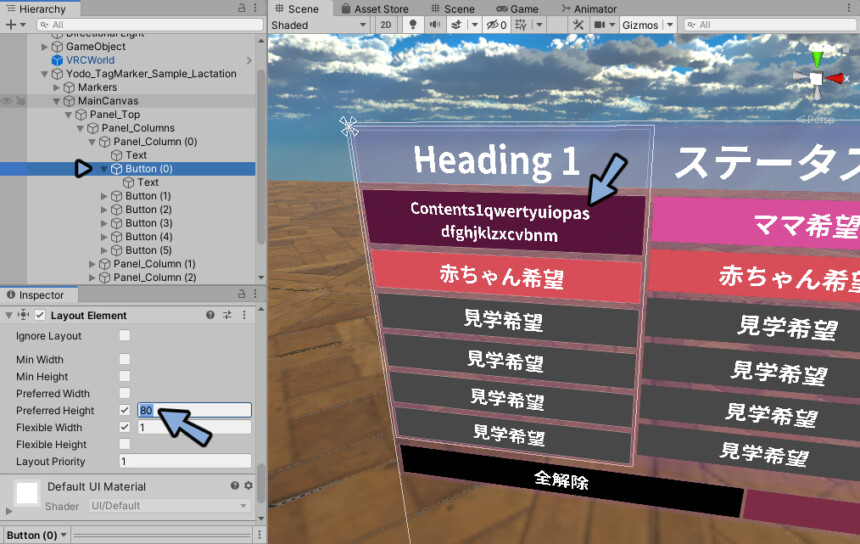
If you break the line with Text, only the first line will be displayed.
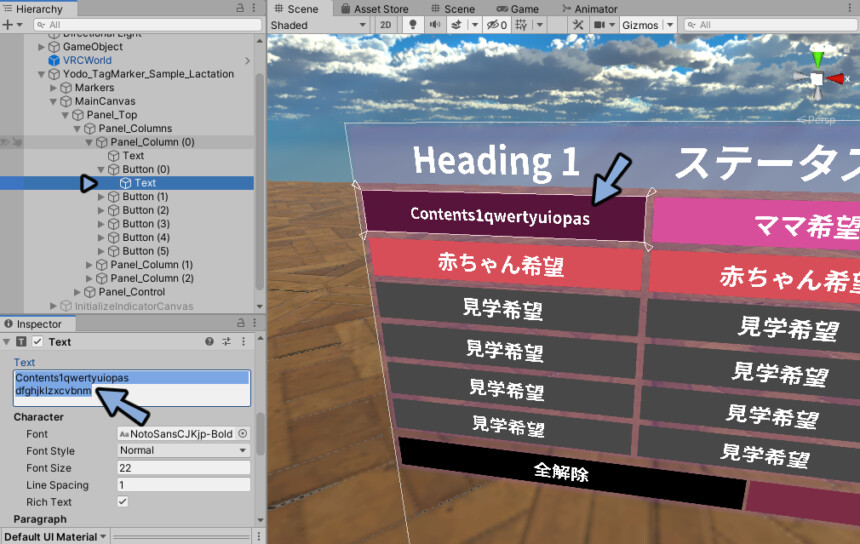
Select the Button whose Text you want to make two lines.
Increase the value of Inspector → Layout Element → Preferred Height to make two lines.
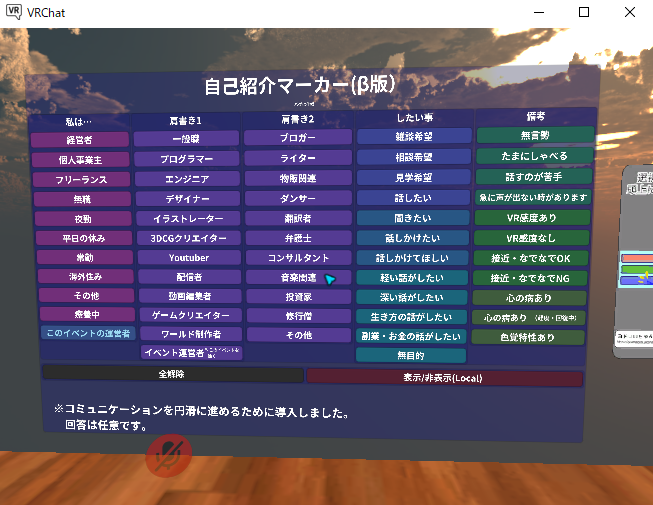
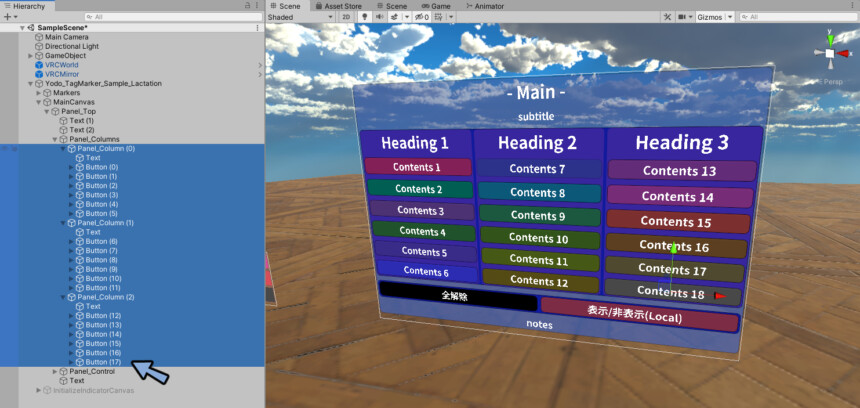
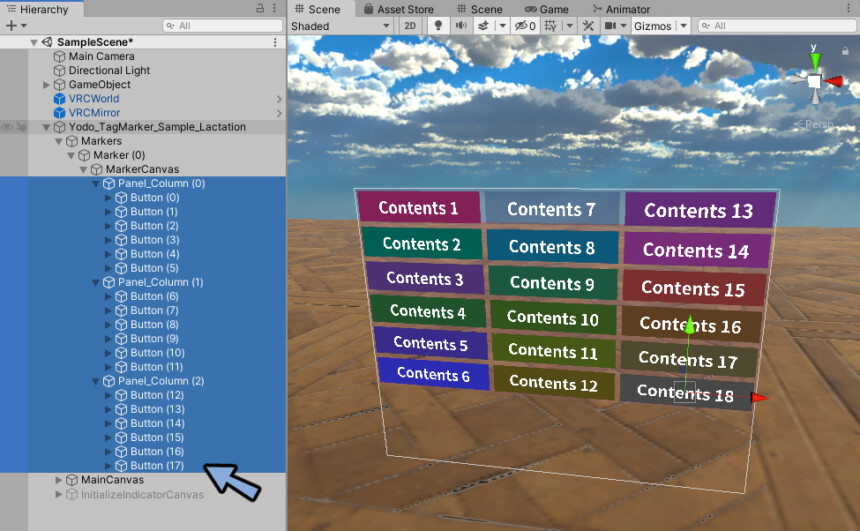
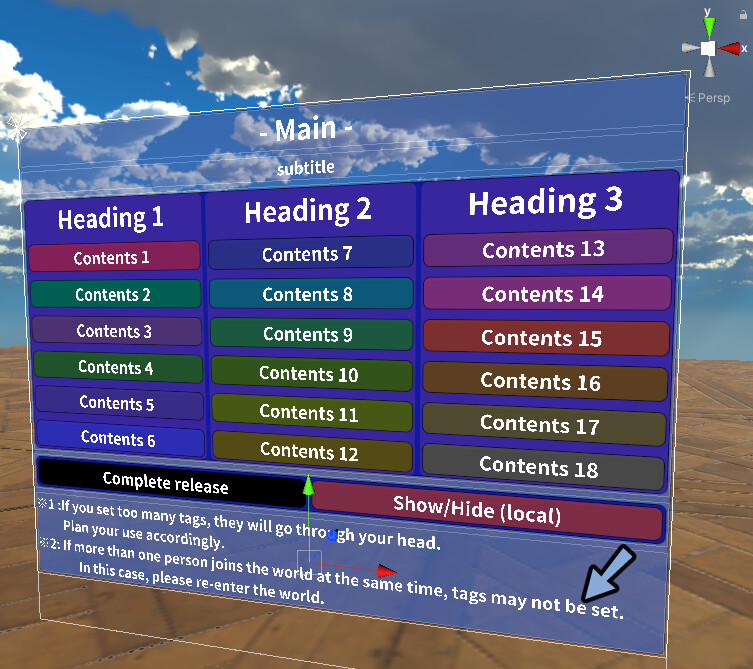
If you adjust all the buttons in this manner, you will end up with something like this.
When it comes to color schemes, it is important to be aware of the importance of “matching” to create a beautiful color scheme.
Hues should be matched according to the purpose or category, and the overall brightness should be matched.
This completes the button adjustment.
Panel Adjustment
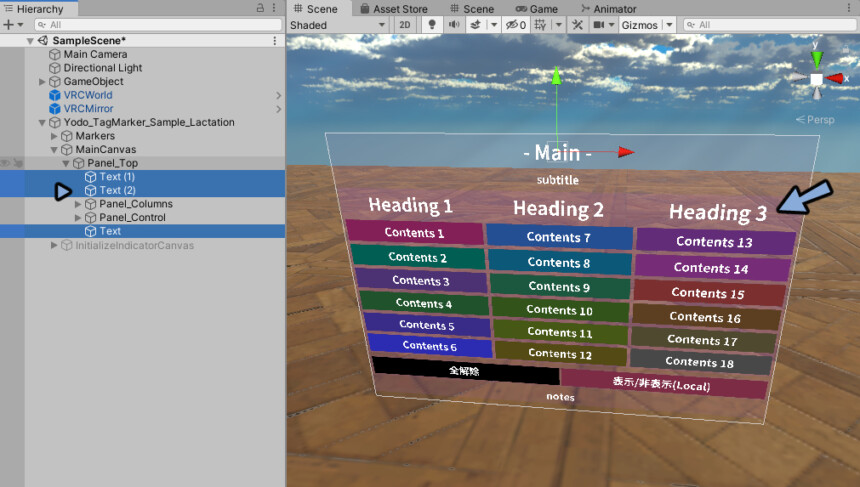
Select Text in Panel_Colums(0).
Ctrl+C to copy.
Paste it into the hierarchy directly below Panel_Top with Ctrl+V.
Then the text will increase to the bottom location.
Follow this procedure to add text to the panel by increasing Text.
The size of the text is adjusted with Font Size.
Shift+click to select Panel_Colums and Panel_Control.
You can change the color behind the text panel by Inspector → Image → Color.
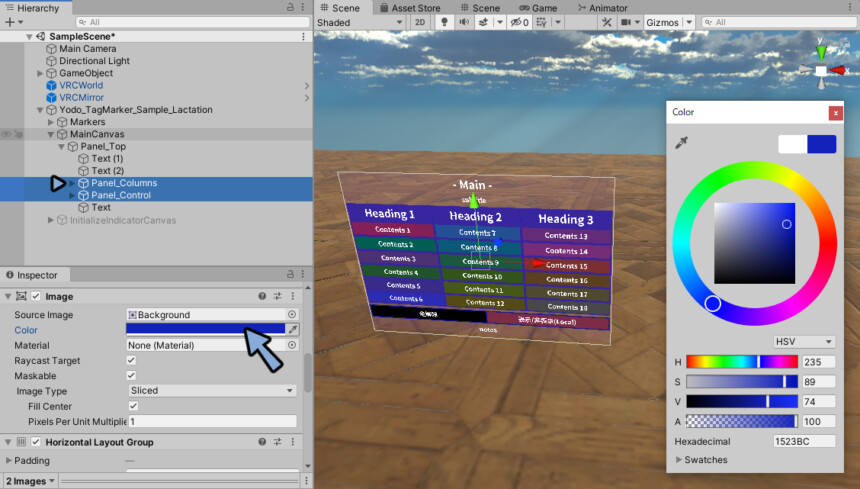
Select Panel_Top → Image → Color.
Then you can set the color of the entire panel.
You can adjust the transparency by adjusting the value of A.

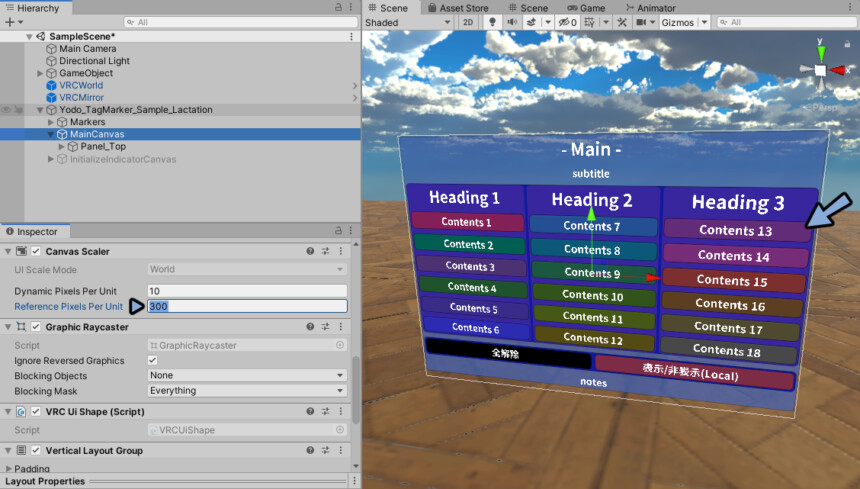
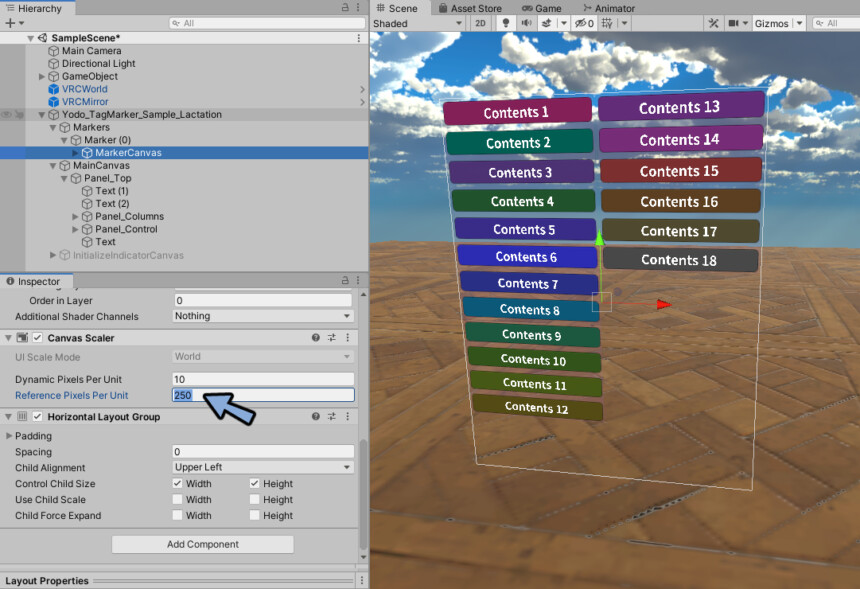
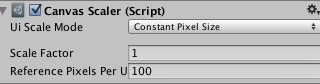
Select MainCanvas → Inspector → Canvas Scaler → Increase the value of Reference Pixels Per Unit to make the corners rounded.
This completes the panel adjustment.
button to display the tag overhead
Synchronize the button with the marker.
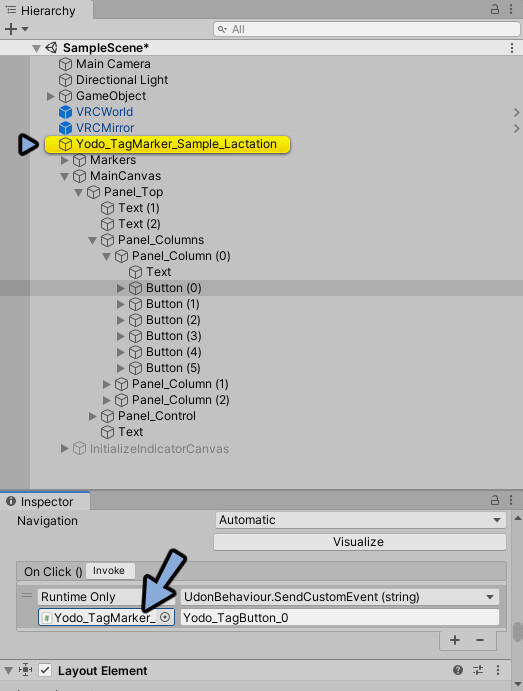
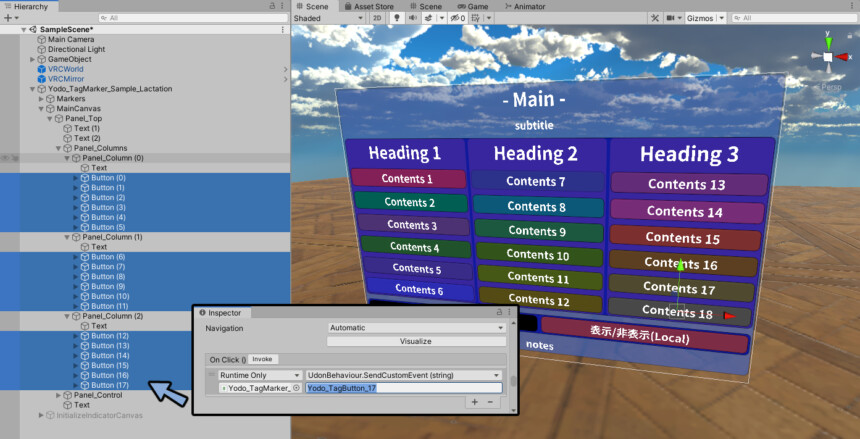
Select Button → Inspector → Look inside On Click() in Button.
Yodo_TagButton_0″ is the button’s signal type.
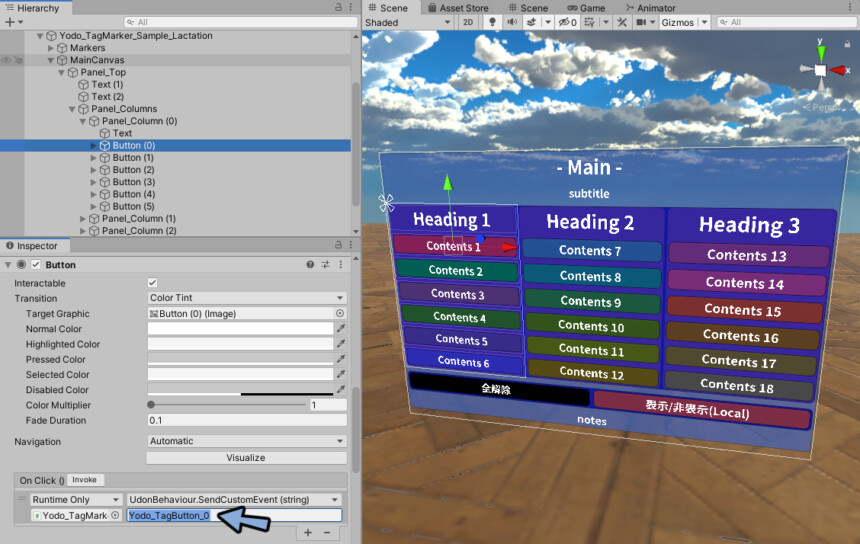
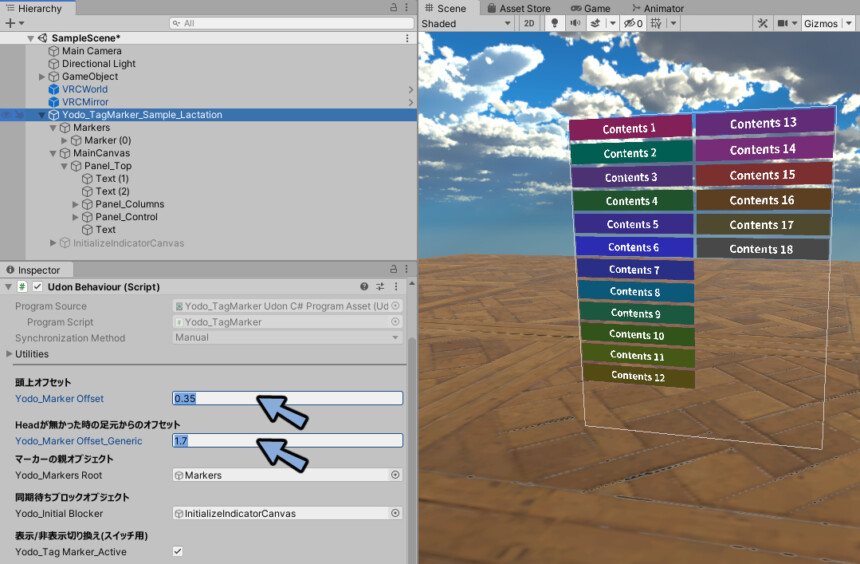
First, make sure the top level of tag markers is set by pressing “Yodo_TagMarker…” on the left side.
If this is not set properly, the button will not work.
Next, select Button and set “Yodo_TagButton_1~63”.
The maximum number of buttons is 64.
Counting starts from 0, so the number will be 0~63.
Here we have assigned “Yodo_TagButton_6” to the seventh button.
Note the typos “Yodo_TagButton6” and “6”.

The name of the changed Button is also changed to the assigned number.
Change to Button (6).
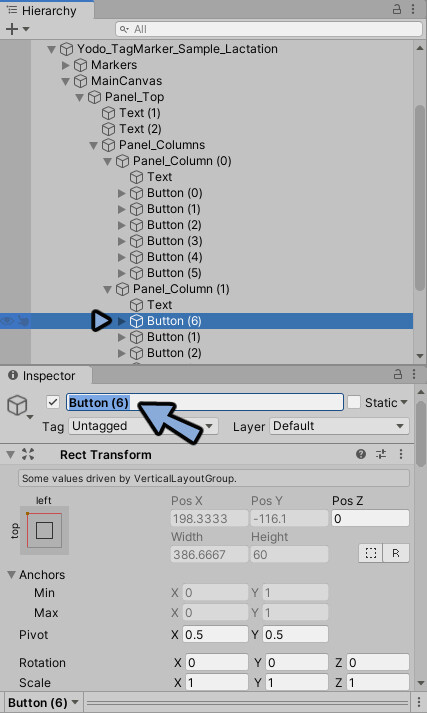
Set “Yodo_TagButton_0~63” and “Button(0~63)” for the number of buttons.
If it is set up like this, it is ok.

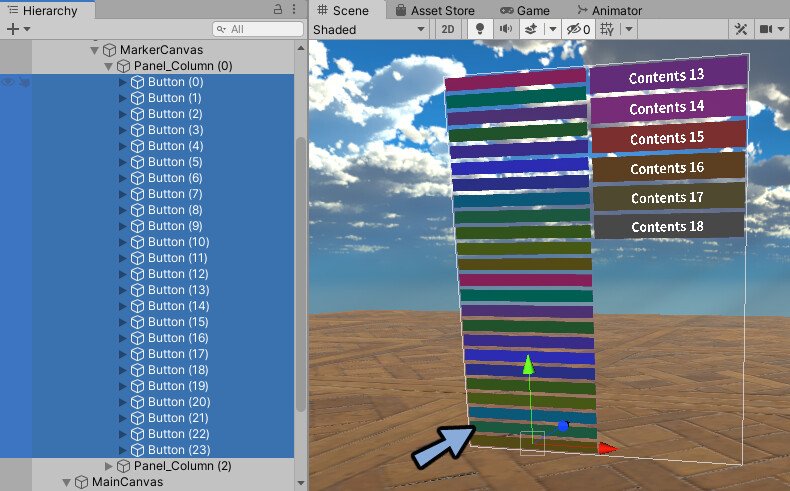
After setting up, copy all buttons (Panel_Column(0~) with Ctrl+C.
In Hierarchy → Markers → Marker(0) → Remove Panel_Column(0) in MarkerCanvas.
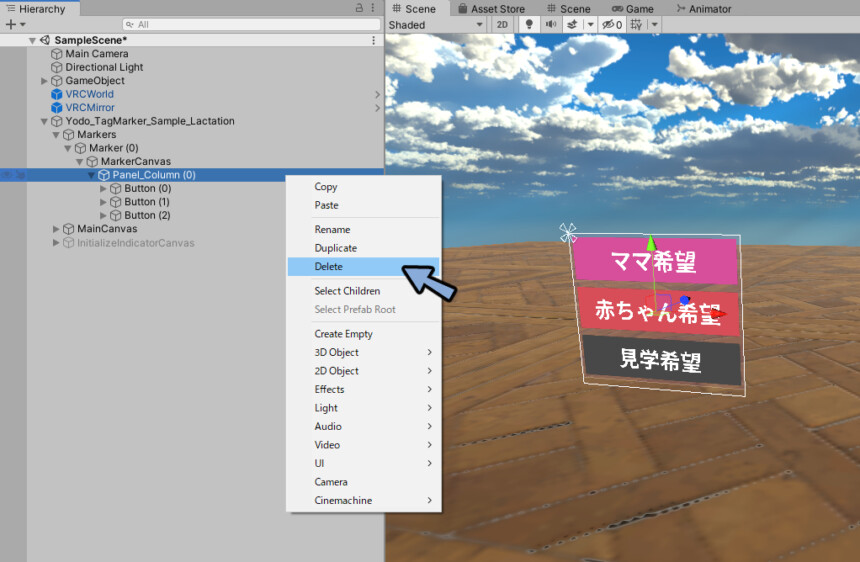
Paste into MarkerCanvas all buttons (Panel_Column(0~) with Ctrl+V.
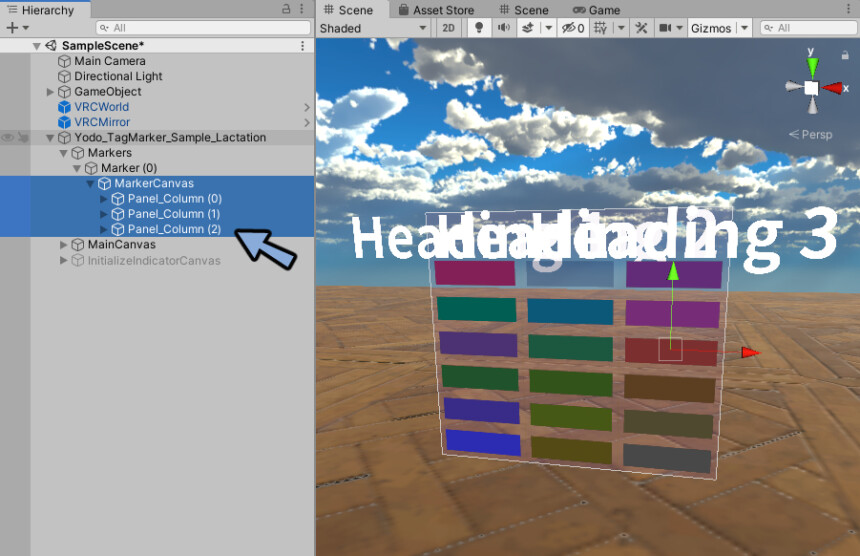
Expand the Rect transform from the MarkerCanvas Inspector.
Adjust the design by changing the Width and Height.
Open Panel_Column(1~) and delete the text in it if you do not need it.
Put Text between Panel_Column(0).
Then you can create tags with text.
Please set it according to your purpose.

If Text is deleted, only tags are displayed.
The order of the Hierarchy may change when pasting.
Therefore, rearrange the order and names of Panel_Columns and Buttons.
Build & Test to confirm operation.
If the Marker and Button are properly synchronized, the tag will appear overhead.
Overhead tag adjustment
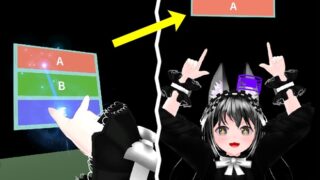
Buttons in Panel_Column can be grouped together.
Copy & Paste Panel_Columns 1 Button → Panel_Columns 0
Delete Panel_Columns 1.

The buttons Displayed in three rows.
but the tags above the head can be in two rows.
Select MarkerCanvas → Inspector.
Rect Transform → Pos Y sets the height from overhead.
Set the height of the overhead tag with Height.
Check Yodo_TagMarker_Sample_Lactation → Udon Behaviour.
1,Yodo_Marker Offset sets the height from overhead.
2,Yodo_Marker Offset_Generic sets the height of the tag from the height of a model without a head bone.
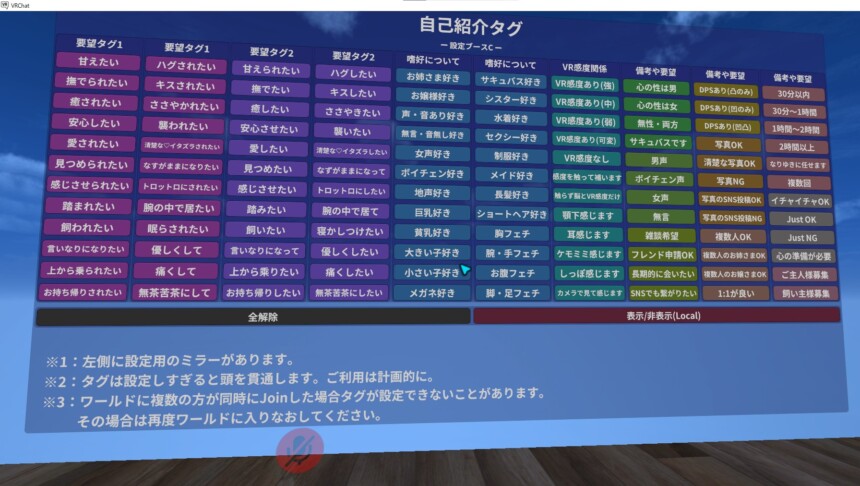
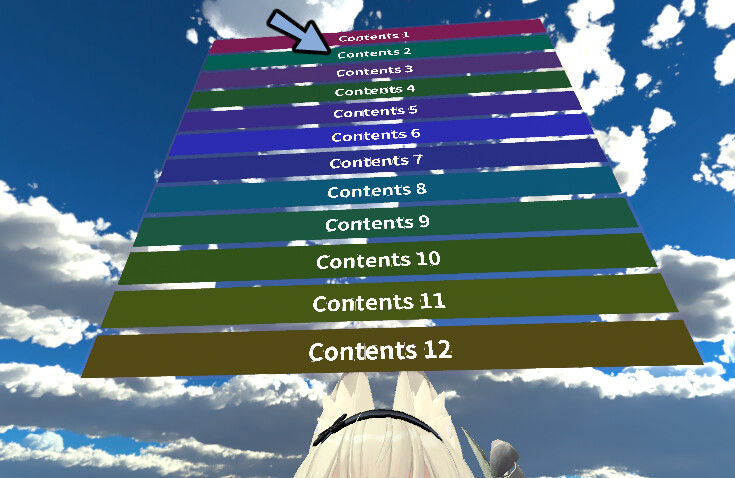
There is a limit to what you can look up and read, so 8~10 tags is the limit.
After about the 11th tag, the text begins to smash when you look up.
If there are many buttons, include this note.
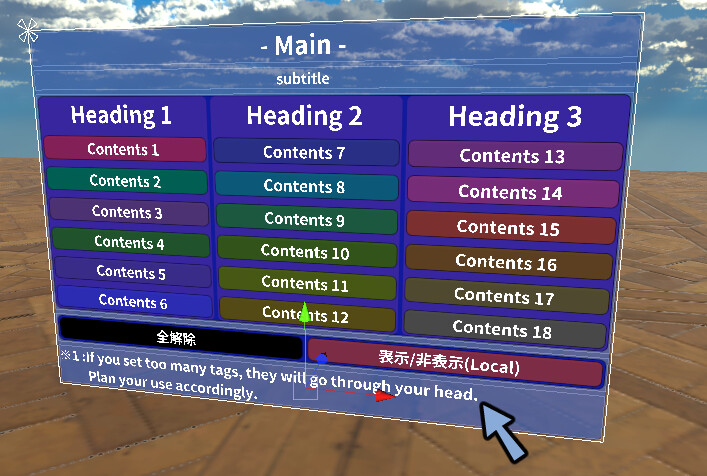
Set by entering text under Panel_Control.
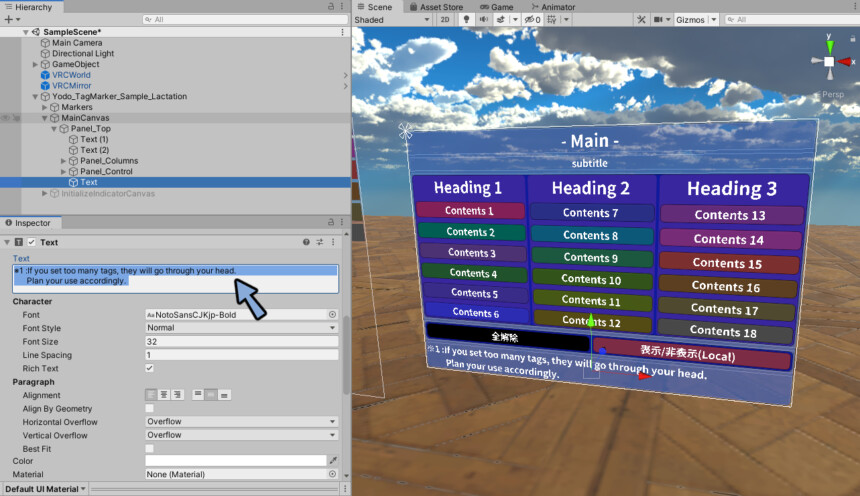
↓For copy paste.
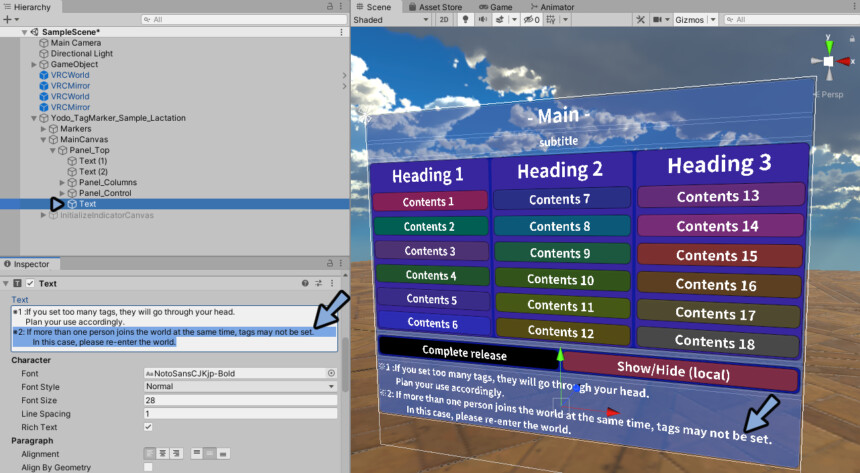
※1 :If you set too many tags, they will go through your head.
   Plan your use accordingly.
If there are many tags that can be set, the preview will be compressed or the text will disappear.
This is how it looks when all tags are set, so you can leave it as it is.
Select MarkerCanvas → Inspector → Canvas Scaler → Reference Pixels Per Unit value.
Increase the value to make the overhead tags rounded corners.
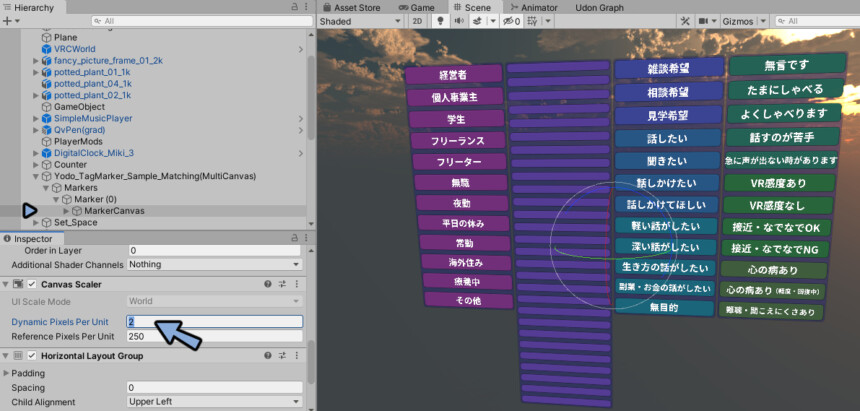
If the overall amount of text is too large, parts of the text may be missing.
The solution is to select MarkerCanvas.
(Behavior in Japanese, not sure if it happens in English.)
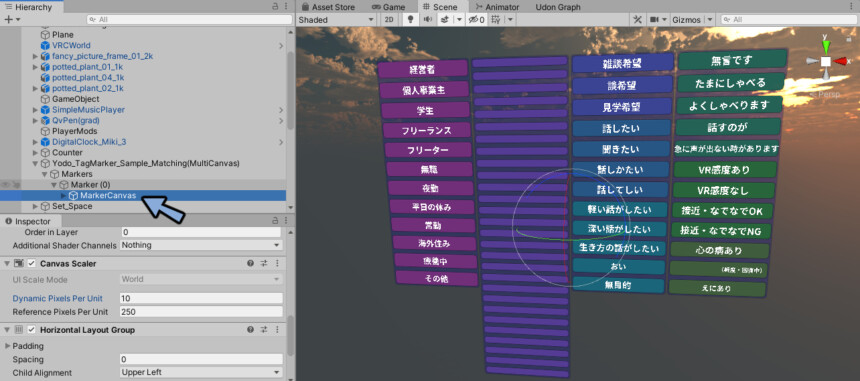
By decreasing the value of Dynamic Pixels Pre Unit, the text will be displayed correctly.
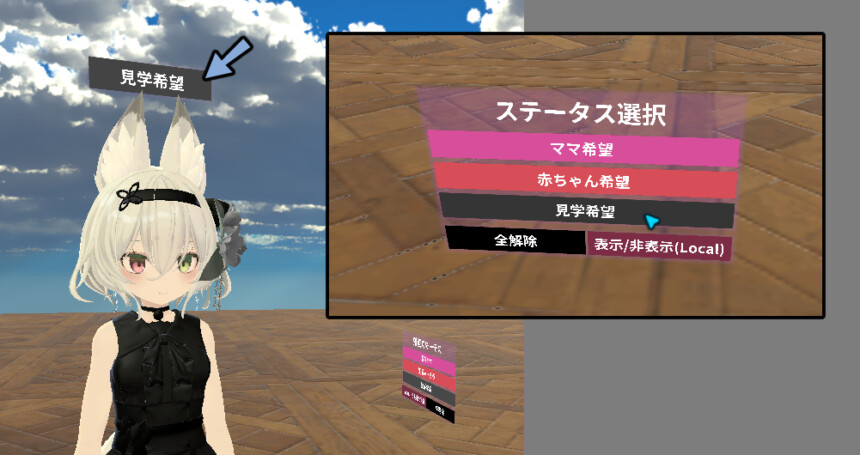
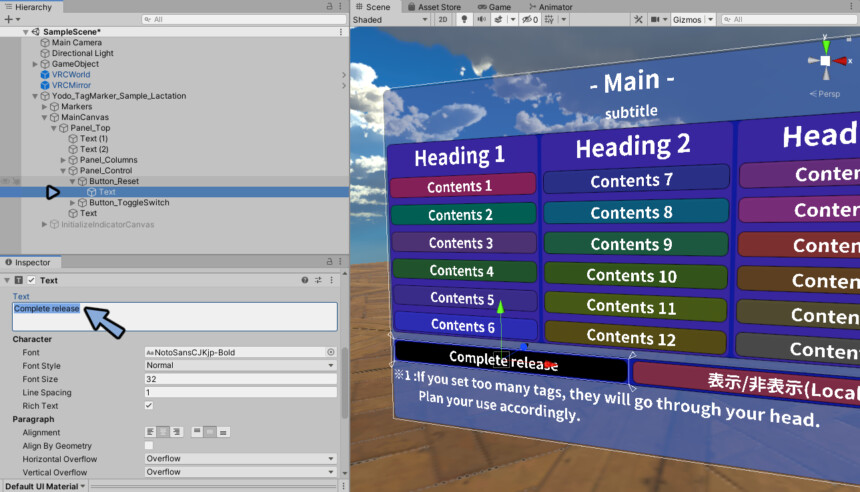
Select MainCanvas → Panel_Top → Panel_Control → Button_Reset → Text.
Change the text in the Text
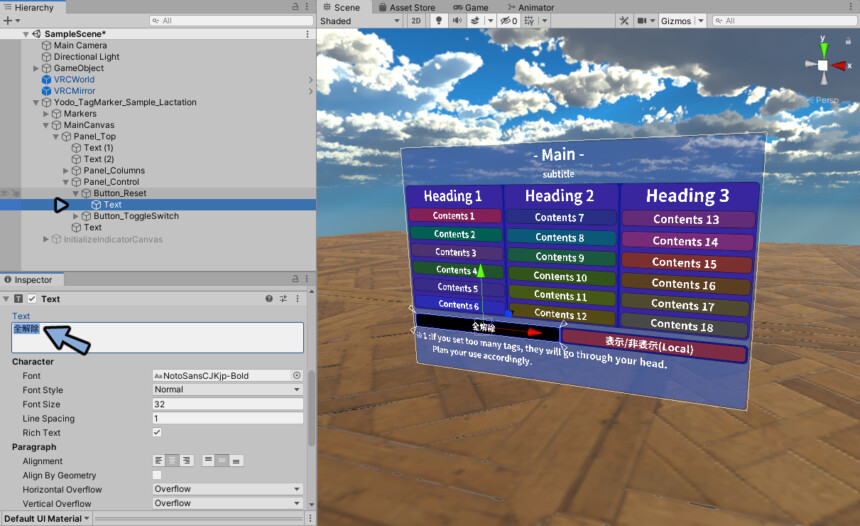
Change 全解除 → Complete release.
Select MainCanvas → Panel_Top → Panel_Control → Button_ToggleSwitch → Text.
Change the text in the Text
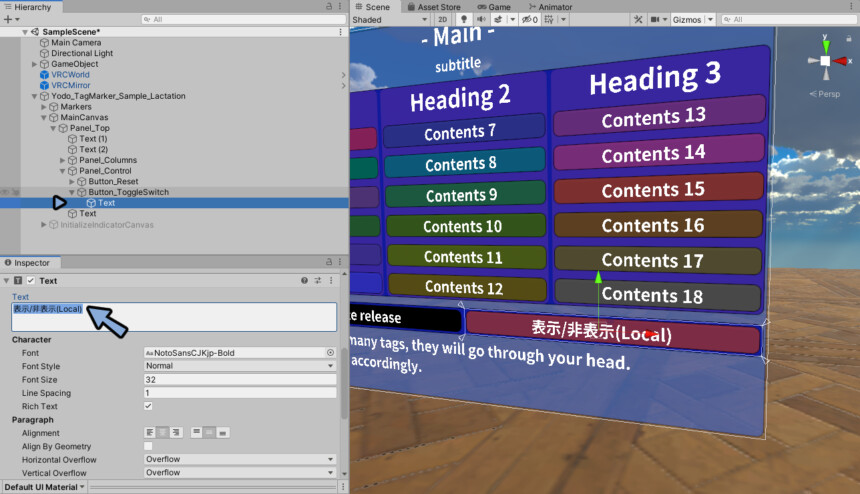
Change 表示/非表示 (Local) → Show/Hide (Local).
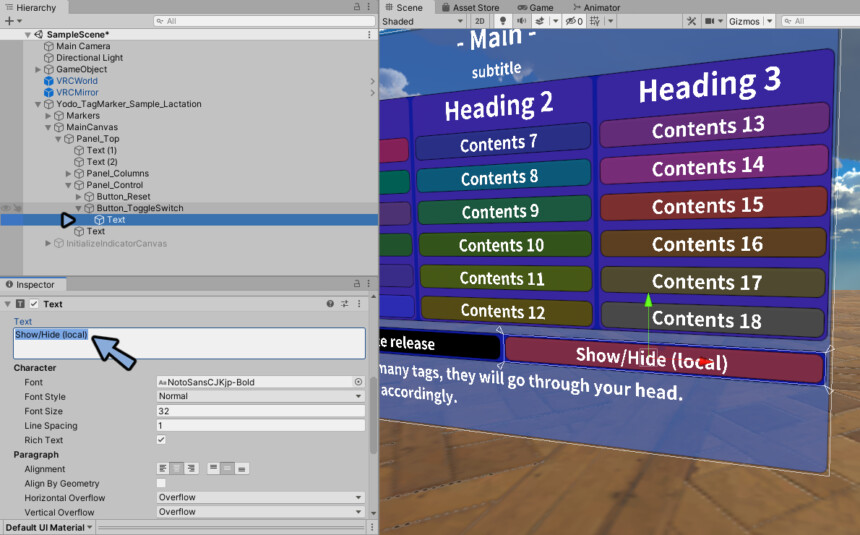
The Show/Hide (Local) function is just reverting to the Marker’s initial position set in Unity.
It is not actually erasing the marker.
You can make it look like it is erased by embedding it under the ground, etc.

Move Markers to a position where it is not visible from the world.
How to set the color of the back color.
Select Panel Column(0)~.
Select Inspector → Image → Color.
Changing the color changes the color of the back color.
This completes the adjustment of the overhead tag.
Simultaneous Join of multiple people
Edit MainCanvas.
Tag settings do not work when multiple people join at the same time.
Therefore, we will add this note.
If there are many buttons, include this note.
↓For copy paste.
※1 :If you set too many tags, they will go through your head.
   Plan your use accordingly.
※2: If more than one person joins the world at the same time, tags may not be set.
     In this case, please re-enter the world.
Setting up multiple people to participate simultaneously is complete.
Assign the tag to the person who joins
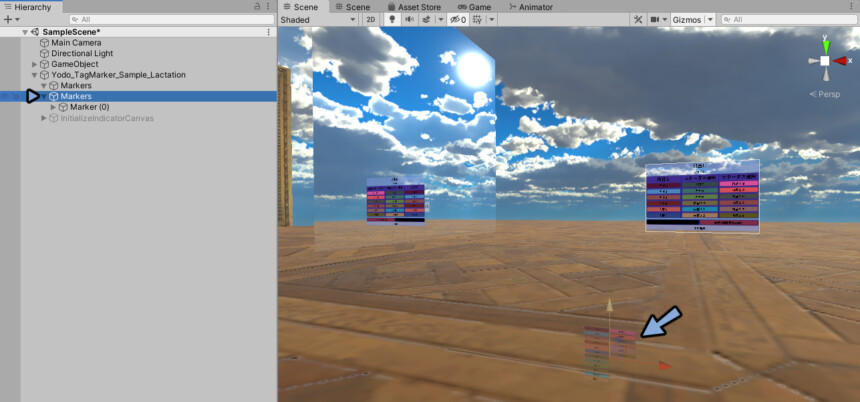
After Marker setting is finished, select Marker(0) and copy it with Ctrl+C.
Increase the number of markers to (0 to a max 81) by pasting.
Each of these markers is assigned to the head of the user who joins.
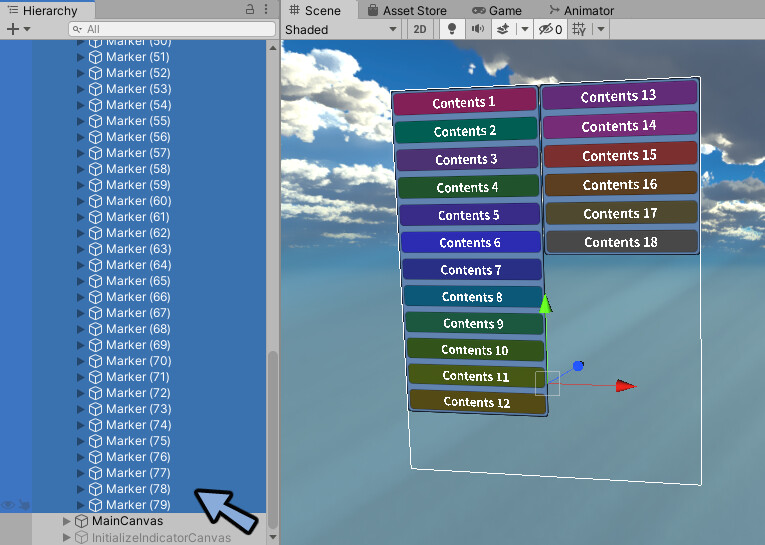
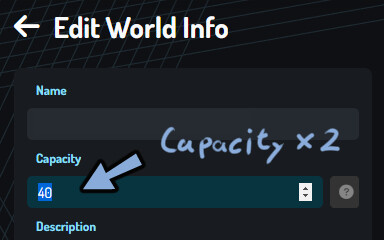
This number is twice the Capacity of the world.
A world can only contain twice as many people as its Capacity.
(For a world with 40 people, the Maker needs to be 0-79)
The maximum number of people in an instance is programmatically set to 82.
Since 0 is counted, 0-81 is the maximum.
This completes the marker setup.
For more detailed settings, please refer to the official Unity “Canvas Component”.
Ending
Explained how to display tags overhead in the VRChat world.
Others are in the process of explaining how to play Youtube videos on VRChat.

Please take a look at this page as well.

コメント