
はじめに
今回はアクションの基本操作を紹介します。
これはBlenderでアニメーションデータを管理するツールです。
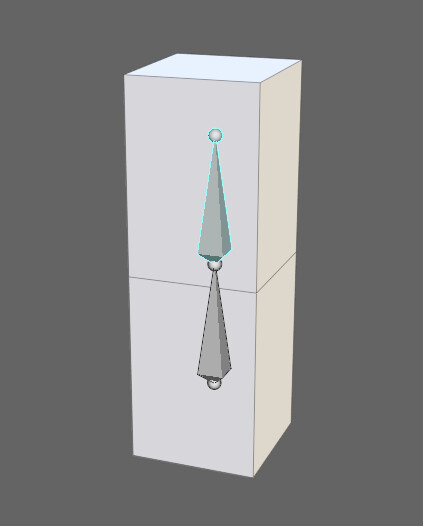
基本的なモデルとボーンを作った状態からスタートします。
作り方はこちらをご覧ください。
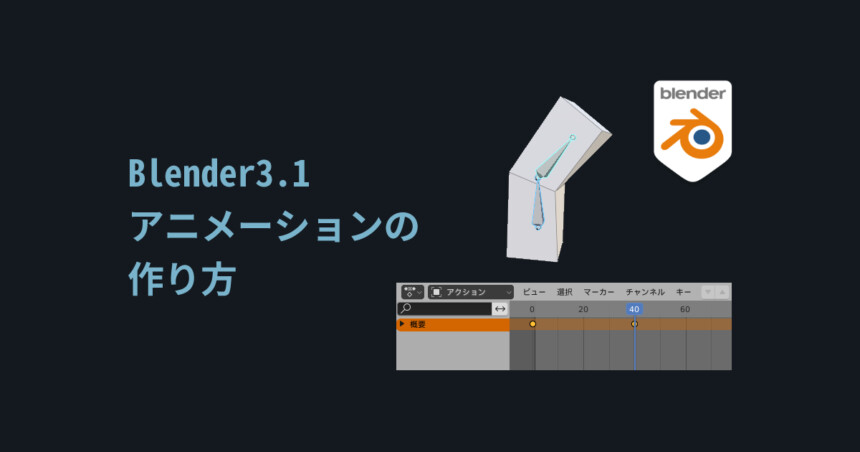
今回はこのようなモデルとボーンを用意しアニメーションデータを作ります。
アクション作成
アクションとは1つのアニメーションデータです。
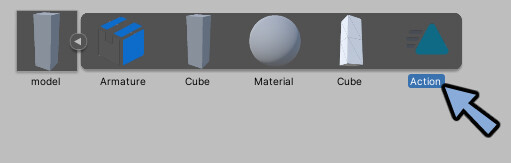
Unity上ではこのように表示されます。
Blenderを立ち上げ。
エディタータイプでドープシートを選択。
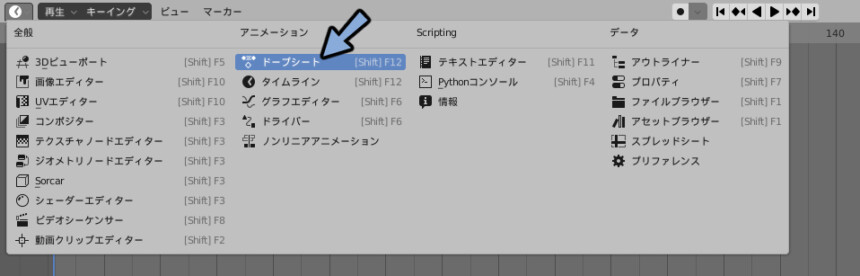
ドープシートをクリック。
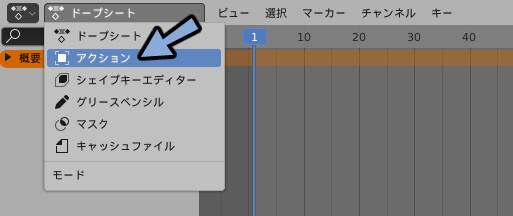
アクションを選択。
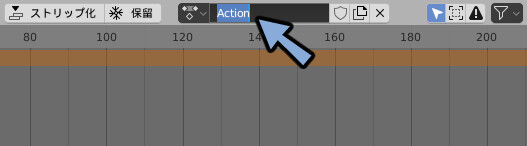
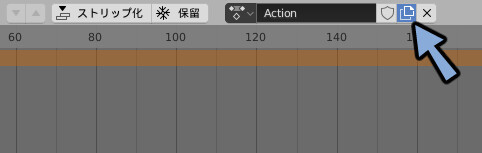
『+新規』を押します。

するとActionができます。
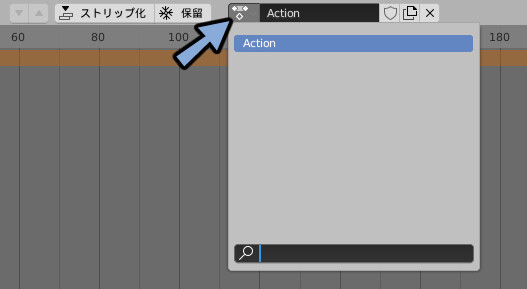
左側のドープシートマークをクリック。
ここでActionが確認できます。
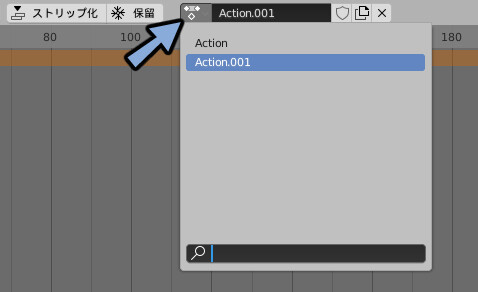
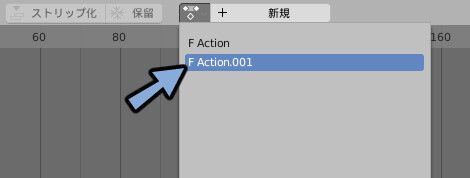
2つ目のアクション作成
ファイルマークをクリック。
ドープシートマークをクリック。
2つ目のアクションが確認。
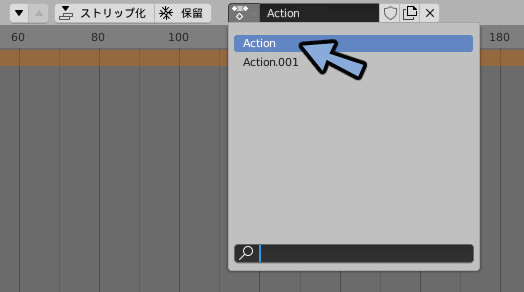
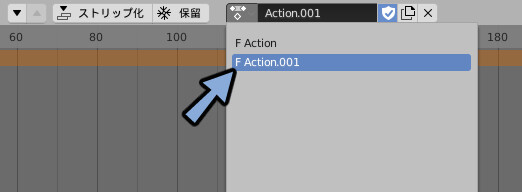
Actionを選択。
これで制作中のアクションを切り替えれます。
これで2つ目のアクションの製作が完了です。
データ保護
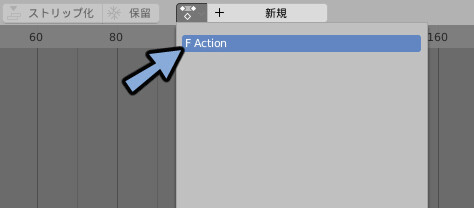
盾マークにチェックを入れます。
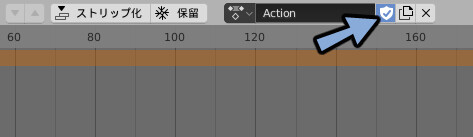
ドープシートマークをクリック。
F という文字が入れば成功です。
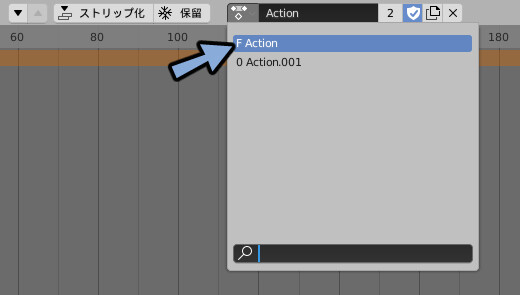
0という表示はモデルにアクションが割り当てられてないという意味です。
この0がついたActionはBlenderファイルの再起動で消えます。
意図せずアクションが消える現象の原因になるのでチェックを入れておいてください。
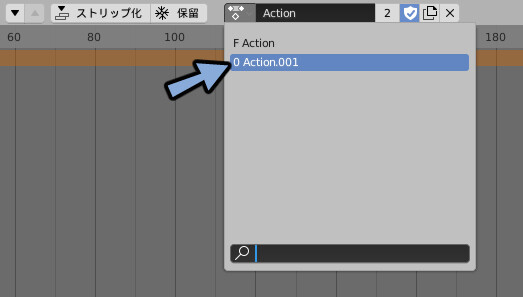
Fか0の表記が無いアクション
表示が無いものは”データが保護されてない状態”+”現在モデルに割り当てられてる”アクションです。
アウトライナーなどで確認できます。
その他不具合や意図しないところで割り当てられてる場合、表記が無いアクションになります。
アクションの削除
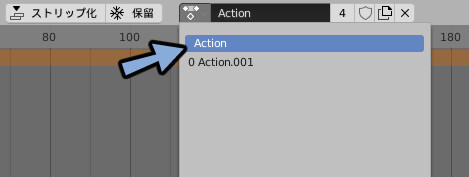
アクションの削除は×を押すだけでは消えません。
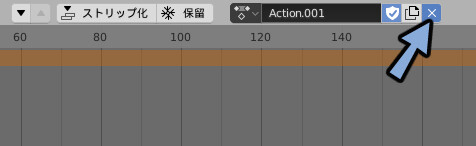
一番左のドープシートのマークを押します。
生き残ってる事が確認できます。
ここからはアクションを消す方法を紹介します。
ドープシートで消したいActionを選択。
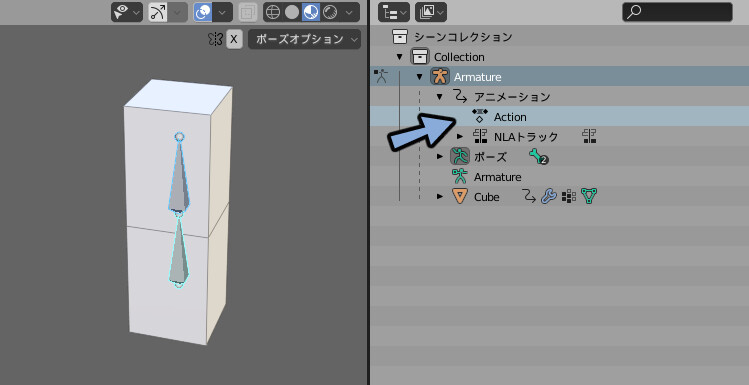
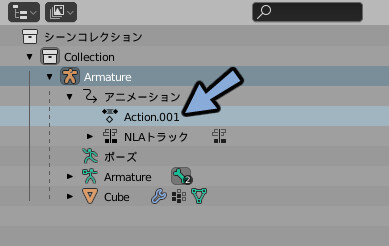
アウトライナーでArmatureを選択。
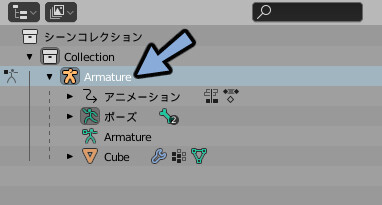
アニメーションの階層を展開。
消したいアクションを右クリック。
削除を押します。
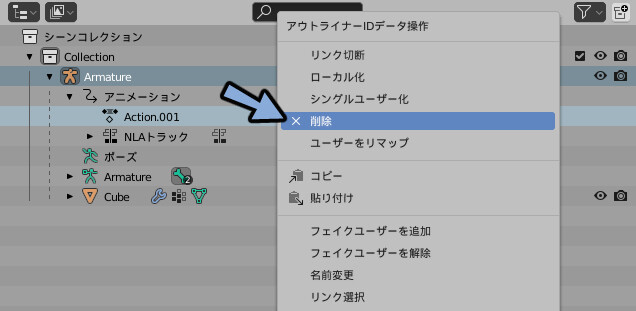
これでアクションが消えます。
アクション名の変更
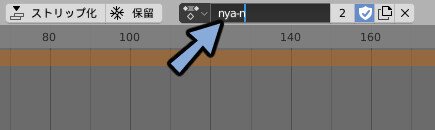
アクションの名前はAction所に名前を打ち込む事で変更できます。
まとめ
今回はアクションの基本操作を紹介しました。
またこのアクションでアニメーションを作る方法やアニメーションの書き出し方はこちらで解説。
ぜひこちらもご覧ください。
コメント