はじめに
今回はValveIndexでピースサインが正しく出ない問題の対処法を紹介します。
ValveIndexでピースサインをした際にピースのアニメーションを表示させる設定を行います。
この方法ではピースサインの際にValve Indexの指が動かなくなるので注意してください。
個人的にはピースサインはパイメニューの入力で設定することをおすすめします。
この方法だとValve Indexの指が動きます。
詳細はこちらで解説。
前提条件
下記の2つを使えることを前提に進めます。
・VRC Avator Descriptor
・Playable Layers
使い方はこちらをご覧ください。
この2つの記事を元に、Gestureに3-Test_Gesが設定された状態からスタートします。
VRC Avator Descriptorの設定についてはこちらをご覧ください。
Gesture Layerの設定
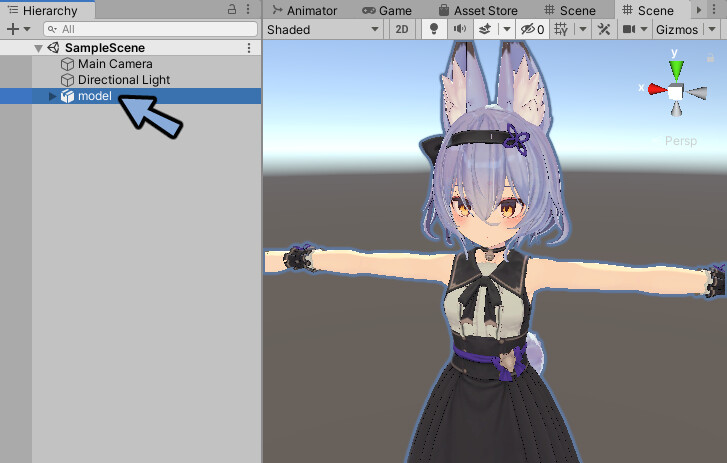
Hierarchyでアバターを選択。
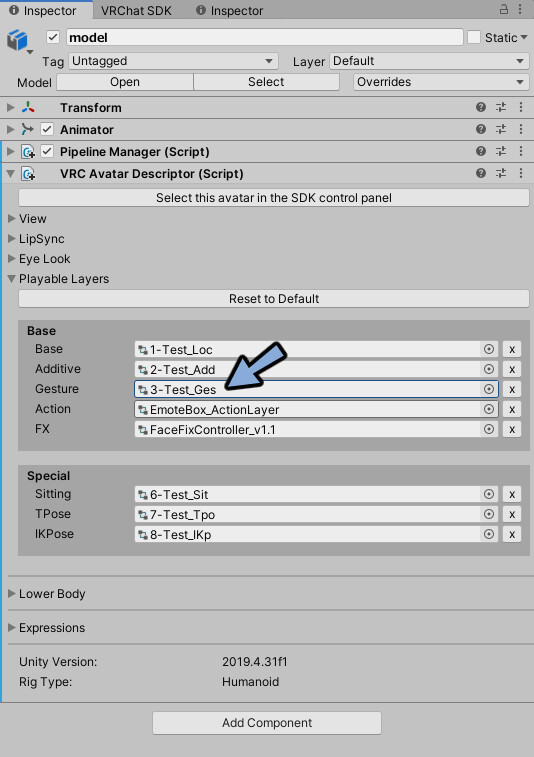
VRC Avatar Descriptor → Playable Layersを開きます。
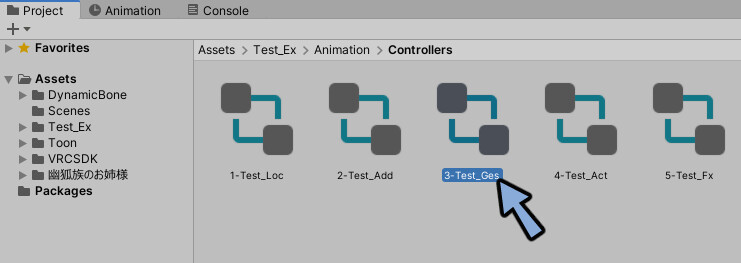
Gestureに割り当てたコントローラーをクリック。
Projectで強調表示されたコントローラーをダブルクリック。
左手の設定
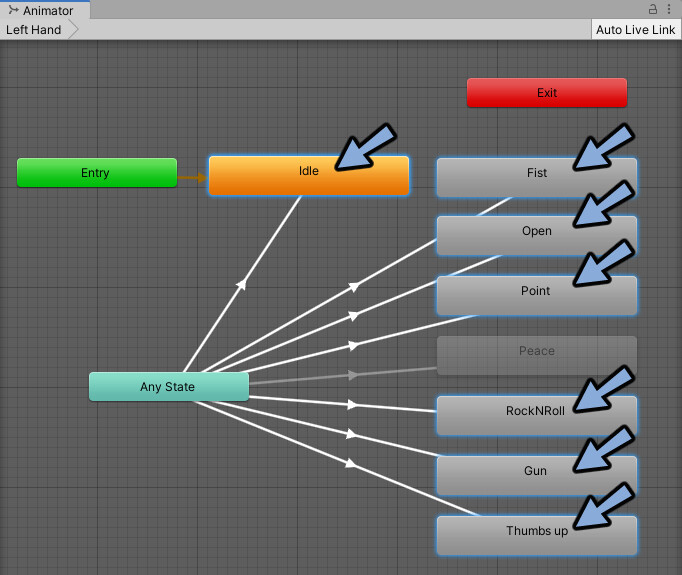
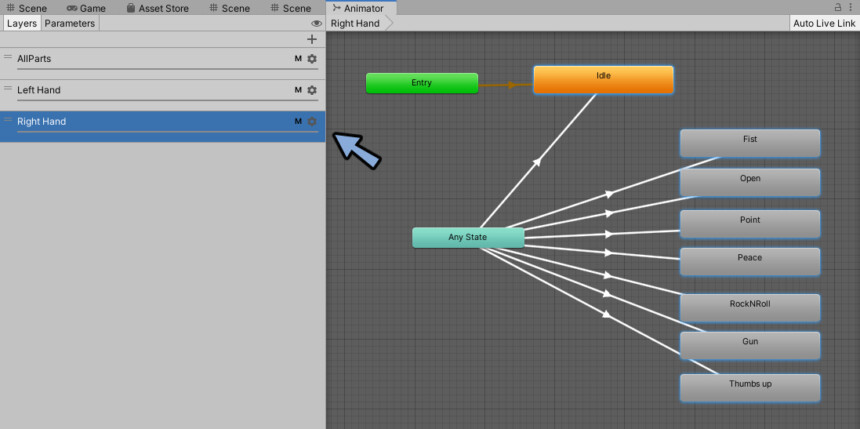
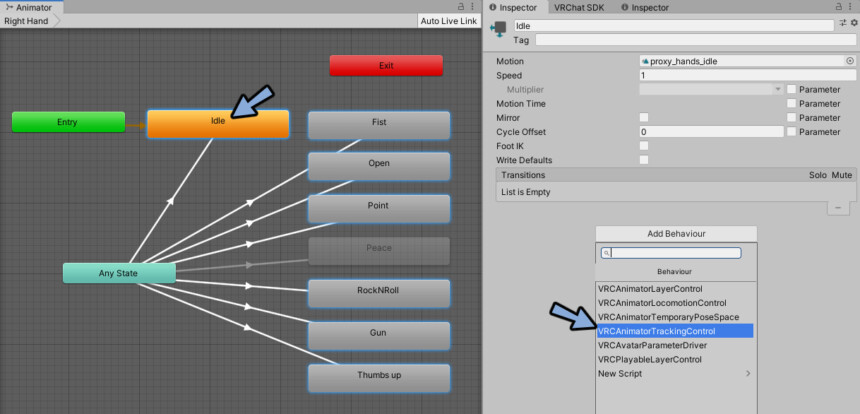
Animatorを開きます。
Left Handをクリック。

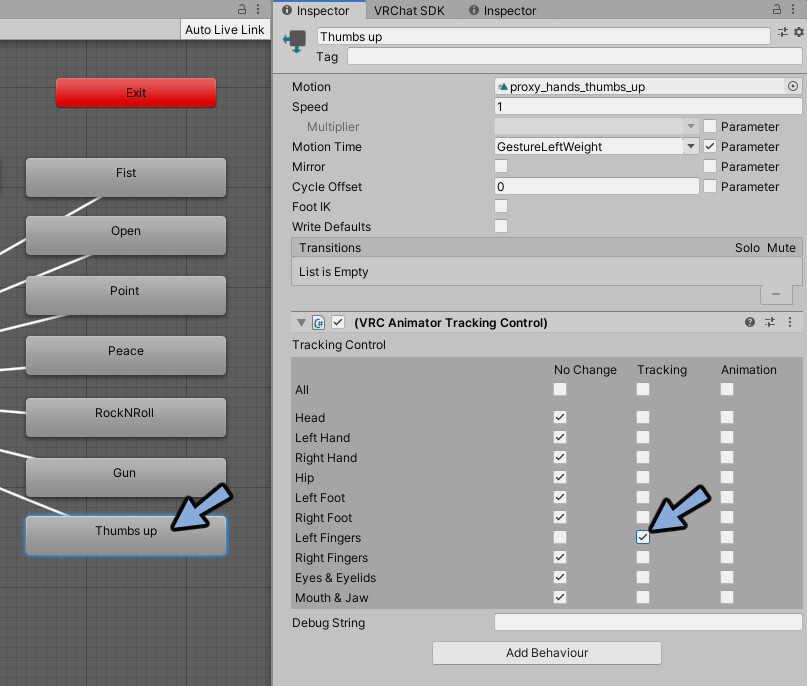
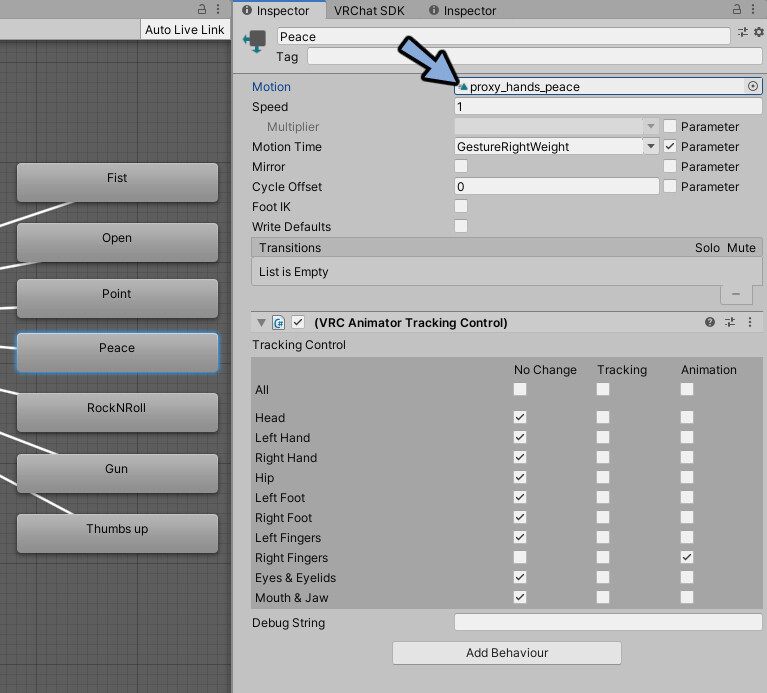
Peaceの箱をクリック。
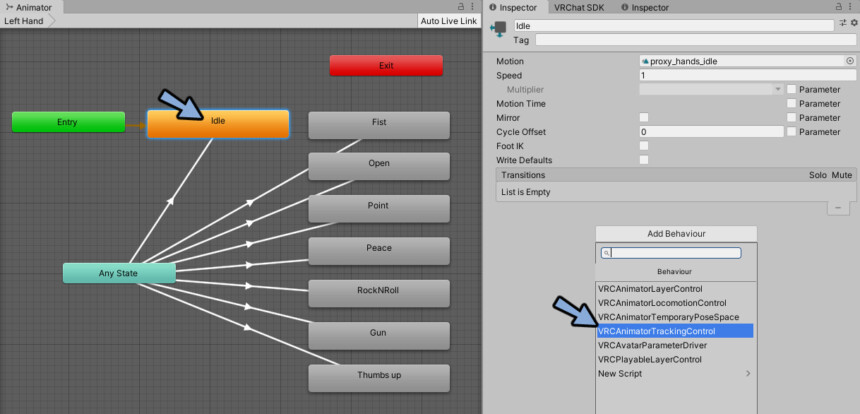
Inspectorを確認。
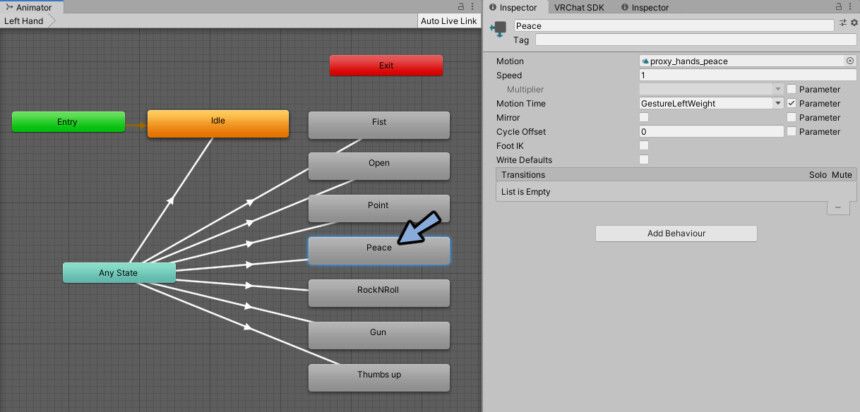
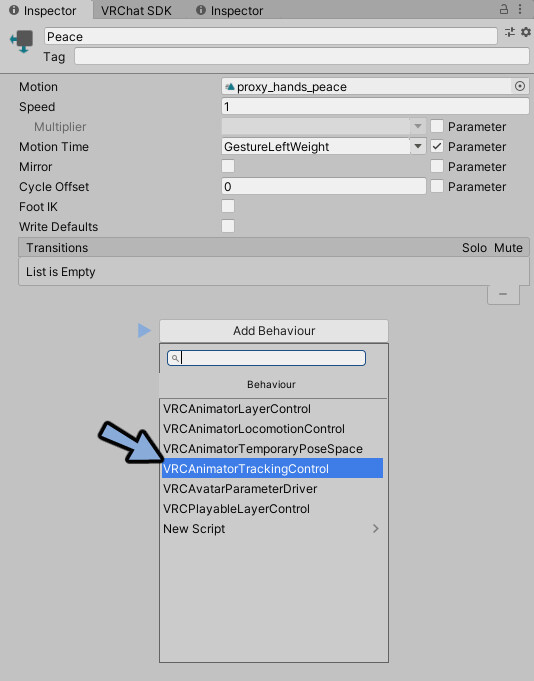
Add Behaviourをクリック。
VRCAnimatorTrakingControlを選択。
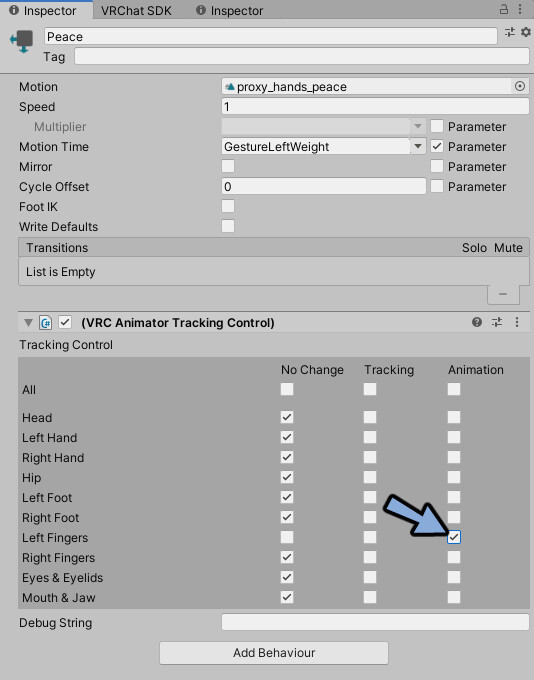
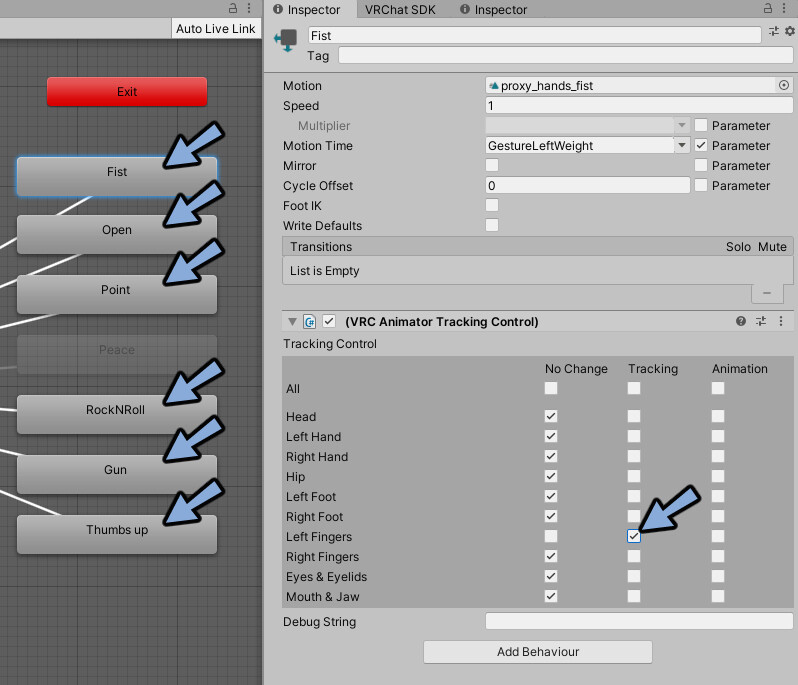
Left FingersのAnimationにチェック。
これでIndexコンのトラッキングが無くなりました。
代わりに既存のピースサインアニメーションが再生されます。
VRCAnimatorTrakingControlは1つでも設定すると残りの全てに設定する必要があります。
干渉対策です。
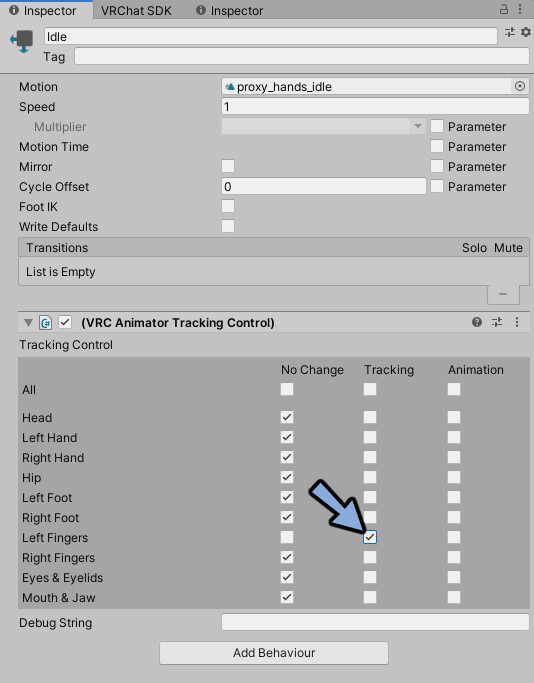
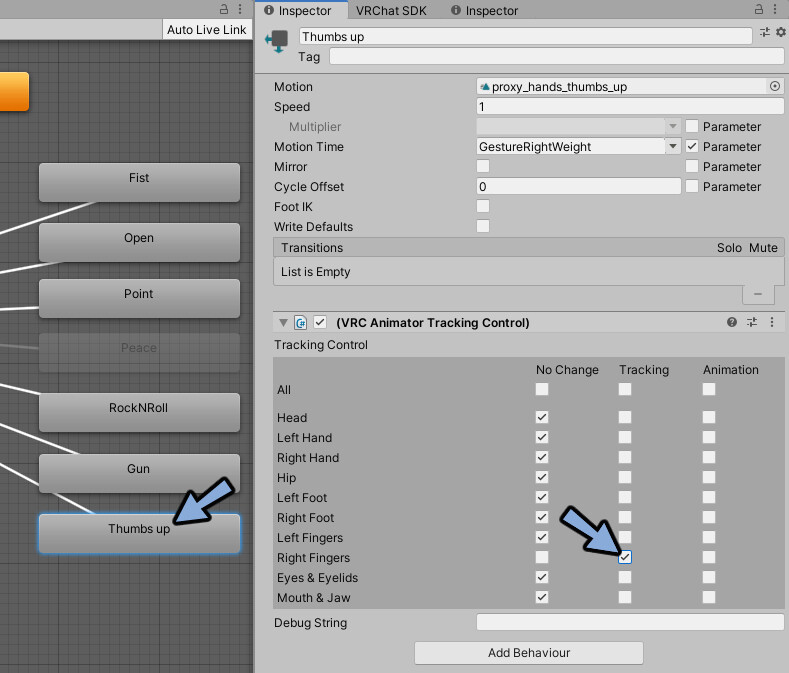
まず、Idleの箱をクリック。
InspectorよりVRCAnimatorTrakingControlを追加。
Left FingersのTrackingにチェック。
これでIdle時はIndexコンの指の動きが反映されます。
残りのPeace以外の箱にも全て同じ設定を行います。
Fist~Thumbs upまで設定が終わりましたらLeft Handの設定が完了です。
右手の設定
続いて右手の設定を行います。
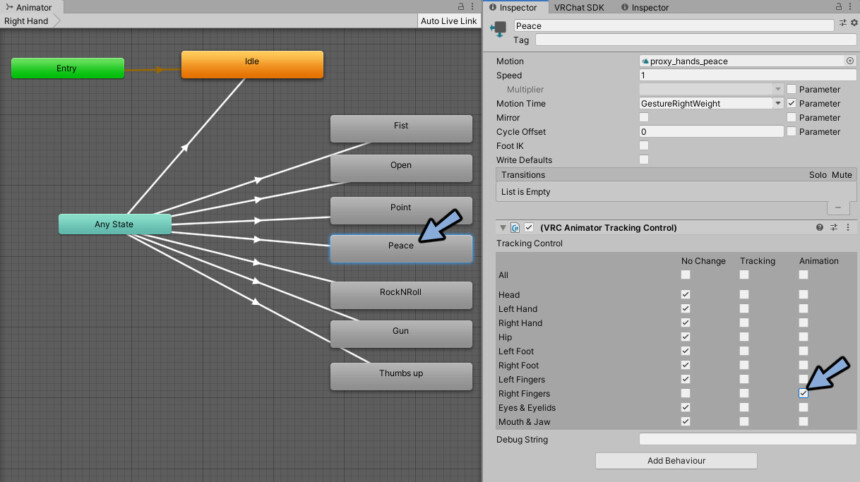
AnimatorのRight Handをクリック。
Peaceを選択 → Inspectorを確認。
VRCAnimatorTrakingControlを追加。
“Right” FingersのAnimationにチェック。
Peace以外の全てに干渉対策を行います。
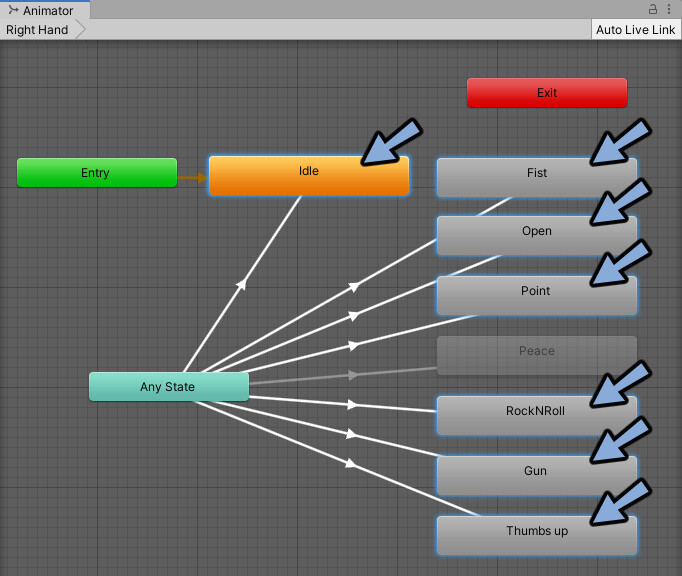
まず、Idleを選択。
InspectorよりVRCAnimatorTrakingControlを追加。
“Right” FingersのTrackingにチェック。

これをFist~Thumbs upまで行います。
これでPeaceのハンドサイン以外の時はIndexコンのトラッキングが有効。
Peaceの入力の時だけ既存のピースサインのアニメーションが再生されるようになりました。
ハンドサイン処理の流れはこちらをご覧ください。
(ハンドサインの入力処理についてからスタート)
VRChatにアップロード。
これで手をピースの形にした際に正しいピースになります。
※親指をタッチセンサーに置くことを忘れないでください。
VRChat上でのGesturesの挙動
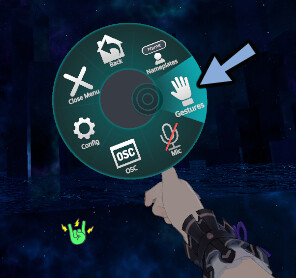
パイメニューを開きます。
Optionsを選択。

Gesturesを押します。
するとハンドサイン入力が無効になります。
ピースサイン中にGesturesを無効化。
するとピースサインのままになります。
※ハンドサインが無効化され処理が上書きされないからです。
ピースサインをしていない時にGesturesを無効化。
するとピースサインができなくなります。
以上がVRChat上でのGesturesの挙動です。
まとめ
今回はGesture Layerを使ったピースサインの設定方法を紹介しました。
ハンドサインを使って表情を変える方法はこちらで解説。
ぜひこちらもご覧ください。
コメント