はじめに
今回はKritaという無料ペイントソフトの基本的な使い方を紹介。
ファイルの作成、保存、ブラシ描画とその為に必要なパネル設定について解説します。
Kritaの導入
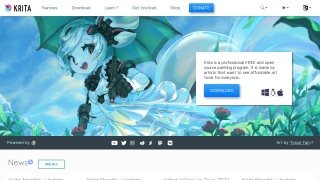
こちらの公式WEBサイトより最新版をダウンロード。
Setupの.exeファイルを実行してインストールします。
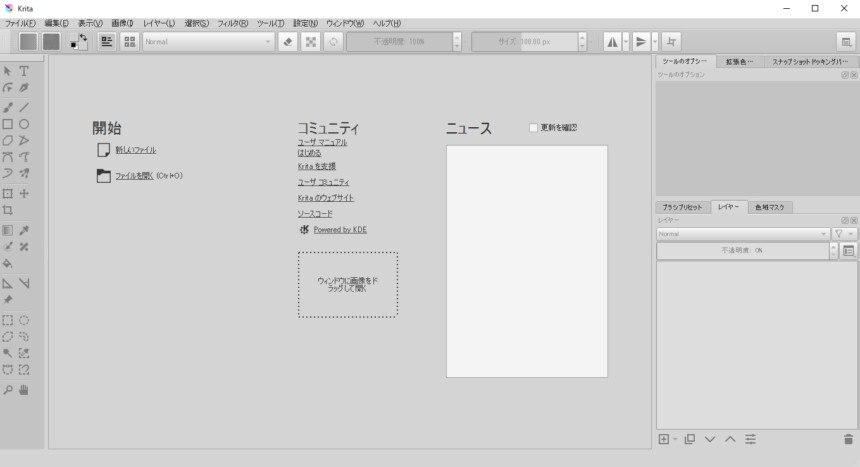
Kritaを起動してこのような立ち上げ画面が出てきたら導入が完了です。
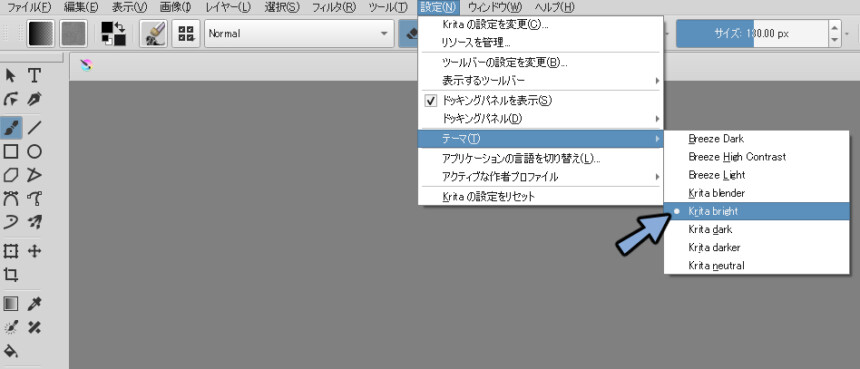
UIの色変更
設定→テーマより好きな色を選ぶことで色を変更できます。
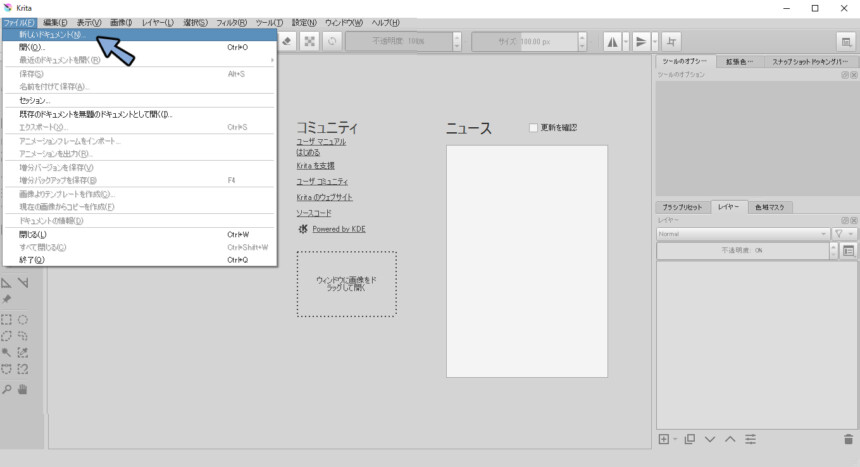
ファイル作成
ファイル→新しいドキュメントより新規画像を作成します。
画像の幅と高さと解像度を指定して”作成ボタンを押します”
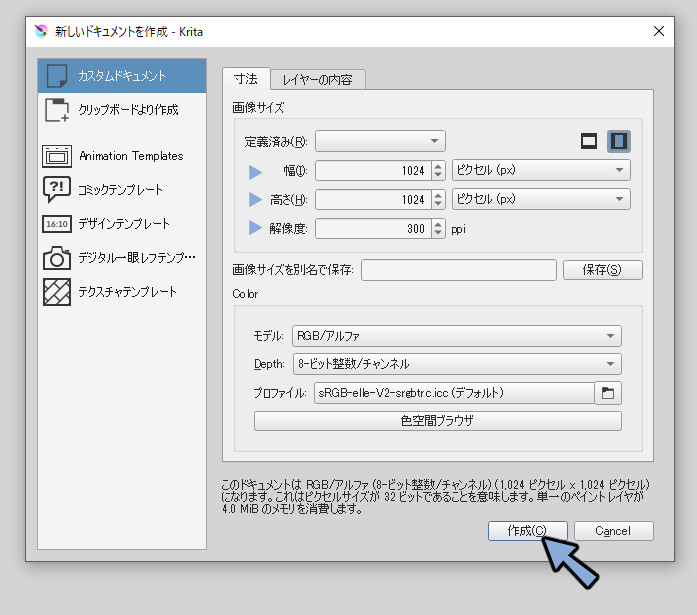
これでファイルの作成が完了です。

保存
ファイル→名前をつけて保存より保存できます。

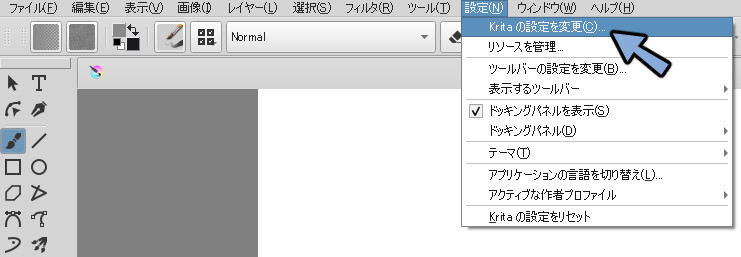
またKritaには自動でバージョンを管理する機能があります。
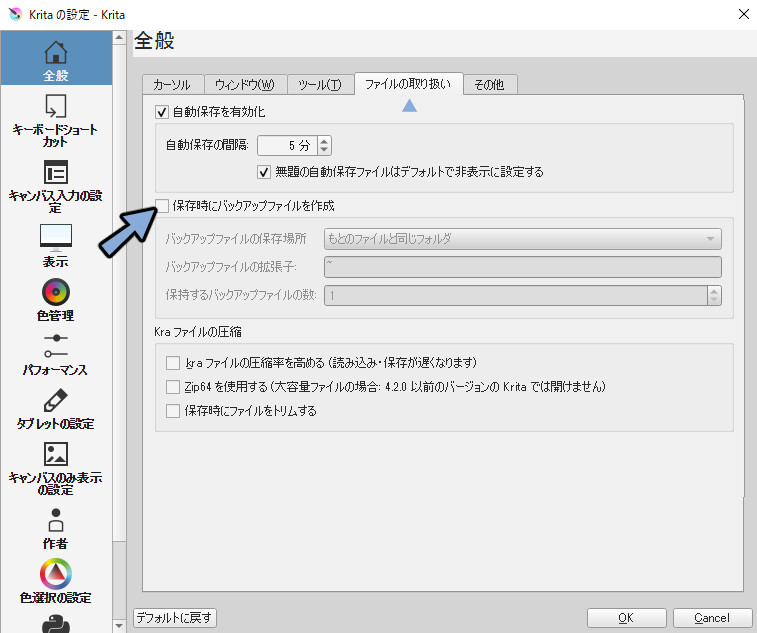
謎のファイルが大量にできあがるのでOFFにします。
設定→Kritaの設定を変更。
全般→ファイルの取り扱い→保存時にバックアップファイルの作成のチェックを外してください。
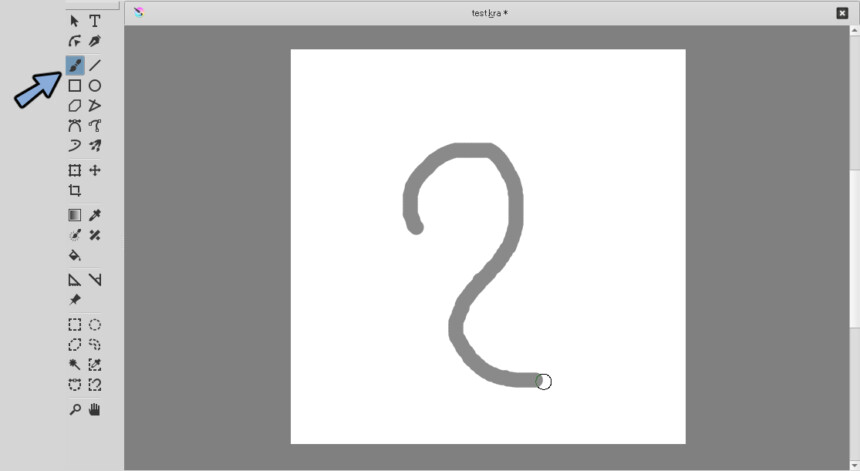
ブラシ描画
ブラシツールを選択してクリックすると描画できます。
マウスを右クリックするとブラシが大量に入ったツールが出てきます。
ここでブラシや色を切り替える事ができます。
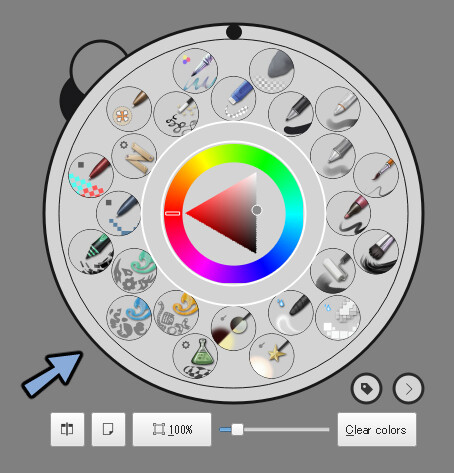
右下の”>”ボタンを押すとブラシの細かい設定を調節できます。

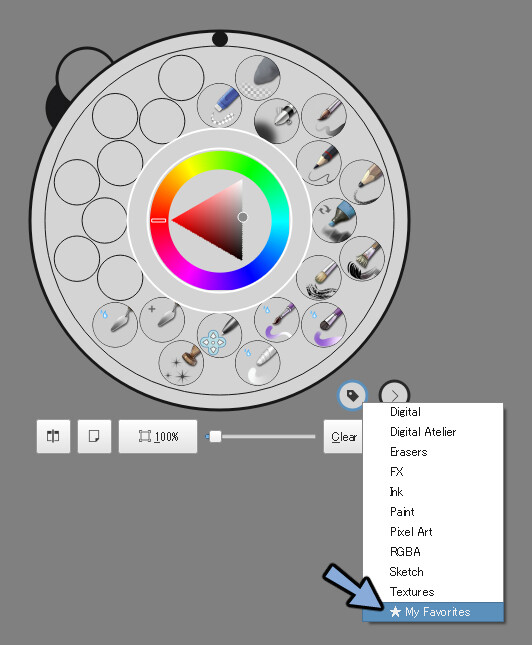
タグボタンでブラシの種類を変更できます。
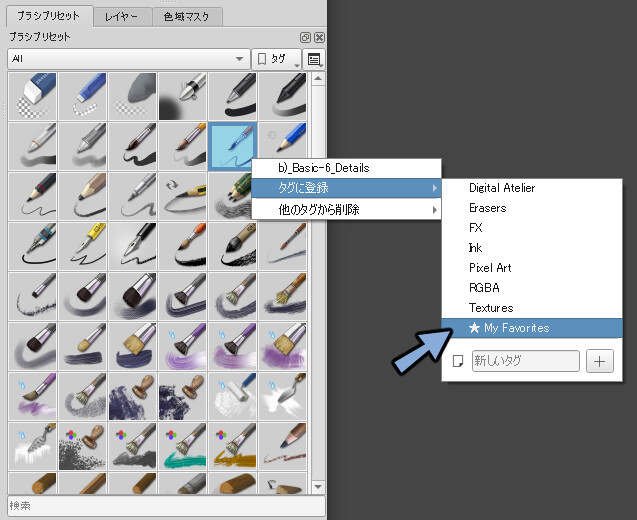
ここには自分でブラシを登録する事も可能です。
ブラシプリセットから気に入ったブラシを右クリックしてタグに登録を選ぶと登録できます。
また、ブラシサイズはShift+クリック+マウスを左右に移動でも調節可能です。
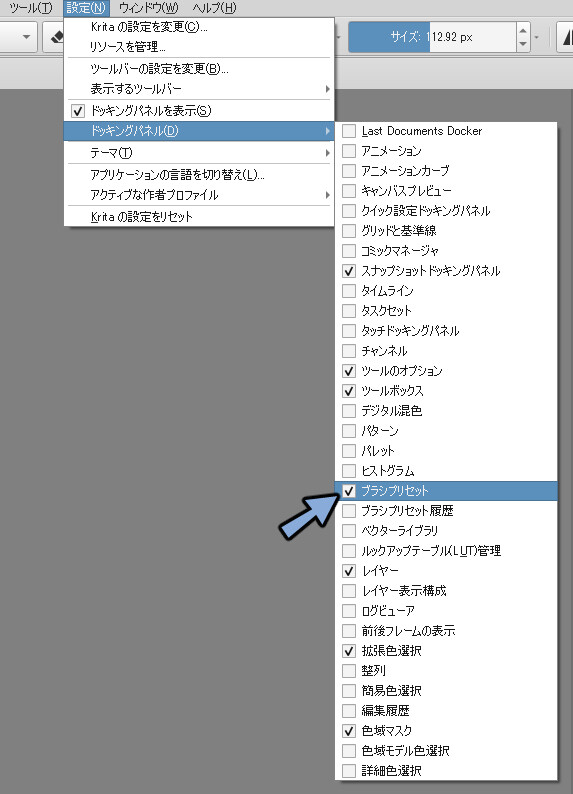
パネルUIの表示/非表示
レイヤーやブラシプリセットなどのウインドウの事をKritaではドッキングパネルと呼びます。
必要なパネルが無い場合は、設定→ドッキングパネルより表示させてください。
消しゴムについて
Eキーで消しゴムマークがオンになります。
これで描画を削除できるようになります。
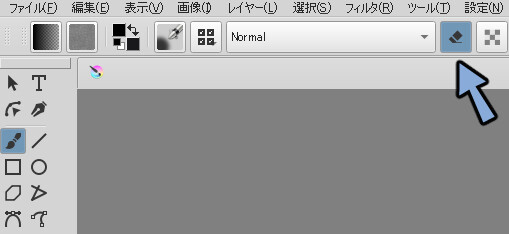
Kritaの消しゴムはブラシの描画色を透明に変えてます。
なので使ってるブラシによって形が変わるので注意してください。
まとめ
Kritaの基本操作について解説しました。
癖が強いツールですが使いこなすと超強力な描画ツールになるので皆様もぜひ導入してください。

コメント