
はじめに
今回は読み込んだモデルのInspectorを設定する方法を紹介。
既存の幽狐さんのモデルをお手本にしながらInspectorを設定します。
前回の記事はこちらをご覧ください。
Inspector設定
設定したいモデルをProjectのAssetsの所でクリック。
するとInspectorの設定が出てきます。
Model
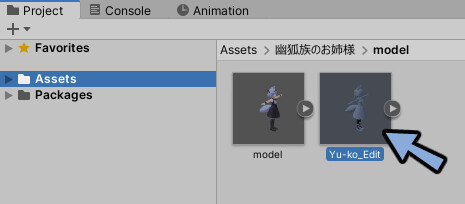
InspectorのModelを選択。
下記のように設定しApplyを押します。
・Inport Camerasのチェックを外します。
・Import Lightsのチェックを外します。
・Read/Write Enabledにチェックを入れます。
・Blend Shape NormalsをNoneに変更。
これでModelの設定が完了です。
Animation
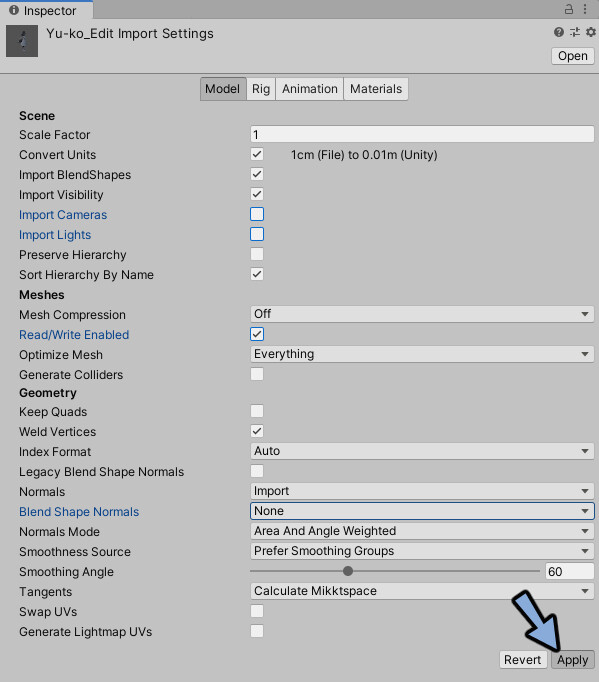
InspectorのAnimationを選択。
設定したアニメーションが無い場合はImport Animationのチェックを外します。
Applyを押します。
これでAnimationの設定が完了です。
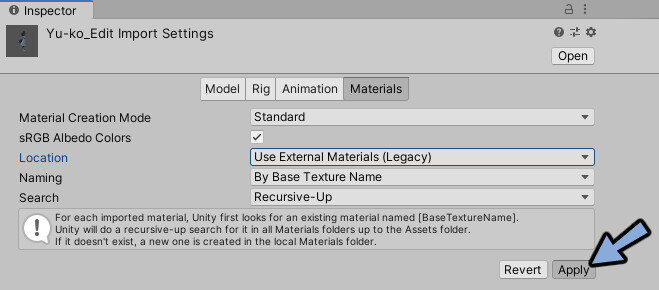
Materials
InspectorのMaterialsを選択。
LocationをUse External Materials(Legacy)に変更。
Applyを押します。
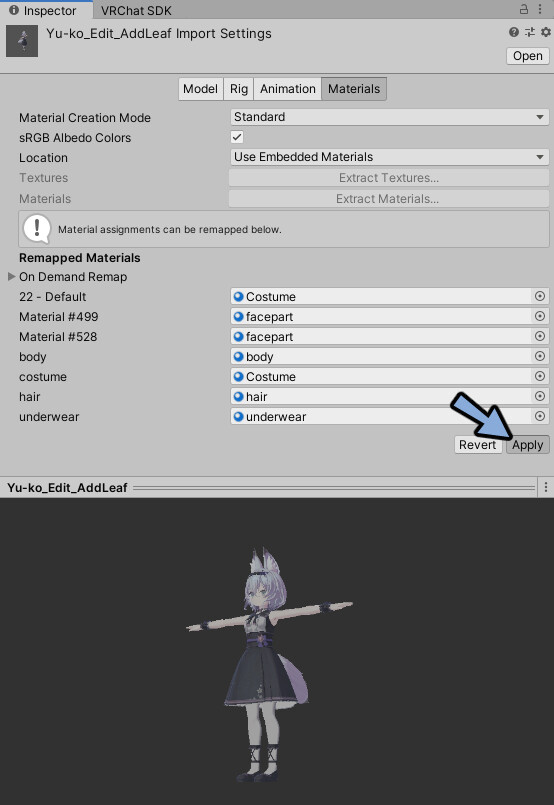
またはLocationをUse External Materialsに変更。
マテリアルを下記のように割り当て。
Applyを押してください。
(記事の更新1か月後ぐらいに発見しました。こっちの方が良いです。)
これでMaterialsの設定が完了です。
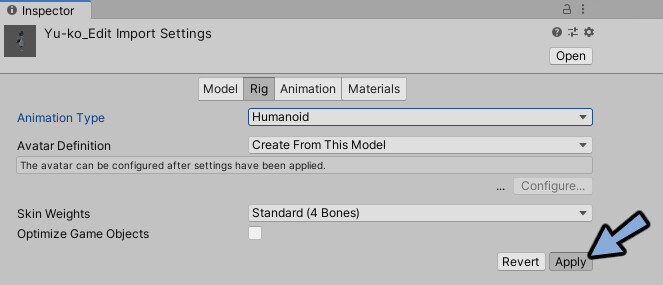
Rig
InspectorのRigを選択。
AnimationTypeをHumanoidに変更。
Applyを押します。
Configure…を押します。
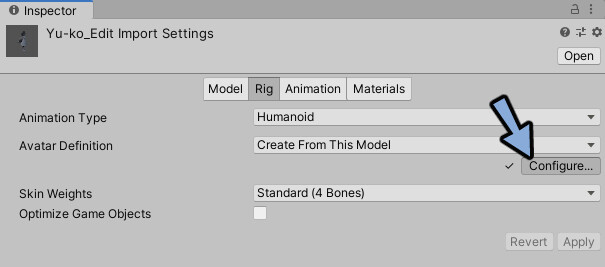
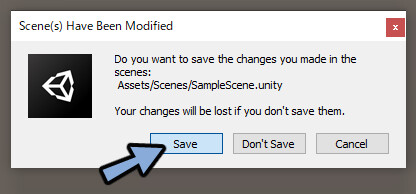
シーンが変更されたが保存されてませんという注意書きが出ます。
Saveを押します。
これで人型の動きとボーンが連動するようになります。
右側の人型を見ながらボーンが正しい位置に入っているかを確認します。
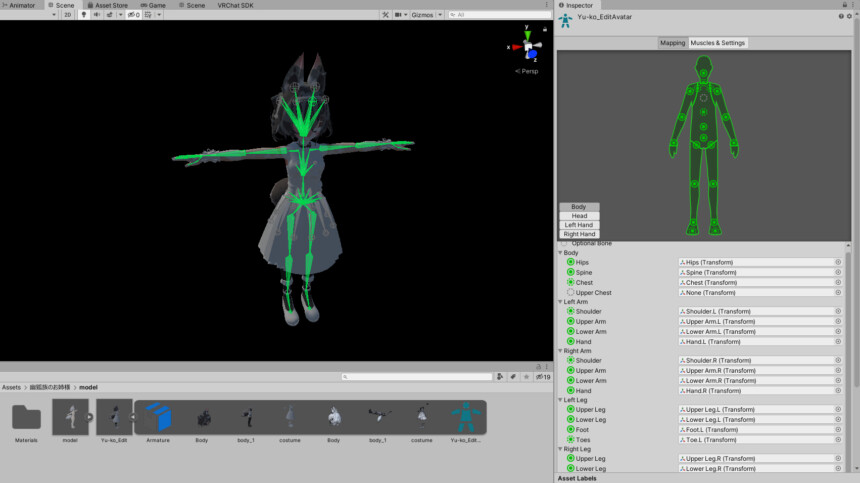
Inspectorでボーンを選択。
Sceneでボーンを動かすとボーンの位置を確認できます。
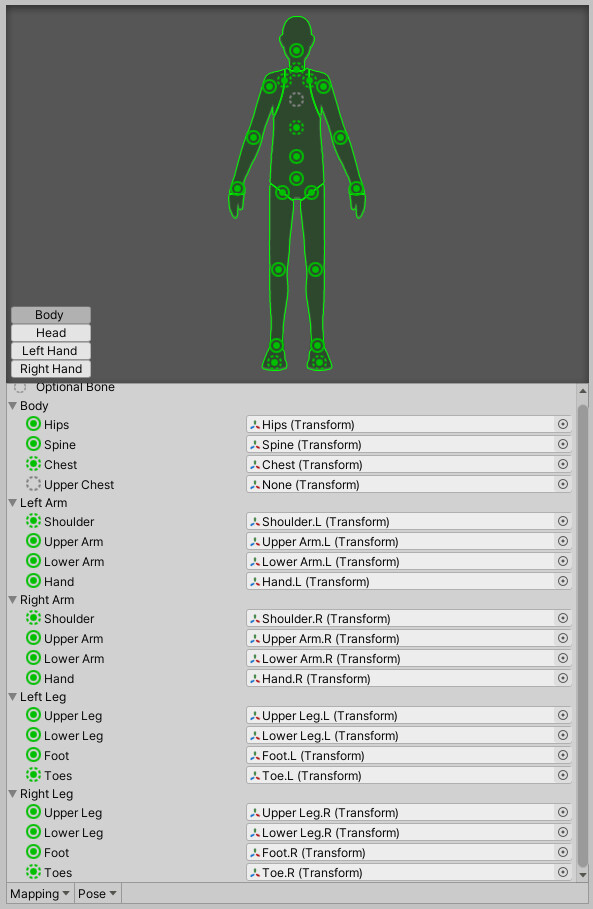
Bodyを選択。
Upper Chestは幽狐さんの場合は入って無いようです。
それ以外で幽狐さんの場合は目立った破綻は起こりません。
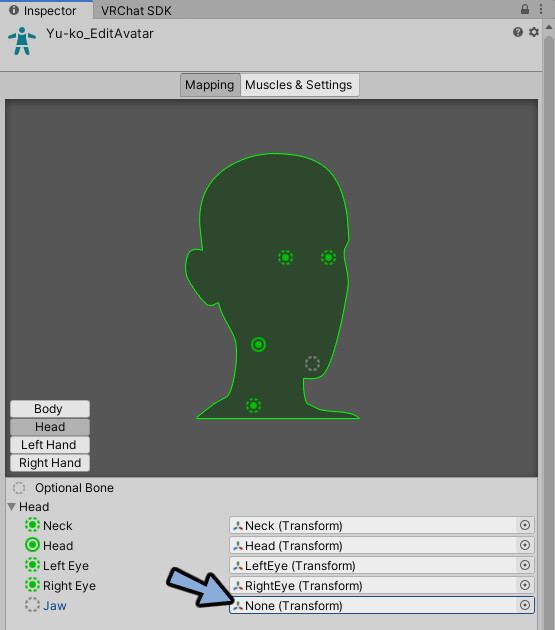
Headを選択。
意図しない謎のボーンが入って無いかを確認。
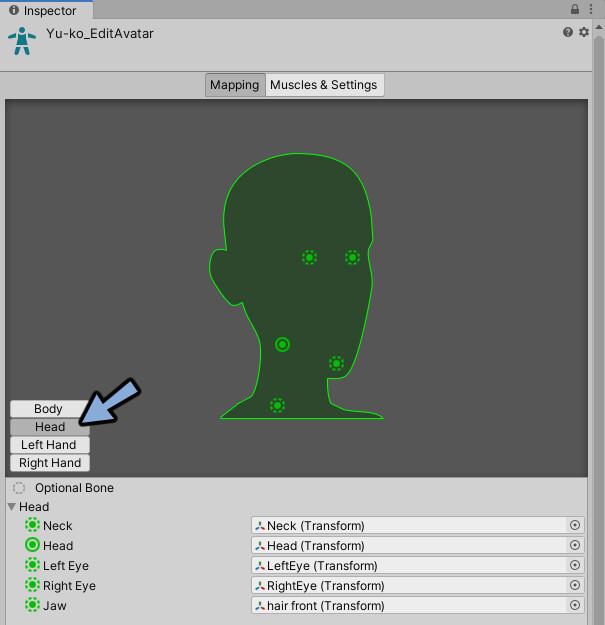
JawにHairのボーンが入っていたのでNoneに変更。
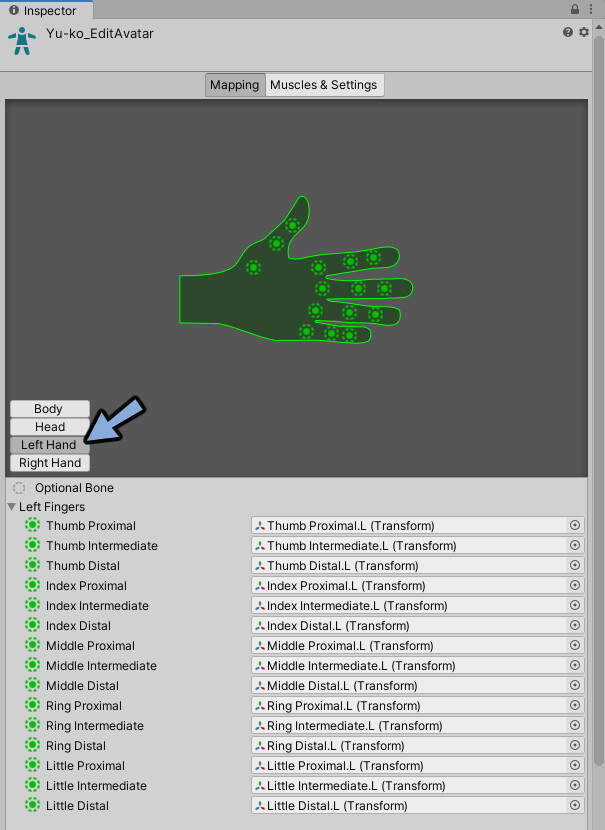
Left Handを選択。
同様に確認。
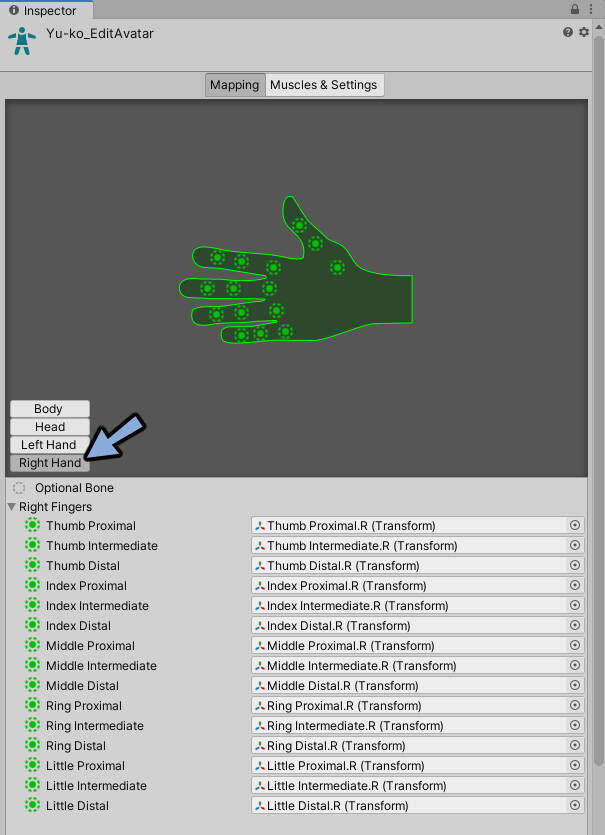
Right Handを選択。
同様に確認。
Muscles & Settingsは特に触りません。
もし触ったかは下記のように設定して元に戻してください。
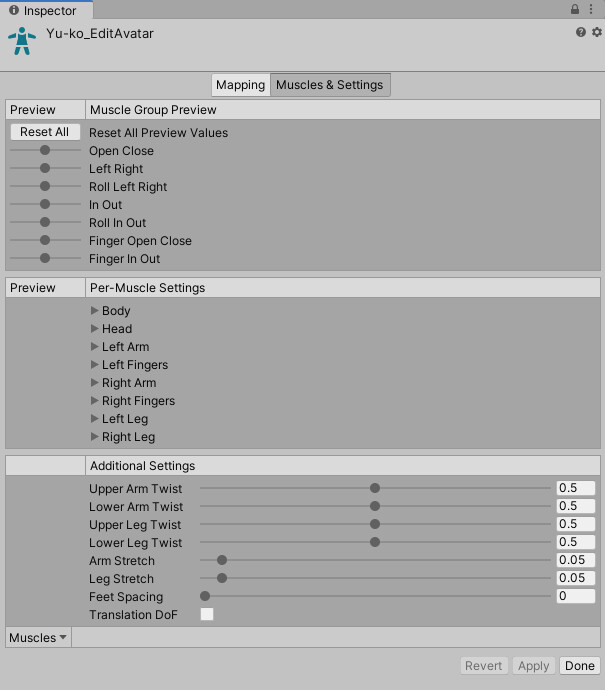
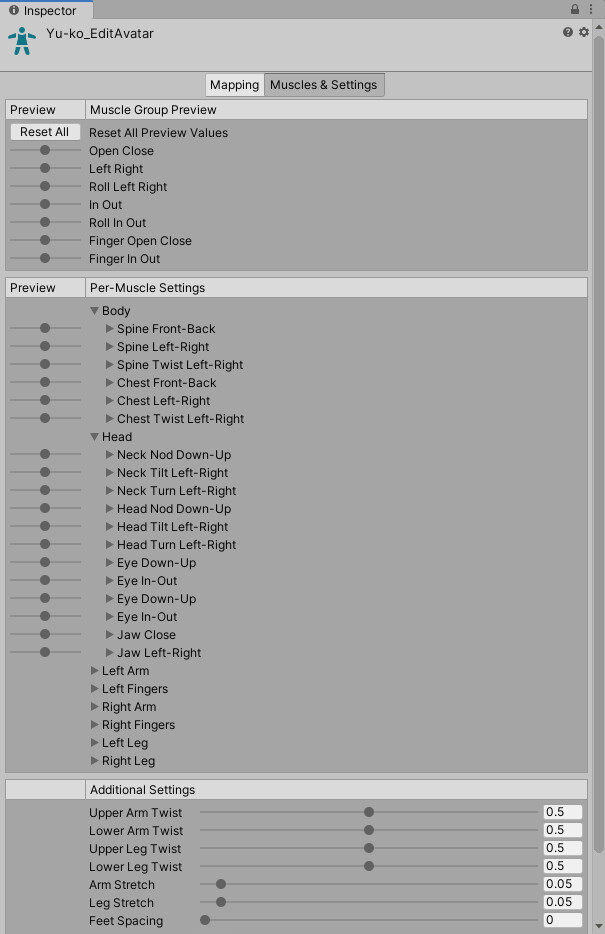
Per-Muscles Settingsの中身は下図の通り。
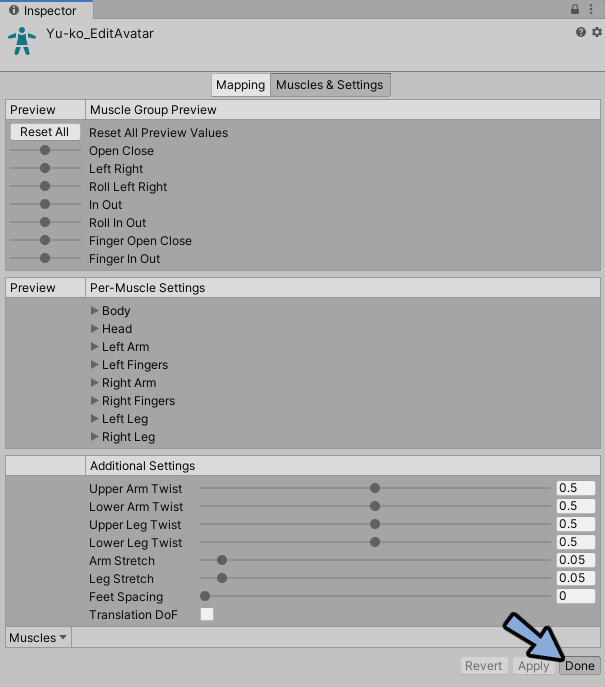
設定出来たらDoneを押します。(Mapping側でDoneを押しても大丈夫です。)
これでInspectorの設定が完了です。
まとめ
今回はUnityに読み込んだモデルのInspector設定を紹介しました。
次回はモデルの動きをVRChatで使うためのアニメーションを設定する方法を解説します。
こちらもご覧ください。
舌出し改変の全体像はこちらでまとめてます。
コメント