はじめに
今回はVRMとは何かという説明からVRChatアバターのVRM形式への変換方法までを紹介します。
VRM0変換して作ります。
※この記事は、2021年11月に作成したものを、2023年3月にアップデートしててます。
VRMとは何か
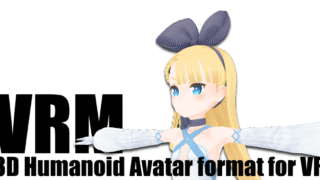
VRMとはVRアプリ向けに3Dの人型アバターを扱うためのファイルフォーマット。
誰でも自由に利用可能。
このVRMを使う事でVRM対応してるアプリやゲームに自分のアバター表示させることができます。
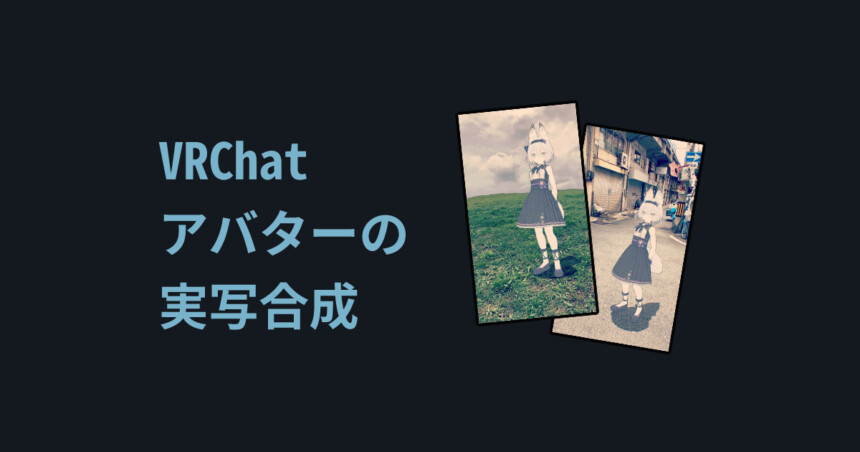
代表的なものではVismuthという実写合成のアプリなどで使います。
VRM0とVRM1の違い
VRM1が高性能です。
揺れ物ボーン関係の修正が入ったようです。
が、現状(2023/03/08)はVRM0形式じゃないと動かないソフトが多数あります。
この対応の問題でVRM0を使う事をおすすめします。
↓↓詳細や公式のアップデート方法の解説↓↓
今回は、VRM 0を使っていきます。
もし、VRM1を使ってみたい方はこちらのモデルなどをDL。
使いたいソフトで動くか確認してください。
VRM作成の事前準備
VRMを作るには5つの物が必要になります。
- Unity
- Humanoidボーン入り3Dモデル(.fbx形式)
- MToonシェーダー
- UniVRM
- VRChatアバターを実装できる程度のUnityの知識
大まかな流れを紹介しますと、
Unity使ってモデルを読み込み→VRM対応のMToonシェーダーを割り当て → UniVRMでVRM化です。
今回はUnityとVRChat用の3Dアバターは持っていて導入できる前提で進めます。
VRChatアバターの導入法を知りたい方はこちらの動画を見て習得してください。
必要データの読み込み
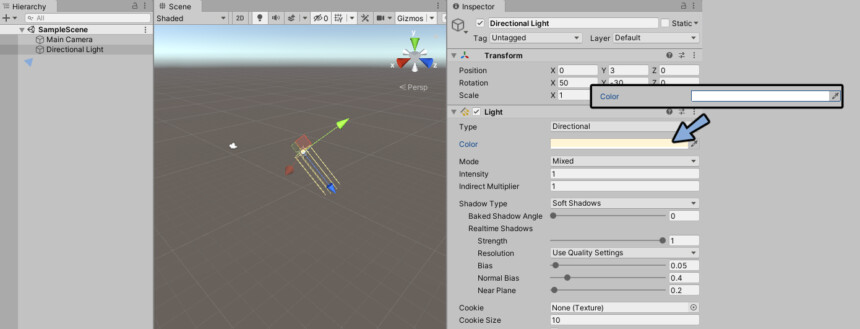
Unityを立ち上げ3DProjectを作成。
今回はUnity 2019.4.30f1を使います。
バージョンはこちらのUniVRMのページを見て対応してるものに合わせてください。

Directional Lightの色を白くします。
次に任意の3DモデルのデータをUnityに読み込みます。
Hierarchyにモデルのデータをドラッグ&ドロップで読み込み表示させます。
prefabデータを読み込むとVRChat向けの設定が入るので.fbxのモデルのデータを読み込みます。
これで必要データの読み込みが完了です。
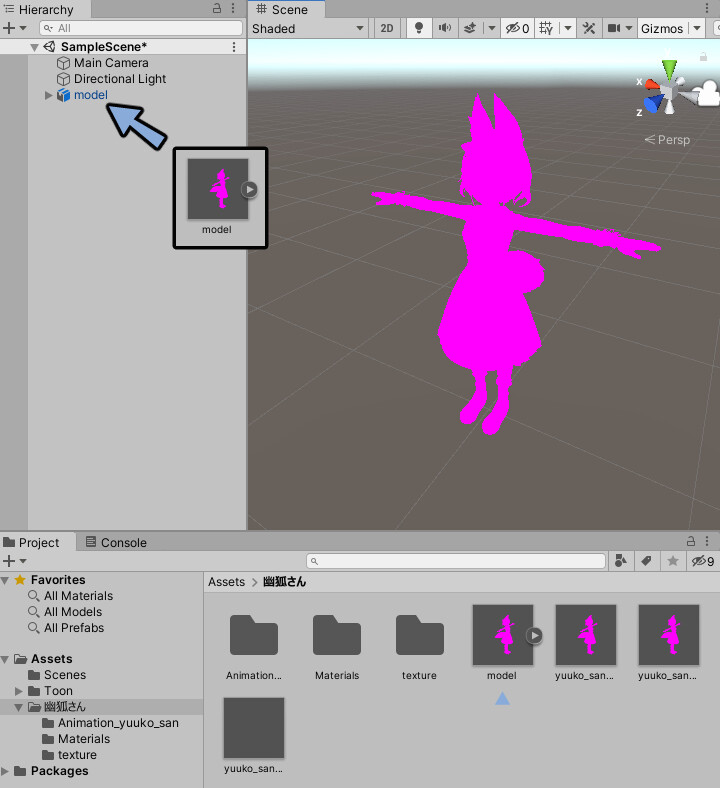
シェーダーを読み込んでおらずマテリアルが消えてます。
VRMにするには対応のシェーダーにする必要があります。
なので設定してもVRM非対応の物は使えないので気にせず進めます。
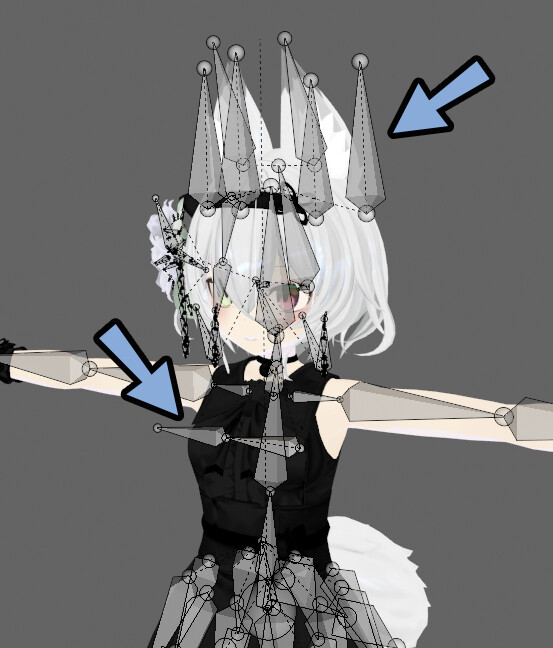
重要:ボーンの確認
念のため、読み込んだモデルのボーンが壊れて無いか、
Blenderなどに読み込んで確認してください。
このように壊れてると、データ的に問題がある作りになります。
一応、対処療法はあるので、記事ではこちらも紹介しますが…
理想は3Dモデルの修正です。
※私のモデルは色々改造した結果、ボーンの一部が壊れていました。
基本的に、Boothに売られてるモデルであれば。大丈夫と思います。
MToonシェーダーの導入
MToonのGitHubページに飛びます。
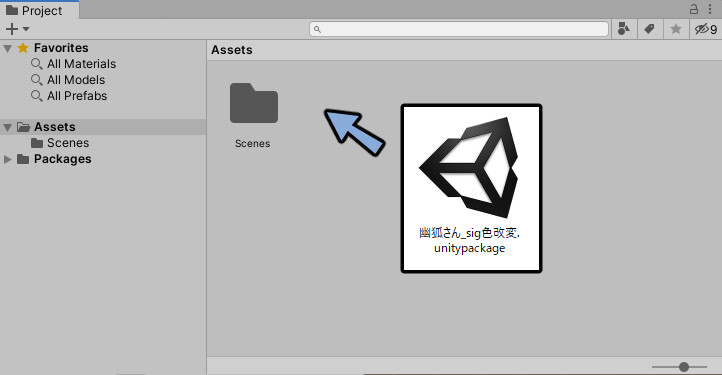
こちらよりDLして入手してください。
ライセンスはMITlicenseです。
Copyright (c) 2018 Masataka SUMI
Released under the MIT license
https://github.com/Santarh/MToon/blob/master/LICENSE
なのでこのテキストをReadMe等に入れれて配布すれば、改変、再配布、商用利用、有料販売が可能です。
DLして解凍。
MToonはUnityPackageが無いのでMToonというフォルダーをドラッグ&ドロップで読み込みます。
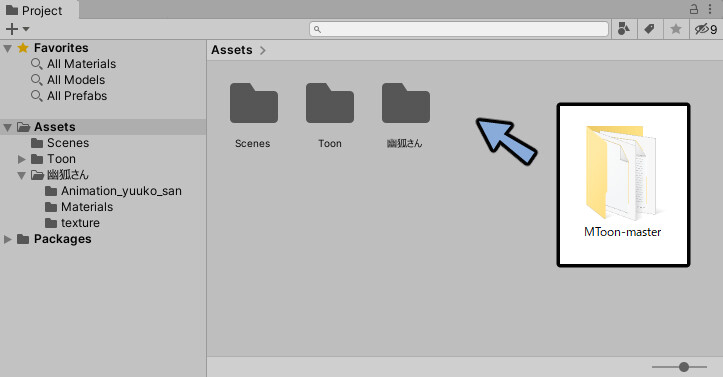
これでMToonの導入が完了です。
UniVRMの導入
UniVRMのGitHubページに飛びます。
トップページを見てUnityのバージョンと導入方法を確認します。
この記事を執筆した時点ではUnityはUnity-2019.4.LTS or later対応
First→Secondのパッケージを順に読み込んでくださいと書かれてました。
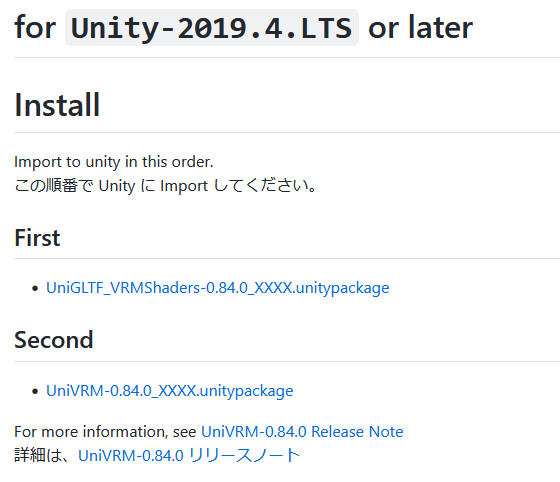
これの通りのUnityのバージョンを使い、パッケージ2つ読み込みます。
UniGLTF_VRMShadersをUnityに読み込みます。
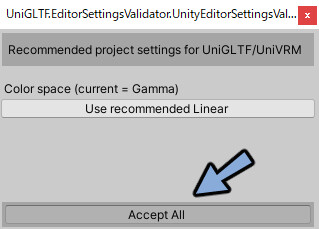
オススメのプロジェクト設定に合わせますか?という表示が出ます。
Accept Allを押して オススメの設定に合わせます。
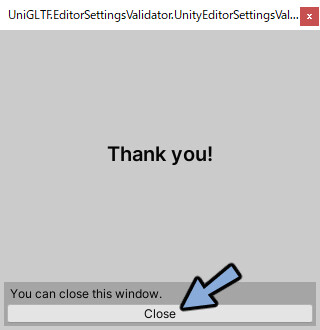
Thank You!という表示がでたらCloseで閉じます。
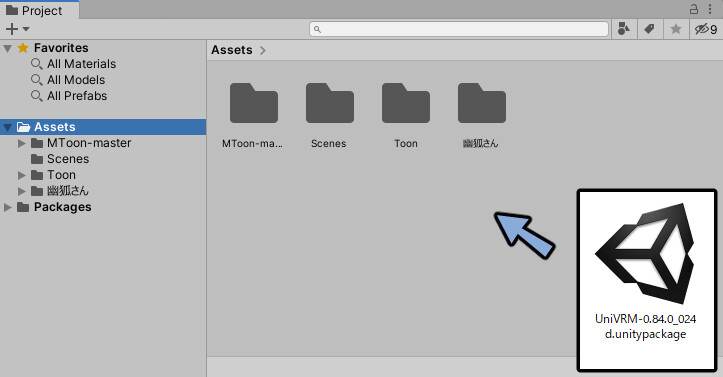
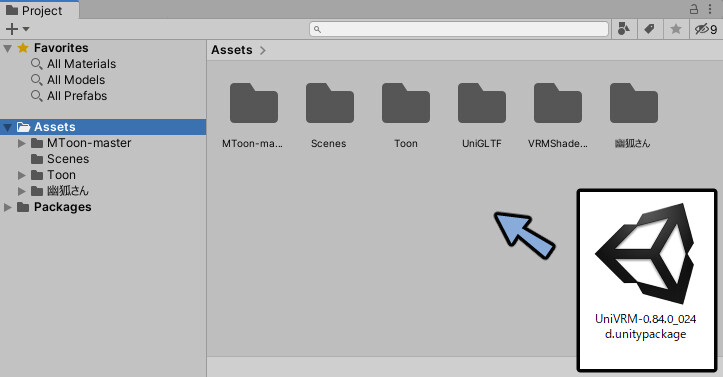
UniVRM-0.84.0_024dを読み込みます。
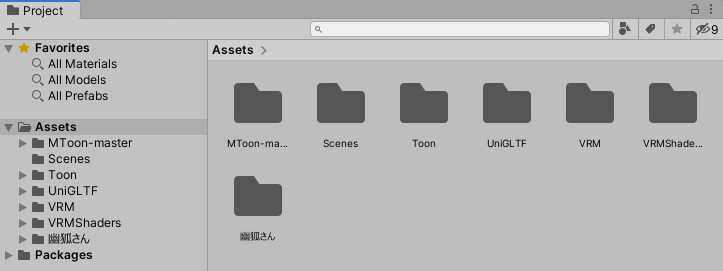
これでUniVRMの導入が完了です。
シェーダーの設定
2023年3月追記
この記事は2021年11月頃書きました。(この頃はUTS2.0が覇権シェーダーでした)
色々あって、2023年では覇権シェーダーlilToonになりました。
こちらは、VRM向けの変換ボタンがあります。
便利なのでこちらをご活用ください。
ちなみにUTS2.0はこちらの方法でlilToon化できます。
元の記事(過去のやり方)
シェーダーが違うので関係上完璧な見た目の再現は出来ません。
なのでなるべく近い見た目を作っていく作業になります。
ProjectのAssetsの所で右クリックしてCreateからMaterialを選択し作成。

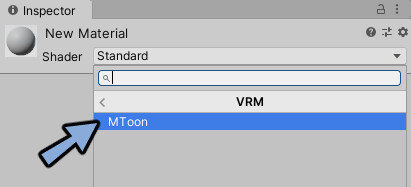
InspectorのshaderのStandardをクリックしVRMを選択。
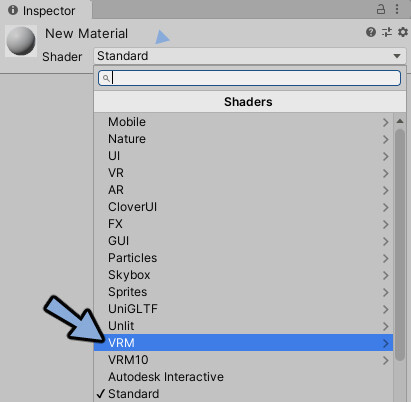
MToonを選択。
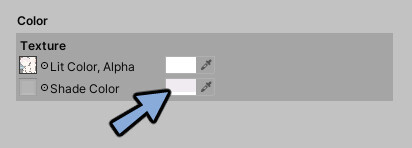
LitColor,Alphaに色のテクスチャを割り当てます。

ShadeColorに影の色を設定。
NomalMapやEmissionなどがある場合はそのテクスチャを読み込んでください。
※このシェーダーは粗さや金属光沢の設定には非対応です。
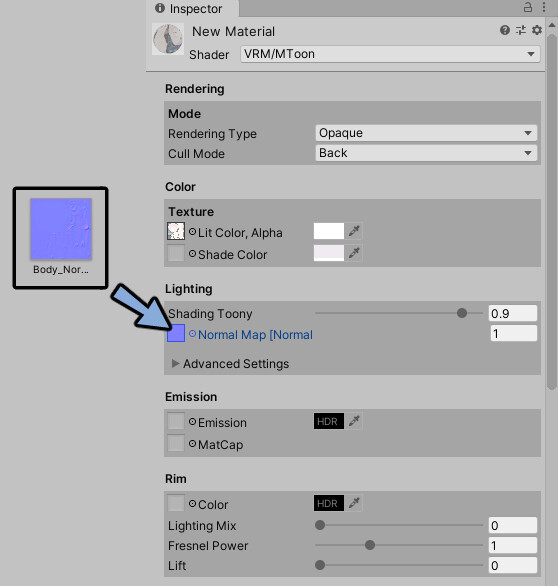
Lightingで影の入り方を調整。

Outlineで輪郭線のを作成し見え方を調整。

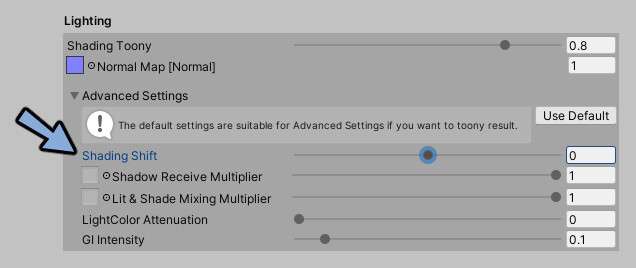
顔に強い影ができる場合はAdvanced Settingsの中のShading Shiftを使って陰影境界をずらします。
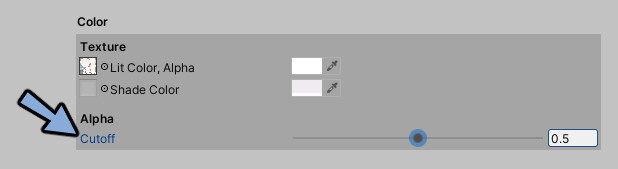
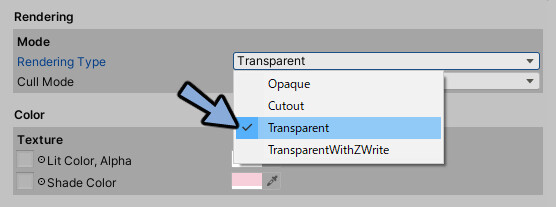
透過の入ったテクスチャ素材を使ってる場合はRendering TypeをCutoutに切り替え、
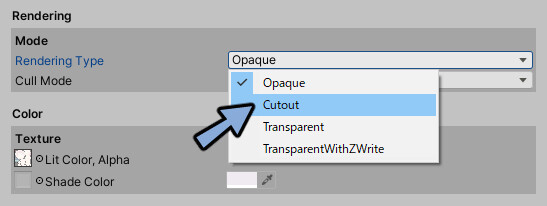
画像を透過情報の入ったpngに差し替え、AlphaのCutoffの数値を調整して透過の閾値を調整してください。
半透明を表現したい場合はTransparentを選択してください。
もっと詳しく設定したい方はこちらのスライドなどの参考資料を見ながら設定してください。
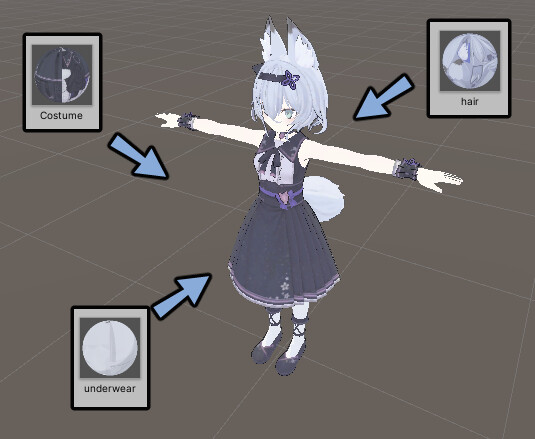
こうして設定したマテリアルをモデルにドラッグ&ドロップで割り当てます。

パーツが分かれてる場合は残りの髪の毛や服のパーツ分のマテリアルも作成します。
同様にパラメータを設定しモデルに割当てます。
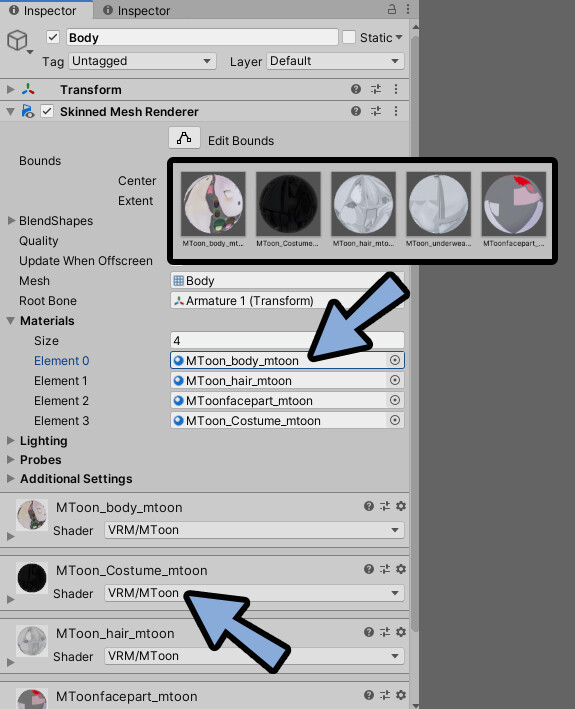
割り当てにくい場合、Hierarchyでメッシュを選択。
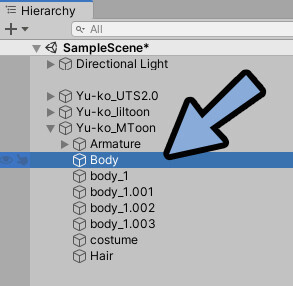
Materialsから割り当てます。
下の所で割り当てられたか確認できます。
良いと思う見え方になりましたらMToonの設定は完了です。
VRMデータの書き出し
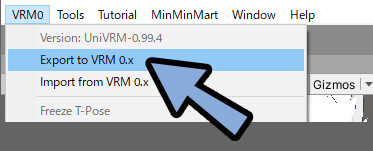
ヒエラルキーからモデルを選択してVRM0を選択してExport UniVRを選択。

※最新版では Export to VRM 0.xに表記が変わりました。
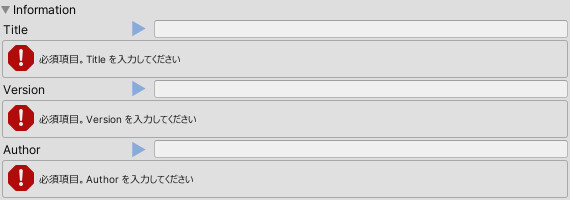
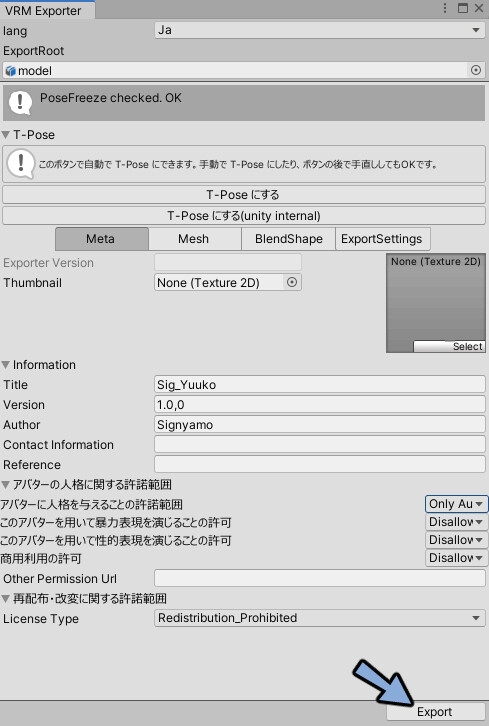
そして絶対に必要な下記の3つの情報を打ち込みます。
- Title にモデル名
- Version にモデルのバージョン
- Author に制作者名
あとは連絡先や親作品がある場合のURLや許諾範囲を決めます。
特にこだわりが無い場合は残りの2つは空白。
許諾範囲は一番上がOnly Author、残りはすべてDisallowで大丈夫です。
エラーをつぶしてエクスポートを押します。
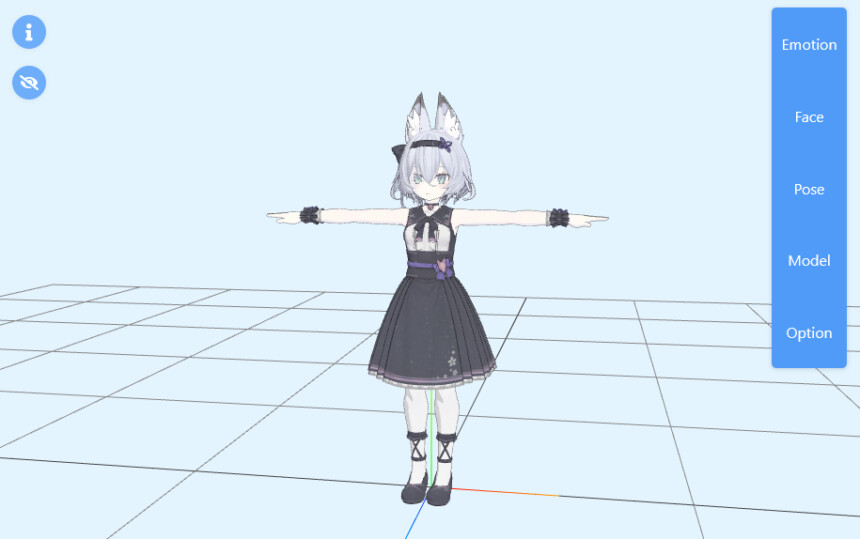
VRM Viewerなどを使い正しく表示されてるかを確認すればVRMデータの書き出しが完了です。
実写合成だけであれば、これで十分です。
VRMの表現を作り込む
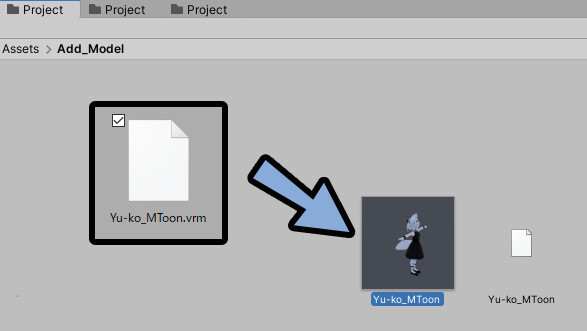
先ほど書き出したVRMを、UnityのProjectに読み込み。
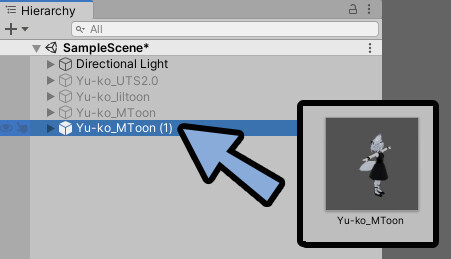
読み込んだVRMモデルをHierarchyにドラッグ&ドロップ。
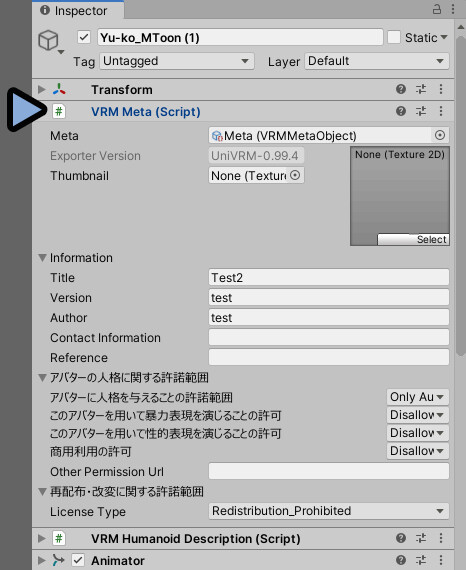
Inspectorを確認。
すると… 設定項目が増えてます。
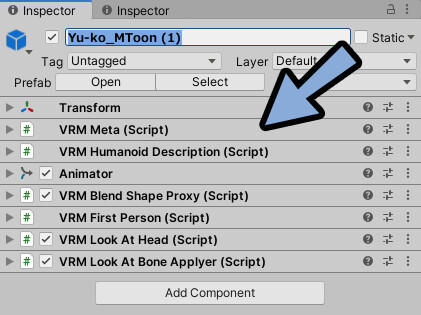
このあたりを設定して、機能を増やしていきます。
サンプルモデルの導入(任意)
このあたりから設定が複雑です。
そこで、見本になるお手本があると便利です。
こちらのモデルをDL。
Unityに読み込み。
横に並べて気になったInspectorがあれば、確認して進めてください。
Lock機能を使えば、表示を固定できます。
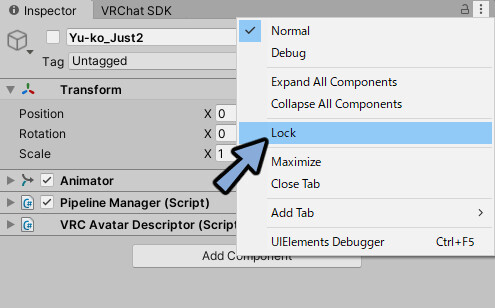
ちなみに、私のUnityにInspectorやProjectが何個もあるのはこのような使い方をしてるからです。
以上が、サンプルモデルの導入です。
顔の動作設定
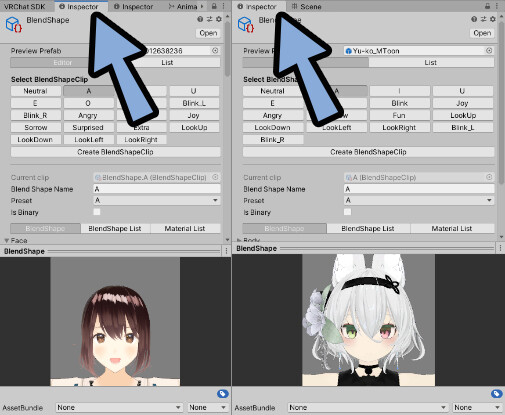
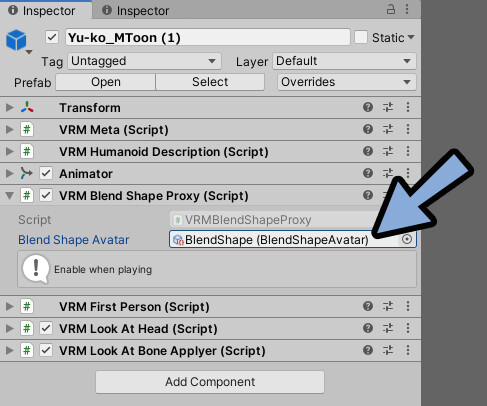
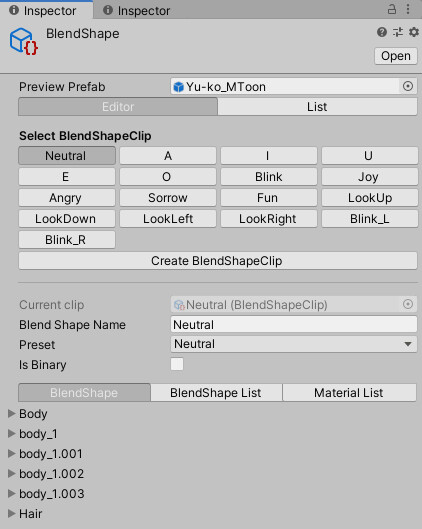
VRM Blend Shape Proxy(Script)のを開きます。
BlendShape (BlendShapeAvatar)をダブルクリック。
すると、表情を設定する画面が出てきます。
(BlendShapeのInspectorです)
一番下の2本線をクリック。
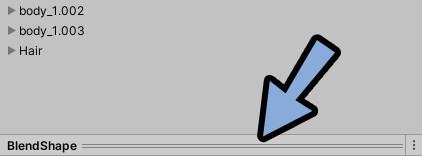
上にドラッグしてプレビューを表示。
Aをクリック。
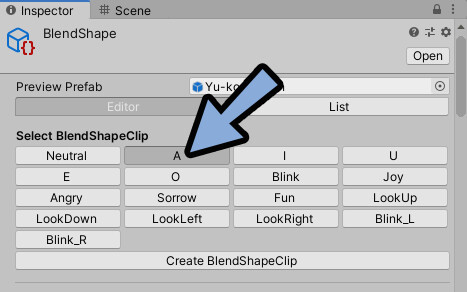
BodyやFaceなどの顔のシェイプキーがあるメッシュを開きます。
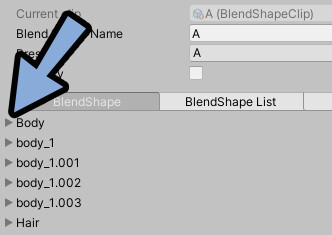
ここでAの口=「あ」を設定します。
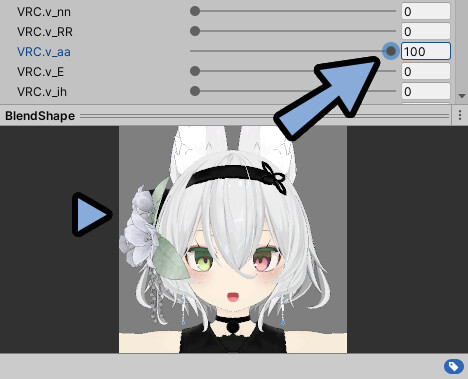
これを「A I U E O → あ い う え お」で設定します。
VRChatアバターの場合は下記のように対応。
・A = aa
・I = ih
・U = ou
・E = E
・O = oh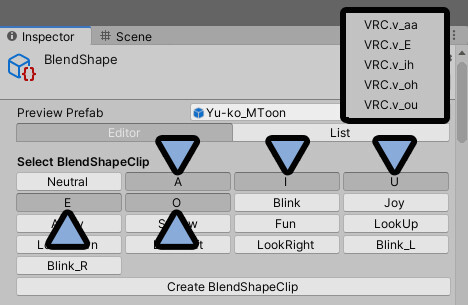
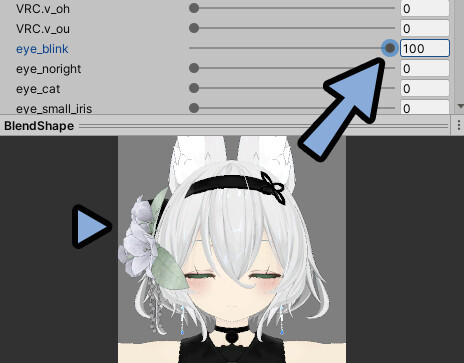
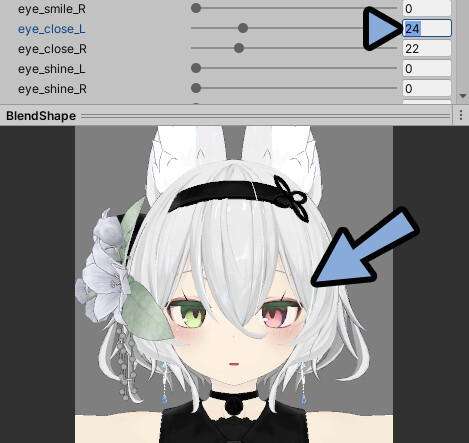
次はBlinkをクリック。

eye_blinkなどの、両目が閉じれるシェイプキーを100にします。
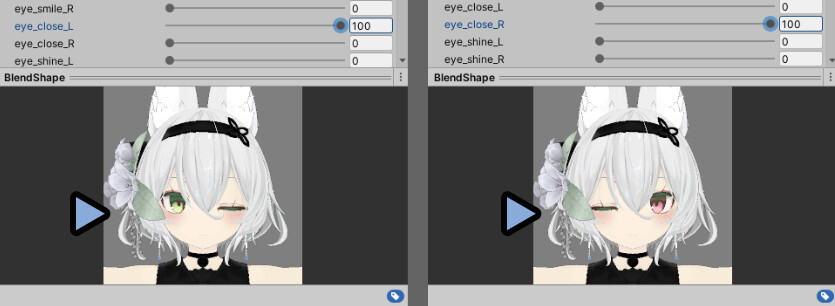
次に「Blink_R」と「Blink_L」を設定します。
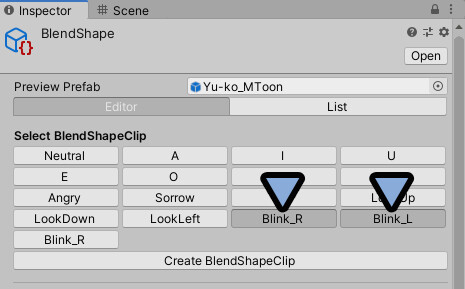
これは、片目を閉じた設定です。
L(左)とR(右)を設定。
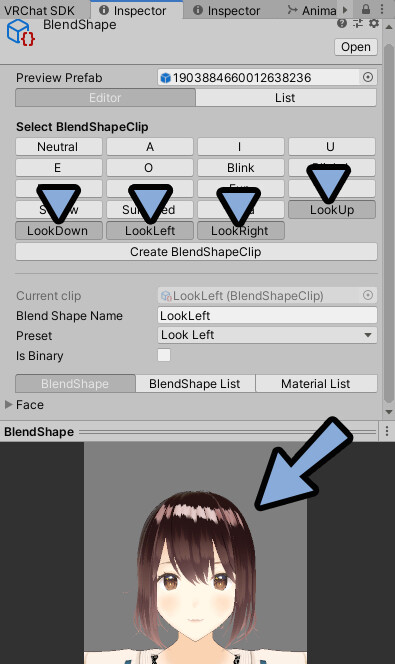
Look Down、Up、Left、Rightは何も設定しなくて大丈夫です。
サンプルモデルでは何も入ってませんでした。
次は、表情を設定していきます。
表情の作り方
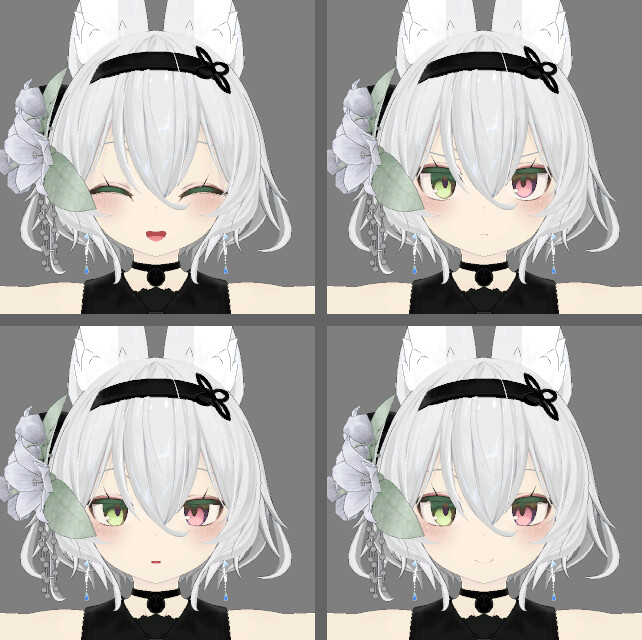
最低限必要な表情は下記の4つ。
・Joy → 喜び(Smile)
・Angry → 怒り
・sorrow → 悲しみ(Sad)
・Fun → ほほえみ
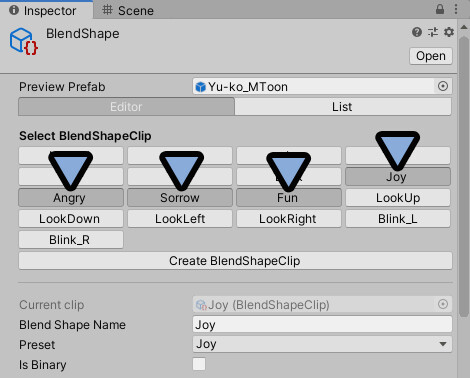
JoyとFunの違いは下記。
喜怒哀楽の「喜」と「楽」に対応してます。
綺麗に作るコツは左右を少しだけズラすことです。
人の本音は表情の左半分に出やすい。
これを意識して、表情を作ります。
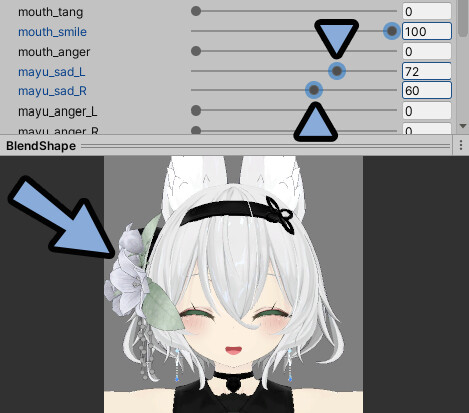
例えば、怒りの表情の場合。
・右半分は建前で抑えてる=変化を弱め。
・左半分は本音で怒ってる=変化を強める。
といった方法で表情を作ります。
筋肉の動きなどを詳しく知りたい方は専門書を買うのがおすすめ。
▼筋肉などの構造を学んだ本。
難易度は高いけどおすすめ。
つよつよ理論書。
▼絵が可愛い。昔、模写した。
ただいろんな作家の絵柄が混ざってる。
好き嫌いは出てくる。
他にも、表情、描き方などで検索。
そして、喜怒哀楽の4つの表情を完成させます。
これで、表情の作り方が完了です。
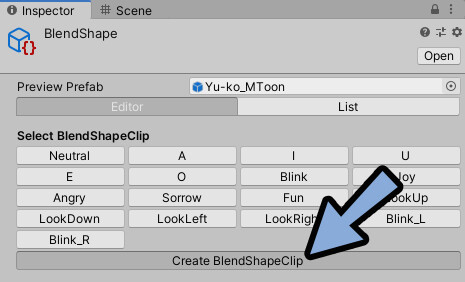
表情の追加+削除
表情は「Create BlendShapeClip」で追加できます。
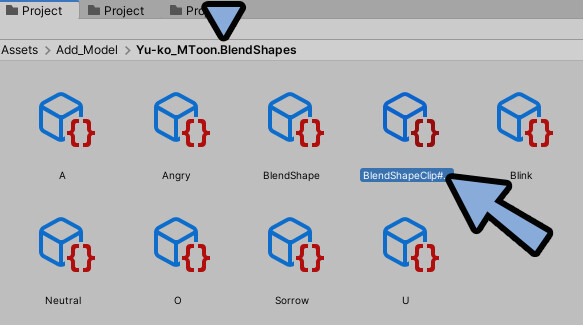
削除する場合は、Project → モデルのBlendShapesフォルダで消したい表情を選択。
Deleteキーで削除。
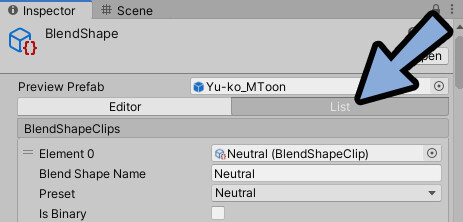
Blend ShapeのInspectorに戻ります。
Listをクリック。
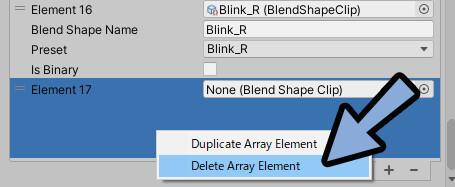
空白になったElementを右クリック。
Delete Array Elementで削除。
もし表情に不自然な影ができる場合はこちらで対処してください。
これで、表情の追加+削除が完了です。
その他のInspector設定
より細かい設定は公式ドキュメントを見てください。
・VRMMeta = モデルの情報調整
・VRM Humanoid Description = ヒューマノイドボーン関係
・VRMFirstPerson = VRで見た時の見え方
・VRM Look At Head = より細かい視線制御
・VRM Look At Bone Applyer = より細かい視線制御
基本、変えなくても大丈夫ですが…
挙動に違和感がある場合は調整をお試しください。
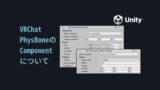
揺れ物ボーンの設定(SpringBone)
VRMの揺れ物ボーンは”SpringBone”です。
まず、Hierarchyで既存のVRChat用モデルから、どこに揺れ物ボーンを入れるか確認します。
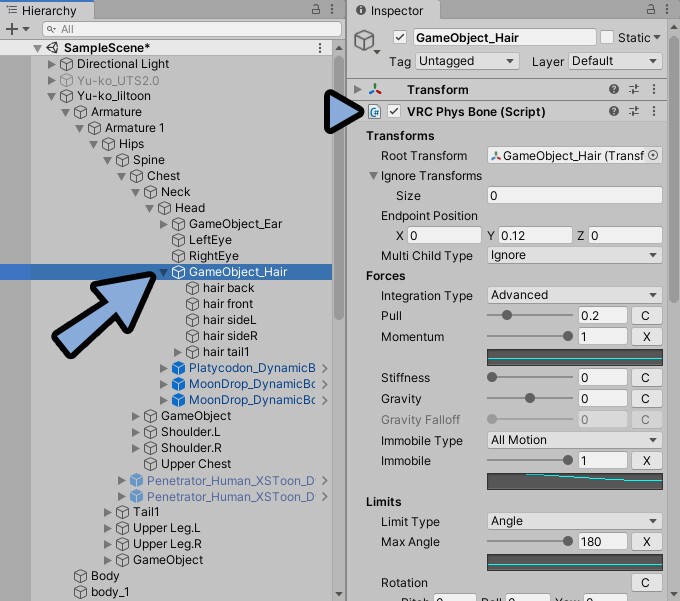
VRMモデルのボーンを開きます。
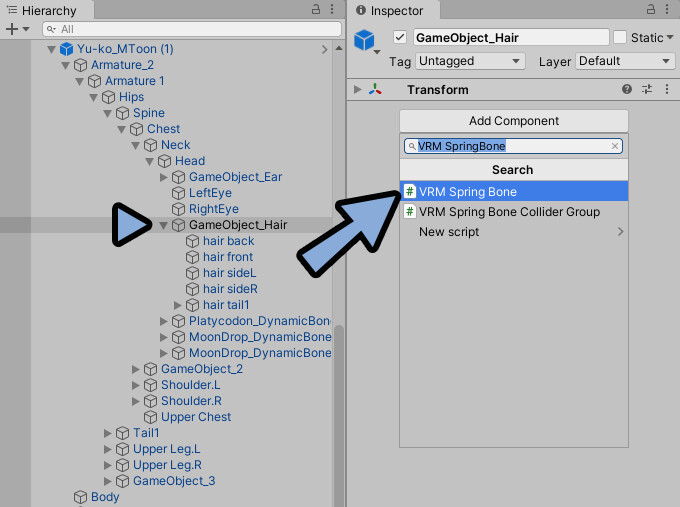
揺らしたいボーンをクリック。
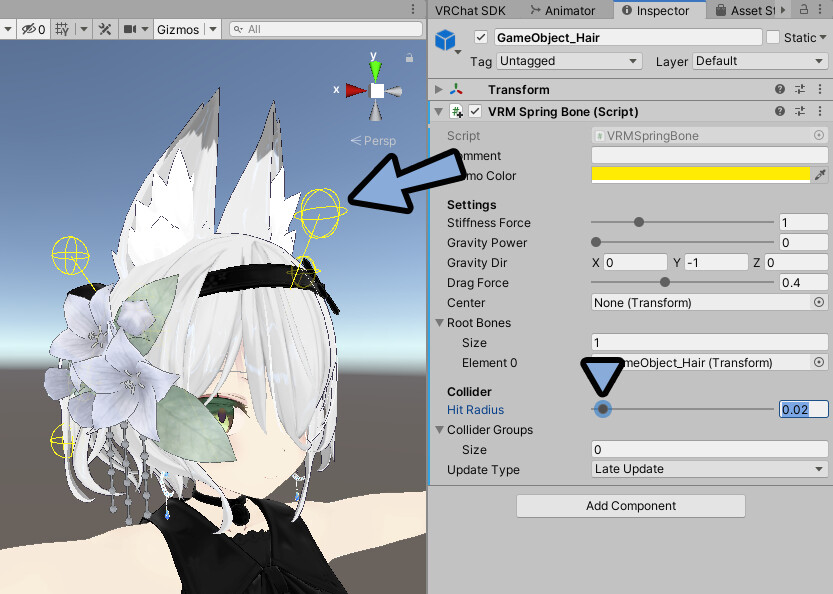
Inspector → Add Component → VRM Spring Boneを入力。
VRM Spring Boneをクリックして追加。
Root BonesのSizeを1に設定。
これは、揺れ物を割り当てる”親ボーン”の数です。
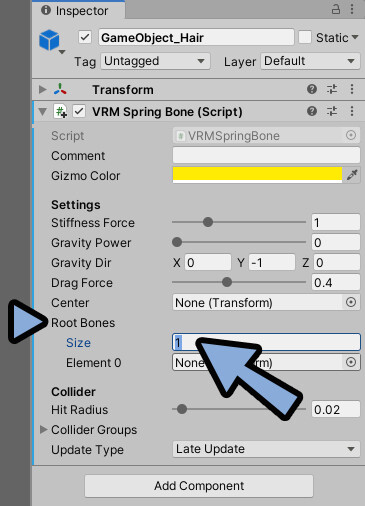
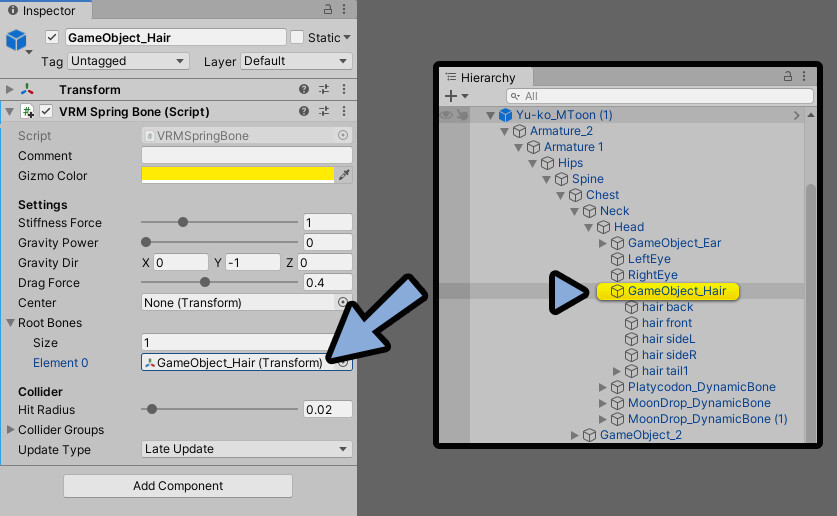
Element 0にHierarchyから揺らしたい一番上のボーン(親)をドラッグ&ドロップ。
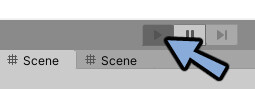
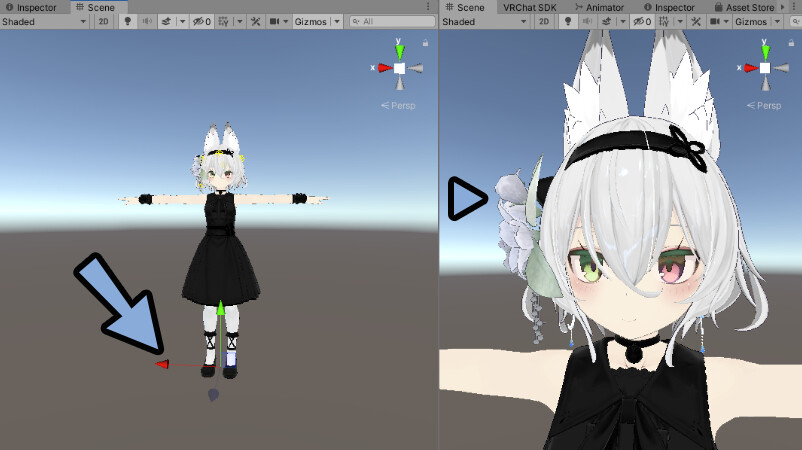
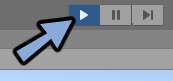
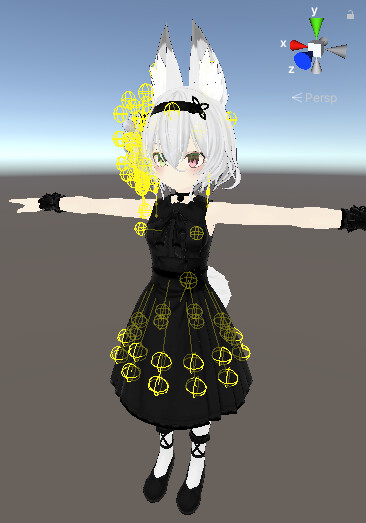
再生ボタンを押してPlayモード。
SceneでWキー
動かします。
すると揺れます。
顔などを確認しやすいようにSceneを分割。
左=操作用、右=顔の確認用。
このようにすると、確認しやすいです。
ただ、Unity上の動きとVRMを使うソフト上の動きが違うことがあります。
最後は使いたいソフトの挙動を確認してください。
再生ボタンを押してPlay状態を解除。
以上が、揺れ物ボーンの基礎設定です。
揺れ物ボーンの動き調整
もう一度、再生ボタンを押してPlayモード。
※Playモード中の編集は保存されず消えるので注意。
下記の4つを使って動きを調整します。
Stiffnes Force = 剛性(上げるとバネっぽい動きになる)
Gravity Power = 重力の強さ
Gravity Dir = 重力の方向
Drag Force = 抗力(入れると動きが滑らかになる)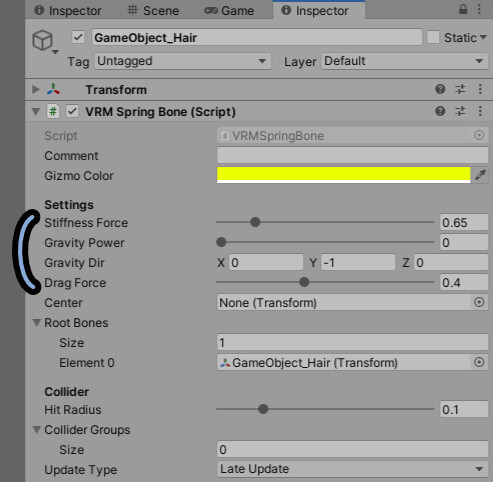
私はDrag Forceを1にしてから、
重力やバネっぽさを調節しました。
それ以外は、ほぼ飾りです。
・Center = ゲームオブジェクトを指定すると揺れの基準点を変えれる
・Collider関係 = 衝突判定を作る時に使う(あとで解説)
・Update Type = 基本Late Update。挙動が変な場合に変える。
        (公式で解説すら見つけられなかった謎パラメーター)
Unityで軽く動きを確認。
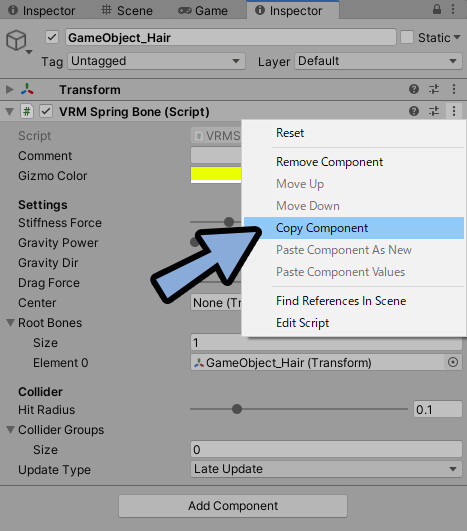
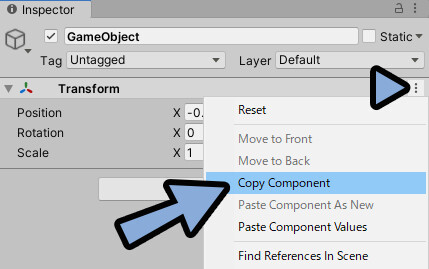
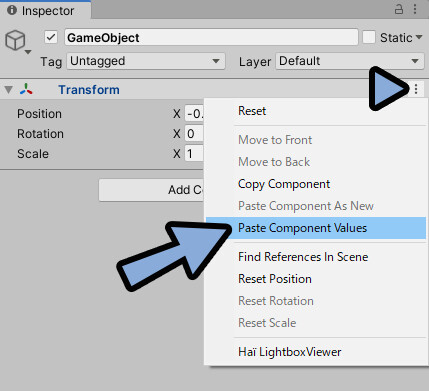
問題無さそうであれば、VRM Spring Boneの3つの点をクリック。
Copy Componentを選択。
再生ボタンを押してPlay状態を解除。
もう一度、VRM Spring Boneの3つの点をクリック。
Paste Component Valuesを選択して割り当て。
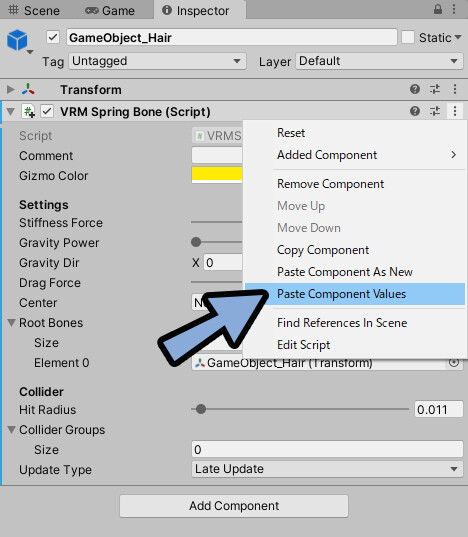
このような操作を全身の揺らしたい所で行います。
これで、揺れ物ボーンの動き調整が完了です。
動かないボーンについて
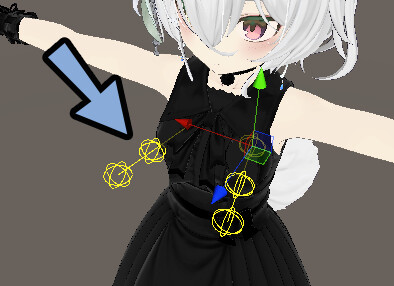
このモデルは、左胸が動きません。

また、意図しないところにボーンが飛び出ています。
※ボーンに表示される球はHit Radiusで大きさを調整できます。
これは、どこかのタイミングでボーンがねじれたり、エラーが出てしまったのが原因です。この場合、Blenderなどを使い、ボーンの向きを修正 → 最初からVRMの設定を行うのが理想です。
が、普通に心が折れます。
そこで、バグ技的な対処療法を紹介します。
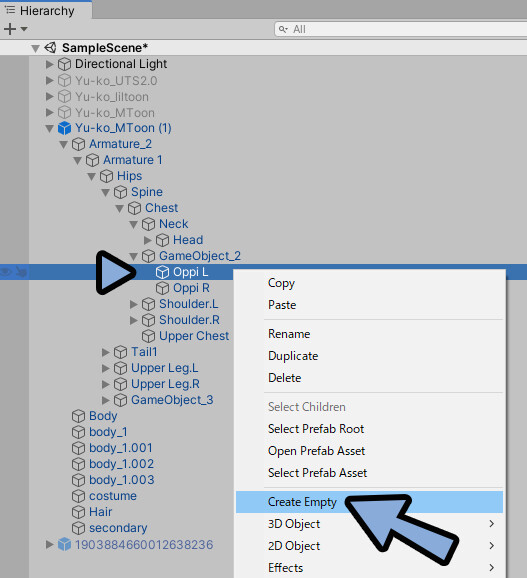
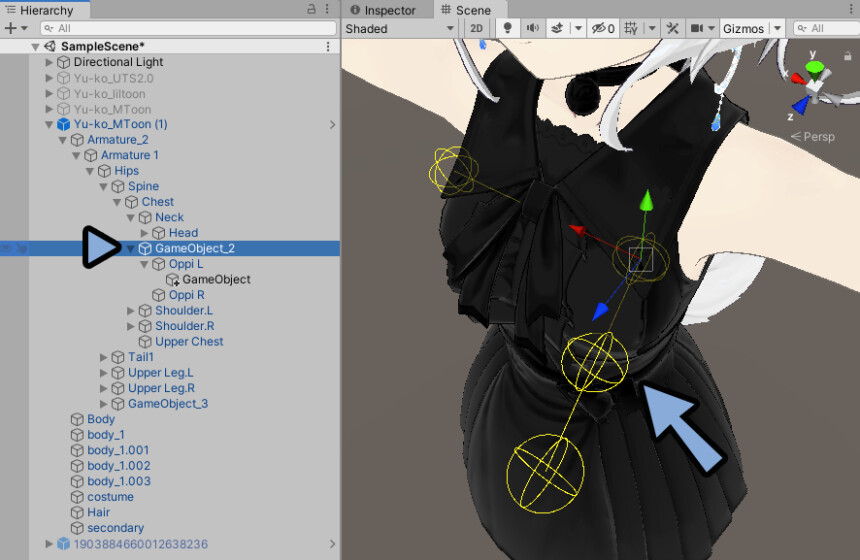
Hierarchyで問題が起こったボーンを右クリック。
Create Emptyを選択。
生成されたGame Objectを選択。
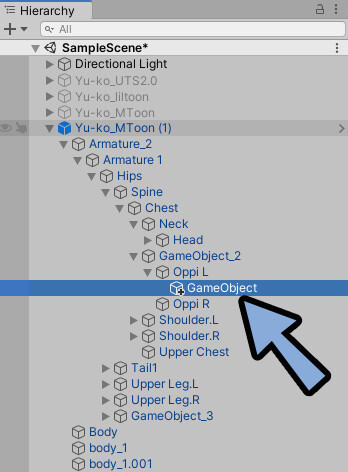
本来あってほしかったボーンの方向に向かって移動させます。
揺れ物ボーンを入れた階層を選択。
すると… ボーンの向きが疑似的に変わります。
バグ技みたいなものなので…
基本はやらない方が良いです。
仕事などで納品する場合、これ使っちゃダメですよ…?
左右があるボーンの場合、GameObjectのTransform横にある3つの点をクリック。
Copy Componentを選択。
同様の手順で反対側にもGameObjectを追加。
(右クリック → Create Empty)
新しく作ったGame Objectをクリックで選択。
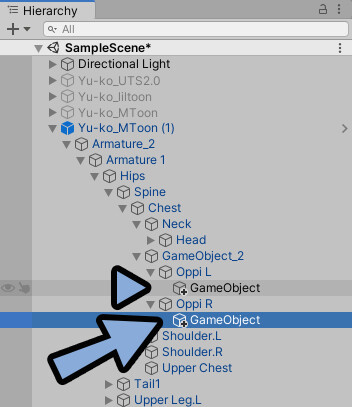
Transform横の3つの点 → Paste Component Valuesを選択。
左右対称になるように、X,Y,Zいずれかの値のプラスマイナスを修正。
これで、左右同じ疑似ボーンができました。
以上で応急処置が完了です。
あまり、おすすめできず、ボーンがカクカクする不具合の原因にもなりますが…
動作チェックして、問題が無いなら、データが汚くても大丈夫と割り切るのも手ですね。
ボーンがカクカクする場合の対処法
VRChatのPhys Bone入りモデルには、
末端のボーン(Leef Bone)が入ってる事があります。
これがあると…カクカクすることがあります。
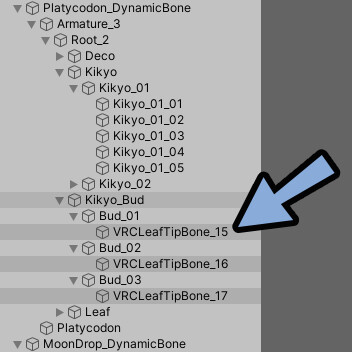
Hierarchyから、こちらを削除してください。
これで、カクカクは治ります。
コライダーの追加
簡単な衝突を作れます。
※VRChatのPhys Boneのように細かく設定はできないので注意。
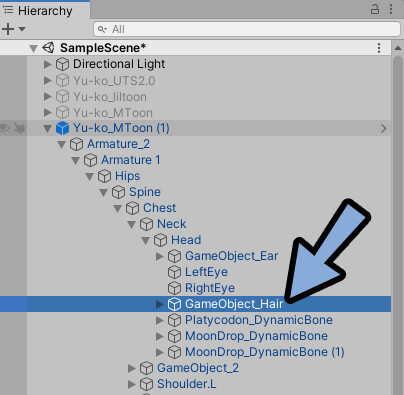
Hierarchyから、コライダーを設定したいボーンをクリック。
※揺れ物ボーンがある1つ前の階層がおすすめ。
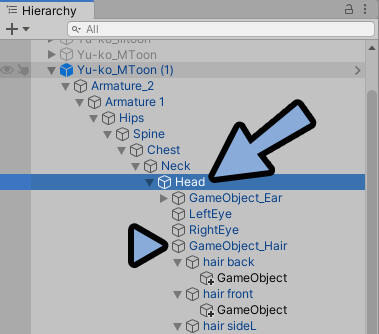
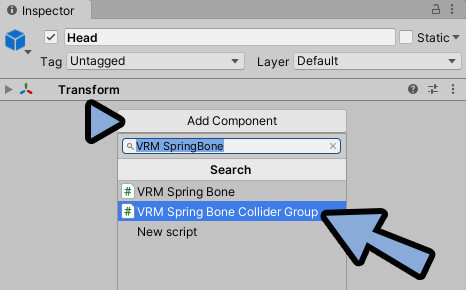
Inspector → Add Componentをクリック。
VRM Spring Bone Collider Groupを選択。
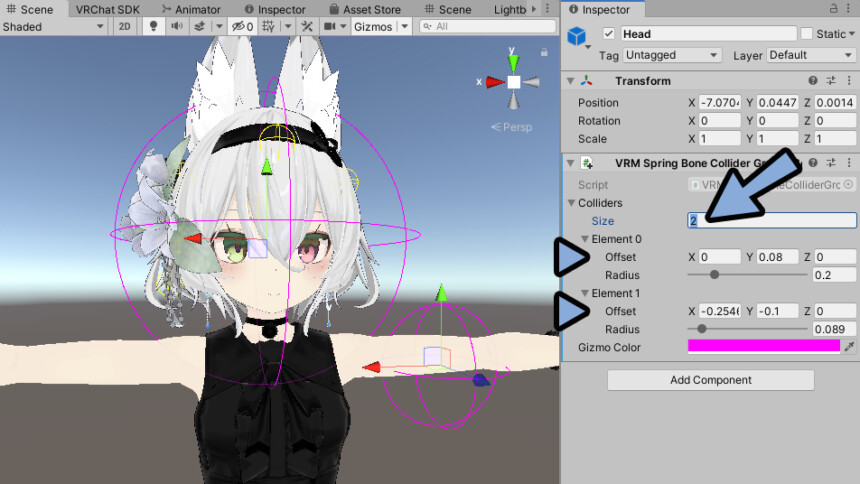
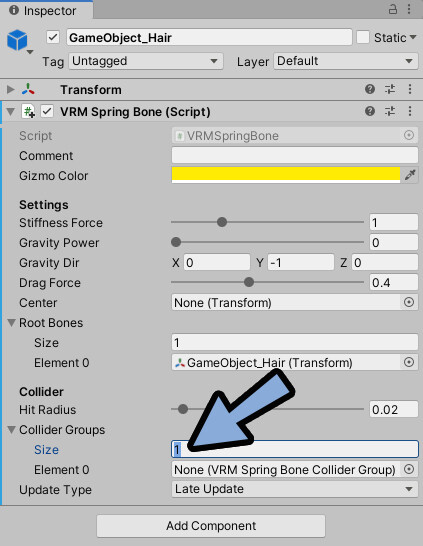
Sizeを1以上に設定。
これは衝突判定の数です。
あとはOffsetで位置を調整。
Radiusで大きさを調整。
次にHierarchyで、この衝突判定の影響を受けてほしいボーンをクリック。
Inspectorを確認。
Collider GroupsのSizeを1以上に設定。
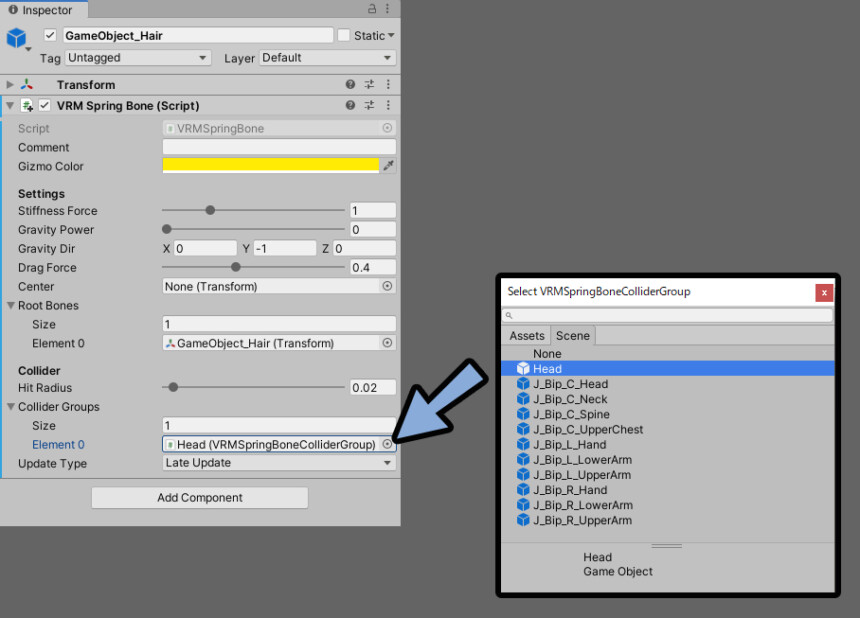
右側の二重丸をクリック。
影響を与えたい衝突判定を入れたボーンを選択。
再生ボタンを押してPlayモード。
Offsetを操作し、動作を確認。
当たってる事が確認できます。
確認が終わりましたら、Playモードを解除。
以上が、コライダーの追加です。
再度書き出す
InspectorのVRM Metaの所で必要な情報を入力。
あとは、初回と同じ手順で書き出します。
(ヒエラルキーからモデルを選択 → VRM0を選択 → Export to VRM 0.xを選択)
あとは、任意のVRMを使うソフトに読み込み動作確認。
これで、VRMデータの作り込みが完了です。
まとめ
今回はVRChatアバターのVRM変換方法を紹介しました。
こちらを行う事でVRM対応の様々なアプリにアバターを読み込むことができます。
また、他にもVRChatやVRMの活用法を解説中。
ぜひ、こちらもご覧ください。
コメント