はじめに
今回はfbxのモデルをUnityに読み込む際のInspector設定について解説します。
シェイプキー追加改変、パーツの分離合成、自作アバターの読み込みにご活用ください。
作例ではこちらの改変を行ったモデルをfbxで書き出したものを設定します。
Inspector設定
Unityへのモデルの読み込み
Unityを開きます。
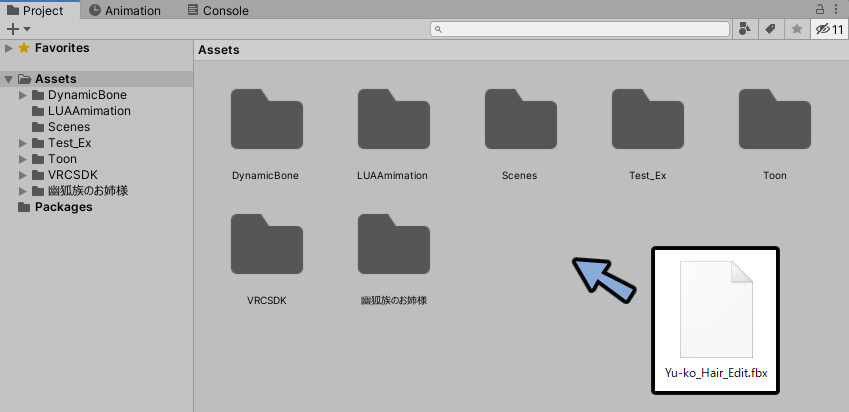
プロジェクトに書き出した.fbxをドラッグ&ドロップ。
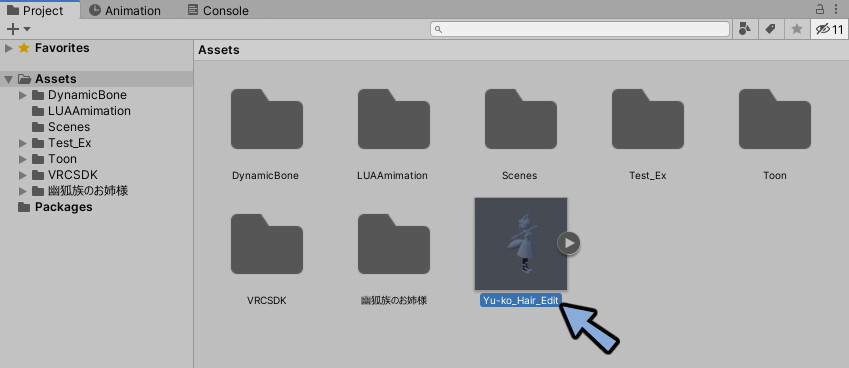
Projectで読み込んだモデルを選択。
Modelの設定
Inspectorを確認。
Modelを選択。
下記のように設定しApplyを押します。
・Inport Camerasのチェックを解除
・Import Lightsのチェックを解除
・Read/Write Enabledにチェック
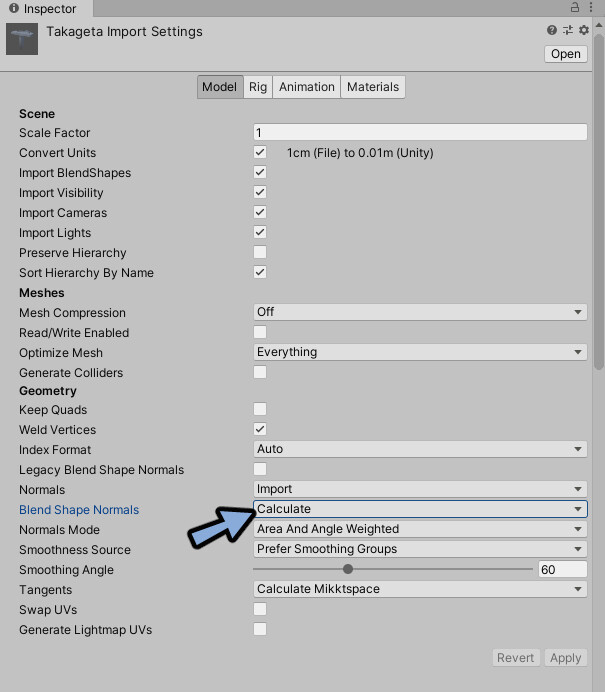
・Blend Shape NormalsをNoneに変更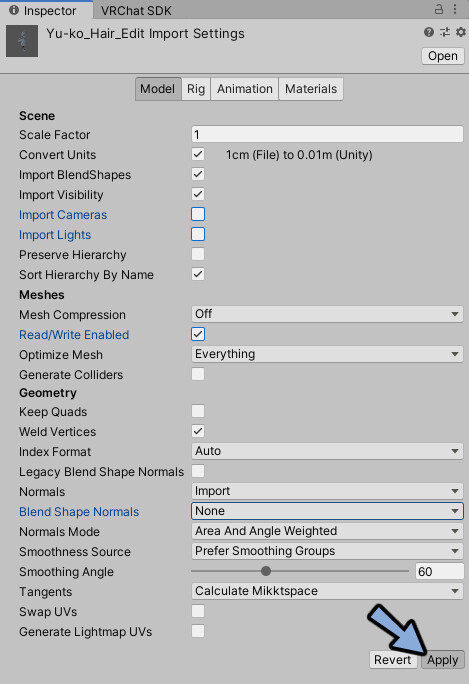
Unity 2022からは「Blend Shape Nromals」が消えたようです。
そしてシェイプキー操作で陰影が変わる現象も無くなったようです。(?)
…たぶん自動でNoneになった。
「Normals」関係は正しく設定しないとシェイプキー操作で陰影の見え方が変わります。
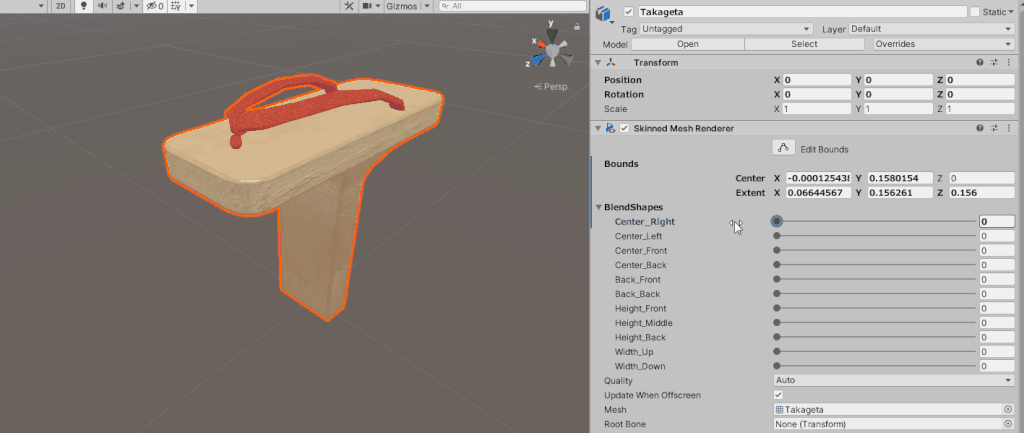
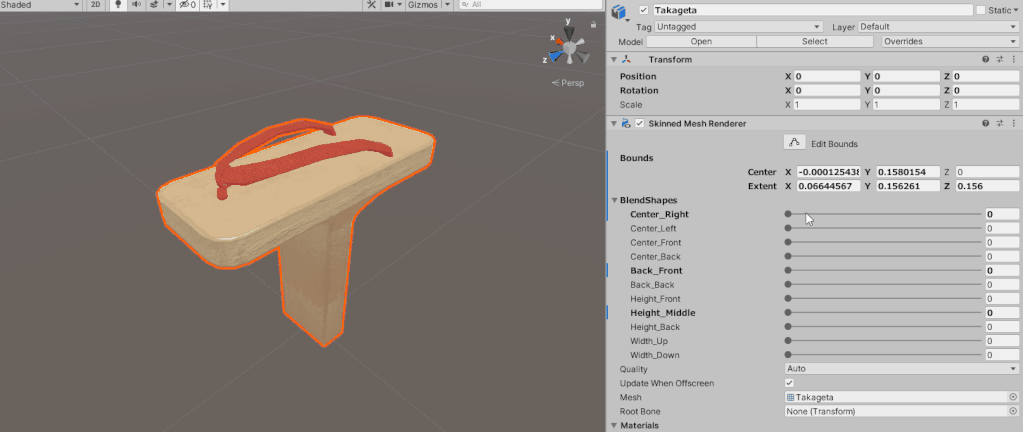
もしシェイプキーを設定した方はBlend Shape Normalsを「Caculate」あたりに設定。
これで光沢や陰影などの見え方が変わらなくなります。
これでModelの設定が完了です。
Rigの設定
InspectorのRigを選択。
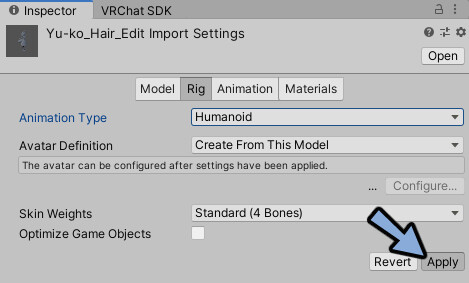
アバターの場合はAnimationTypeをHumanoidに変更。
Applyを押します。
アクセサリーや衣装などのモデルは下記のように設定。
◆シェイプキーやボーンで動かす(衣装など)
→ Animaton Typeを「ジェネリック(Generic)」に設定
※それ以外の設定は基本的に初期状態のままでOK
(No Avatar、標準4ボーン、ボーンを除去が有効)
◆変形なしモデル
→ 「なし」に設定
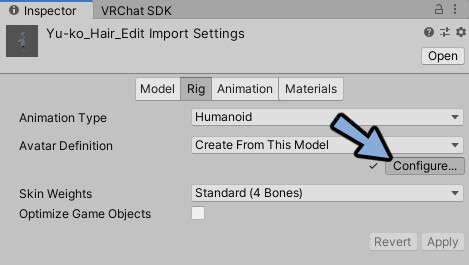
Configure…を押します。
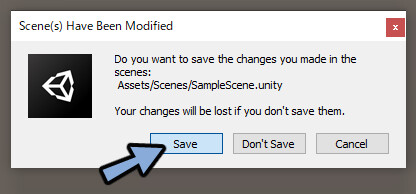
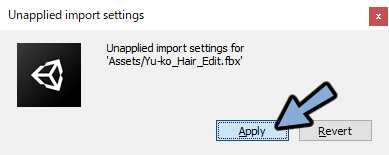
注意書きが出ることがあります。
出た場合はSaveを押します。
Humanoidボーンの設定が出てきます。
ボーンは自動で割り当てられるので破綻が無いか確認。

基本はJaw(顎)で破綻が起こります。
Headを選択。
JawをNoneに変更。(選択してDeleteキー)
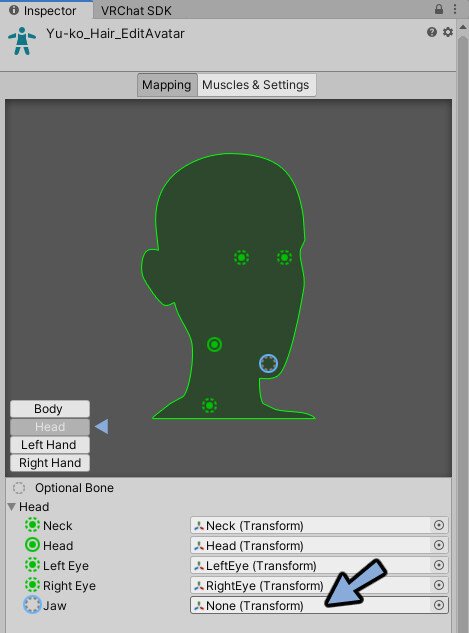
それ以外で破綻が無いか念のため確認します。
Humanoidボーンの一覧表はこちら(文字潰れ対策Twitter)
修正と確認が終わりましたらDoneを押します。
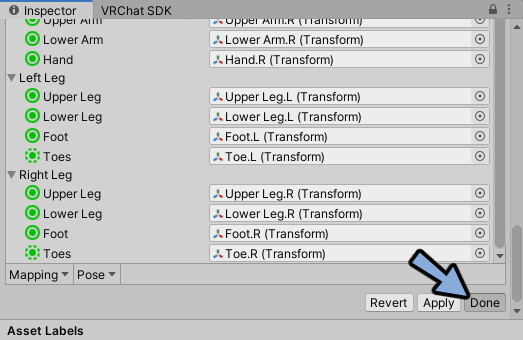
注意書きが出てくるのでApplyを押します。
これでRigの設定が完了です。
Animationの設定
InspectorのAnimationを選択。
Import Animationのチェックを解除。
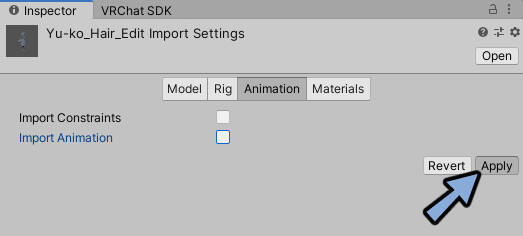
Applyを押します。
これでAnimationの設定が完了です。
制作したアニメーションを使いたい場合
もし自分で作成したアニメーションを使いたい場合は下記の処理を行ってください。
Projectでモデルを開きアニメーションを選択。(説明用に別のモデルに変わりました)

Ctrl+Dで複製します。
すると素材から独立します。
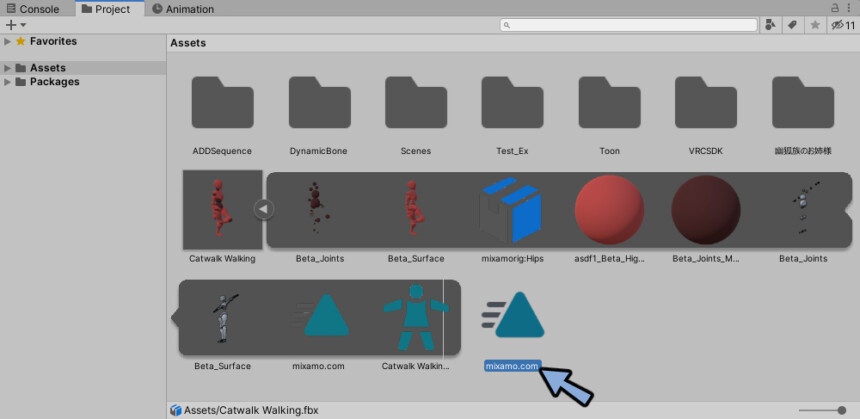
この素材を使ってください。
詳細はこちらで解説。
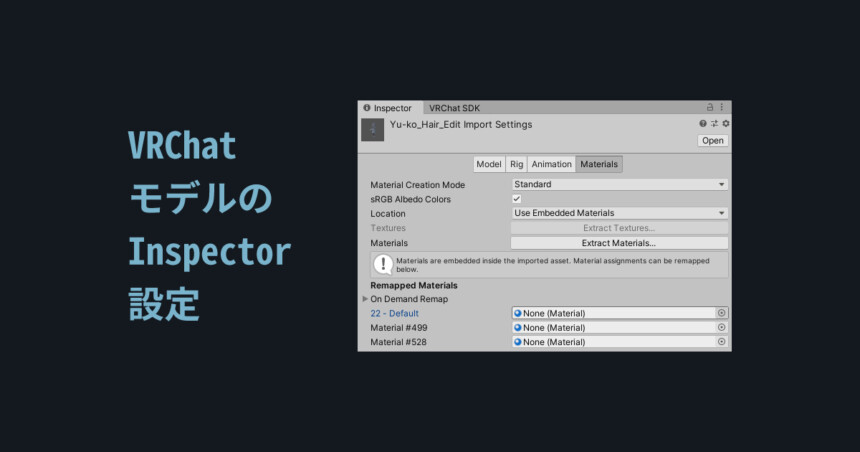
Materialの設定
Projectでモデルのマテリアルがある場所に読み込んだモデルを移動。
操作しやすいようにする為に動かしました。
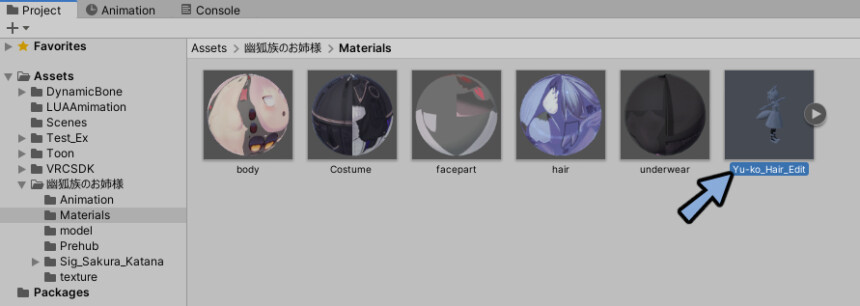
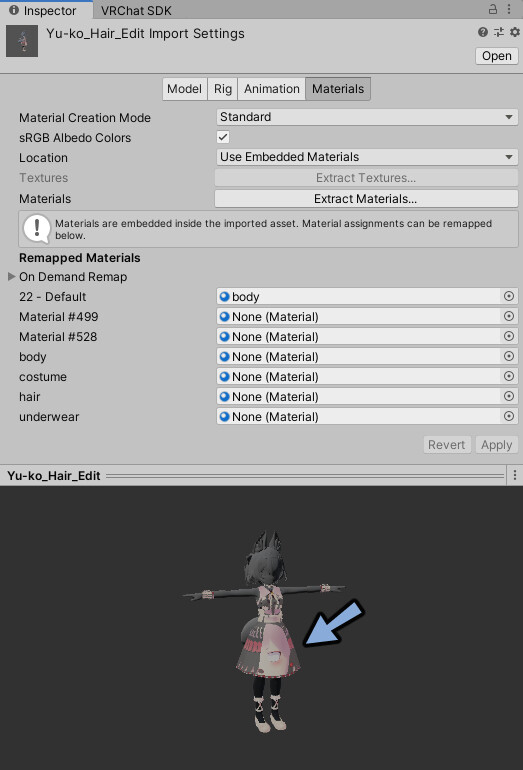
InspectorのMaterialsを選択。
マテリアルがNoneになってます。
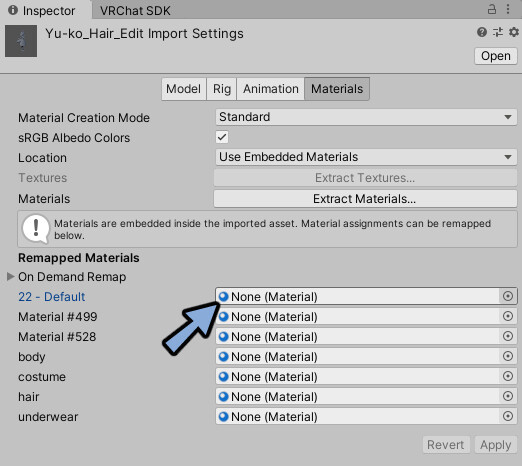
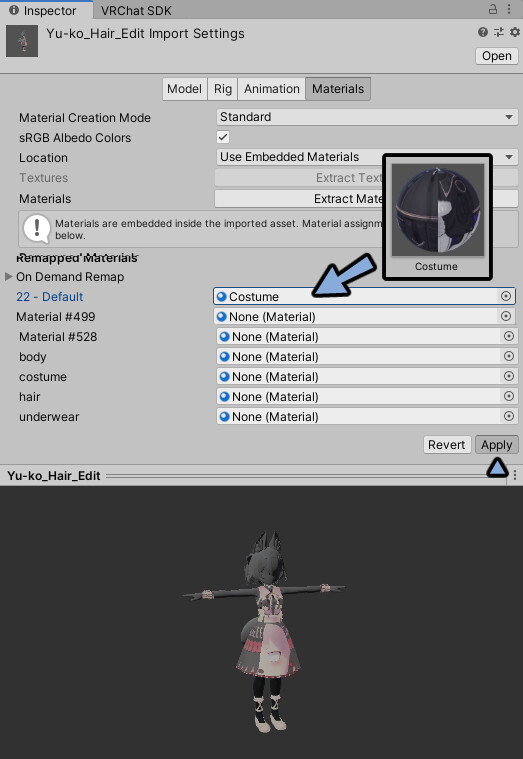
ここにマテリアルを1つ割り当てApplyを押します。
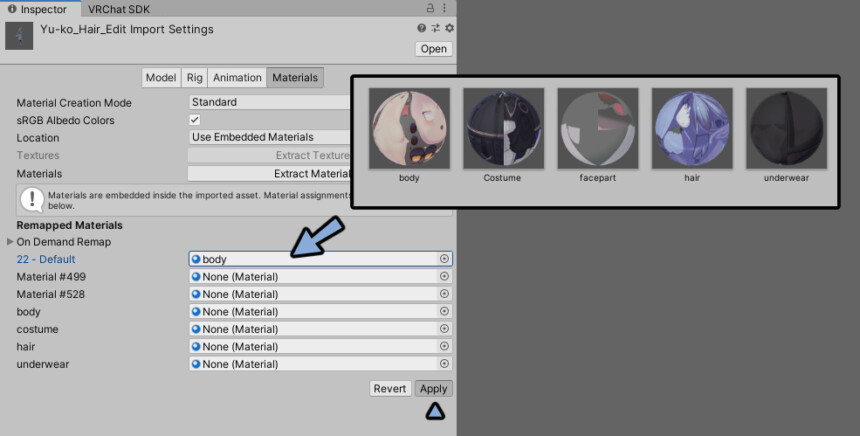
Inspectorの一番下にある名前横バーを選択。
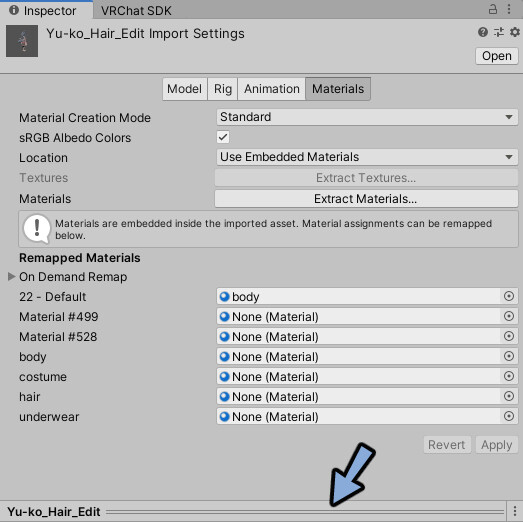
するとプレビューで確認できます。
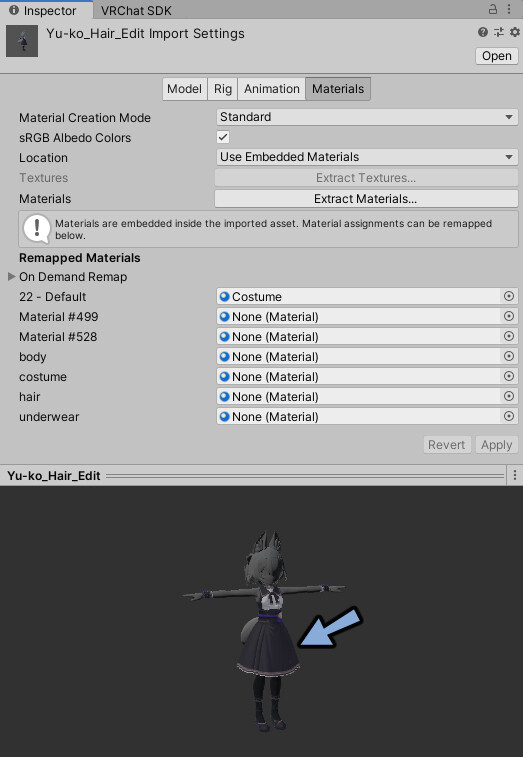
今回設定したマテリアルは間違いであることが分かりました。
正しいマテリアルになるまでマテリアルを割り当て → Applyを押します。
名前などがヒントになります。
これで正しいマテリアルが割り当てられました。
これを残りの全てで行います。
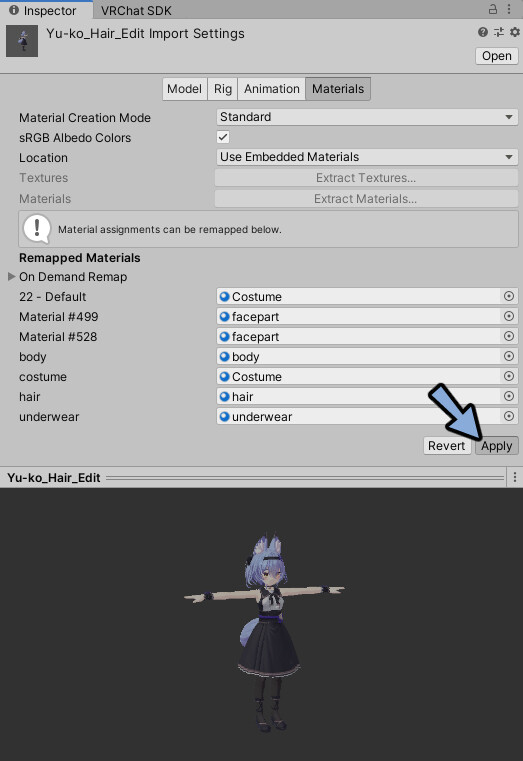
以上でMaterialおよびInspectorの設定が完了です。
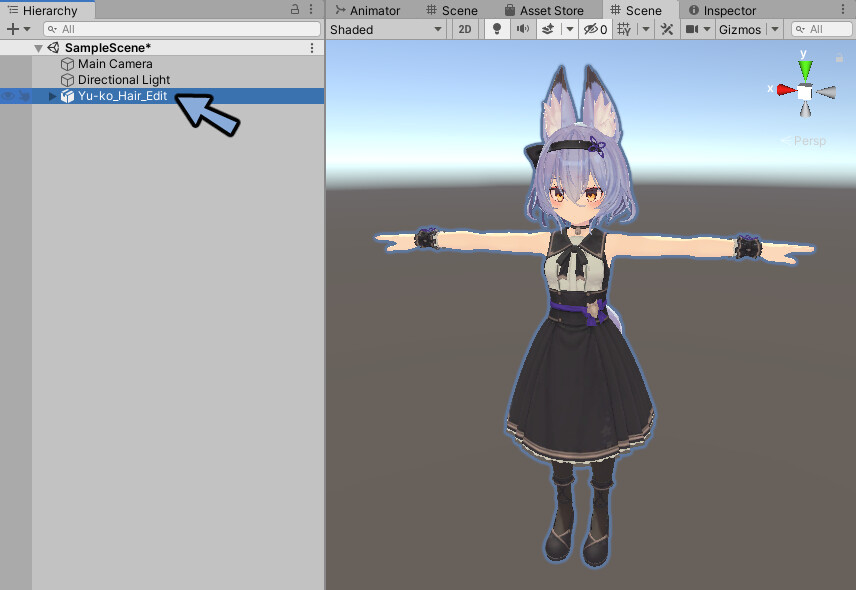
Hierarchyにモデルを読み込めば正しくモデルが表示されます。
まとめ
今回はVRChatモデルのInspector設定方法を解説しました。
VRChatで動かすためのVRC AvatorDescriptorの使い方についてはこちらで解説。
ぜひこちらもご覧ください。

コメント